1977 Gottlieb Cleopatra Pinball
Well, it's long been a dream of mine
to own a pinball machine. The problem is that they're so danged
expensive. As much as I would love to own a Simpsons Pinball
Party, that would likely cost me 3 - 6 thousand dollars.
There's no way that's going to happen. I figured the only
way I'd ever own such a machine is if I started smaller and eventually,
over time, traded my way up. I regularly check Craigs List
in my area and drool over the pins for sale. One day I finally
came across an "affordable" pin. I bought this 1977 Gottlieb
Cleopatra for $200. Here is a link to the machine on the
Internet Pinball Database. It was not working when I bought
it, so I knew it would be a project pin from the start. The
idea here was to get a "starter" pinball machine so that I could learn
some how-to stuff and get my feet wet a little bit. Then down the
road I can decide if I want to try to sell/trade it or not.
The Cleopatra is a Gottlieb "System
1" pinball. This is the first attempt by Gottlieb to move
from the old school Eletro-Mechanical (EM) pinball machines over to the
newer Solid State pinball machines that have CPU boards and
such. There are several different system on pinball
machines, most of which have similar CPU, power and driver boards in them.
Before I get into any of the
details of what all I did I do want to mention a few websites which I
found to be incredibly useful.
1. Pin
Wiki - This website just
has a lot of general non-specific repair tips for pinball
machines.
2. Pin
Wiki System 1 Page
- This page just lists a lot of useful repair
tips that are specific to Gottlieb System 1 pinball
machines.
3. Pin Repair System 1
Repair Guide
- This is the be all end all guide
for System 1 repairs. This covers just about anything and
everything you could ever want or need to know.
4. PinSide
Forum - I used this
forum to post any unaswered questions that I had. The
members were very responsive and incredibly helpful. One
member even offered up his phone number so that I could call him with
questions if needed. That is an awful lot of kindness to offer up
to a stranger. He assured me we were not strangers "We're one big
happy dysfunctional family of pinheads".
Ok, on to the
pics! Please note that none of the repairs that I did on
this pinball machine were original or ground breaking. Most
I learned from all the above guides. But as you probably
know by now, I like to document all my projects. I enjoy looking
back on all the work I've done almost as much as I love looking at the
finished product!
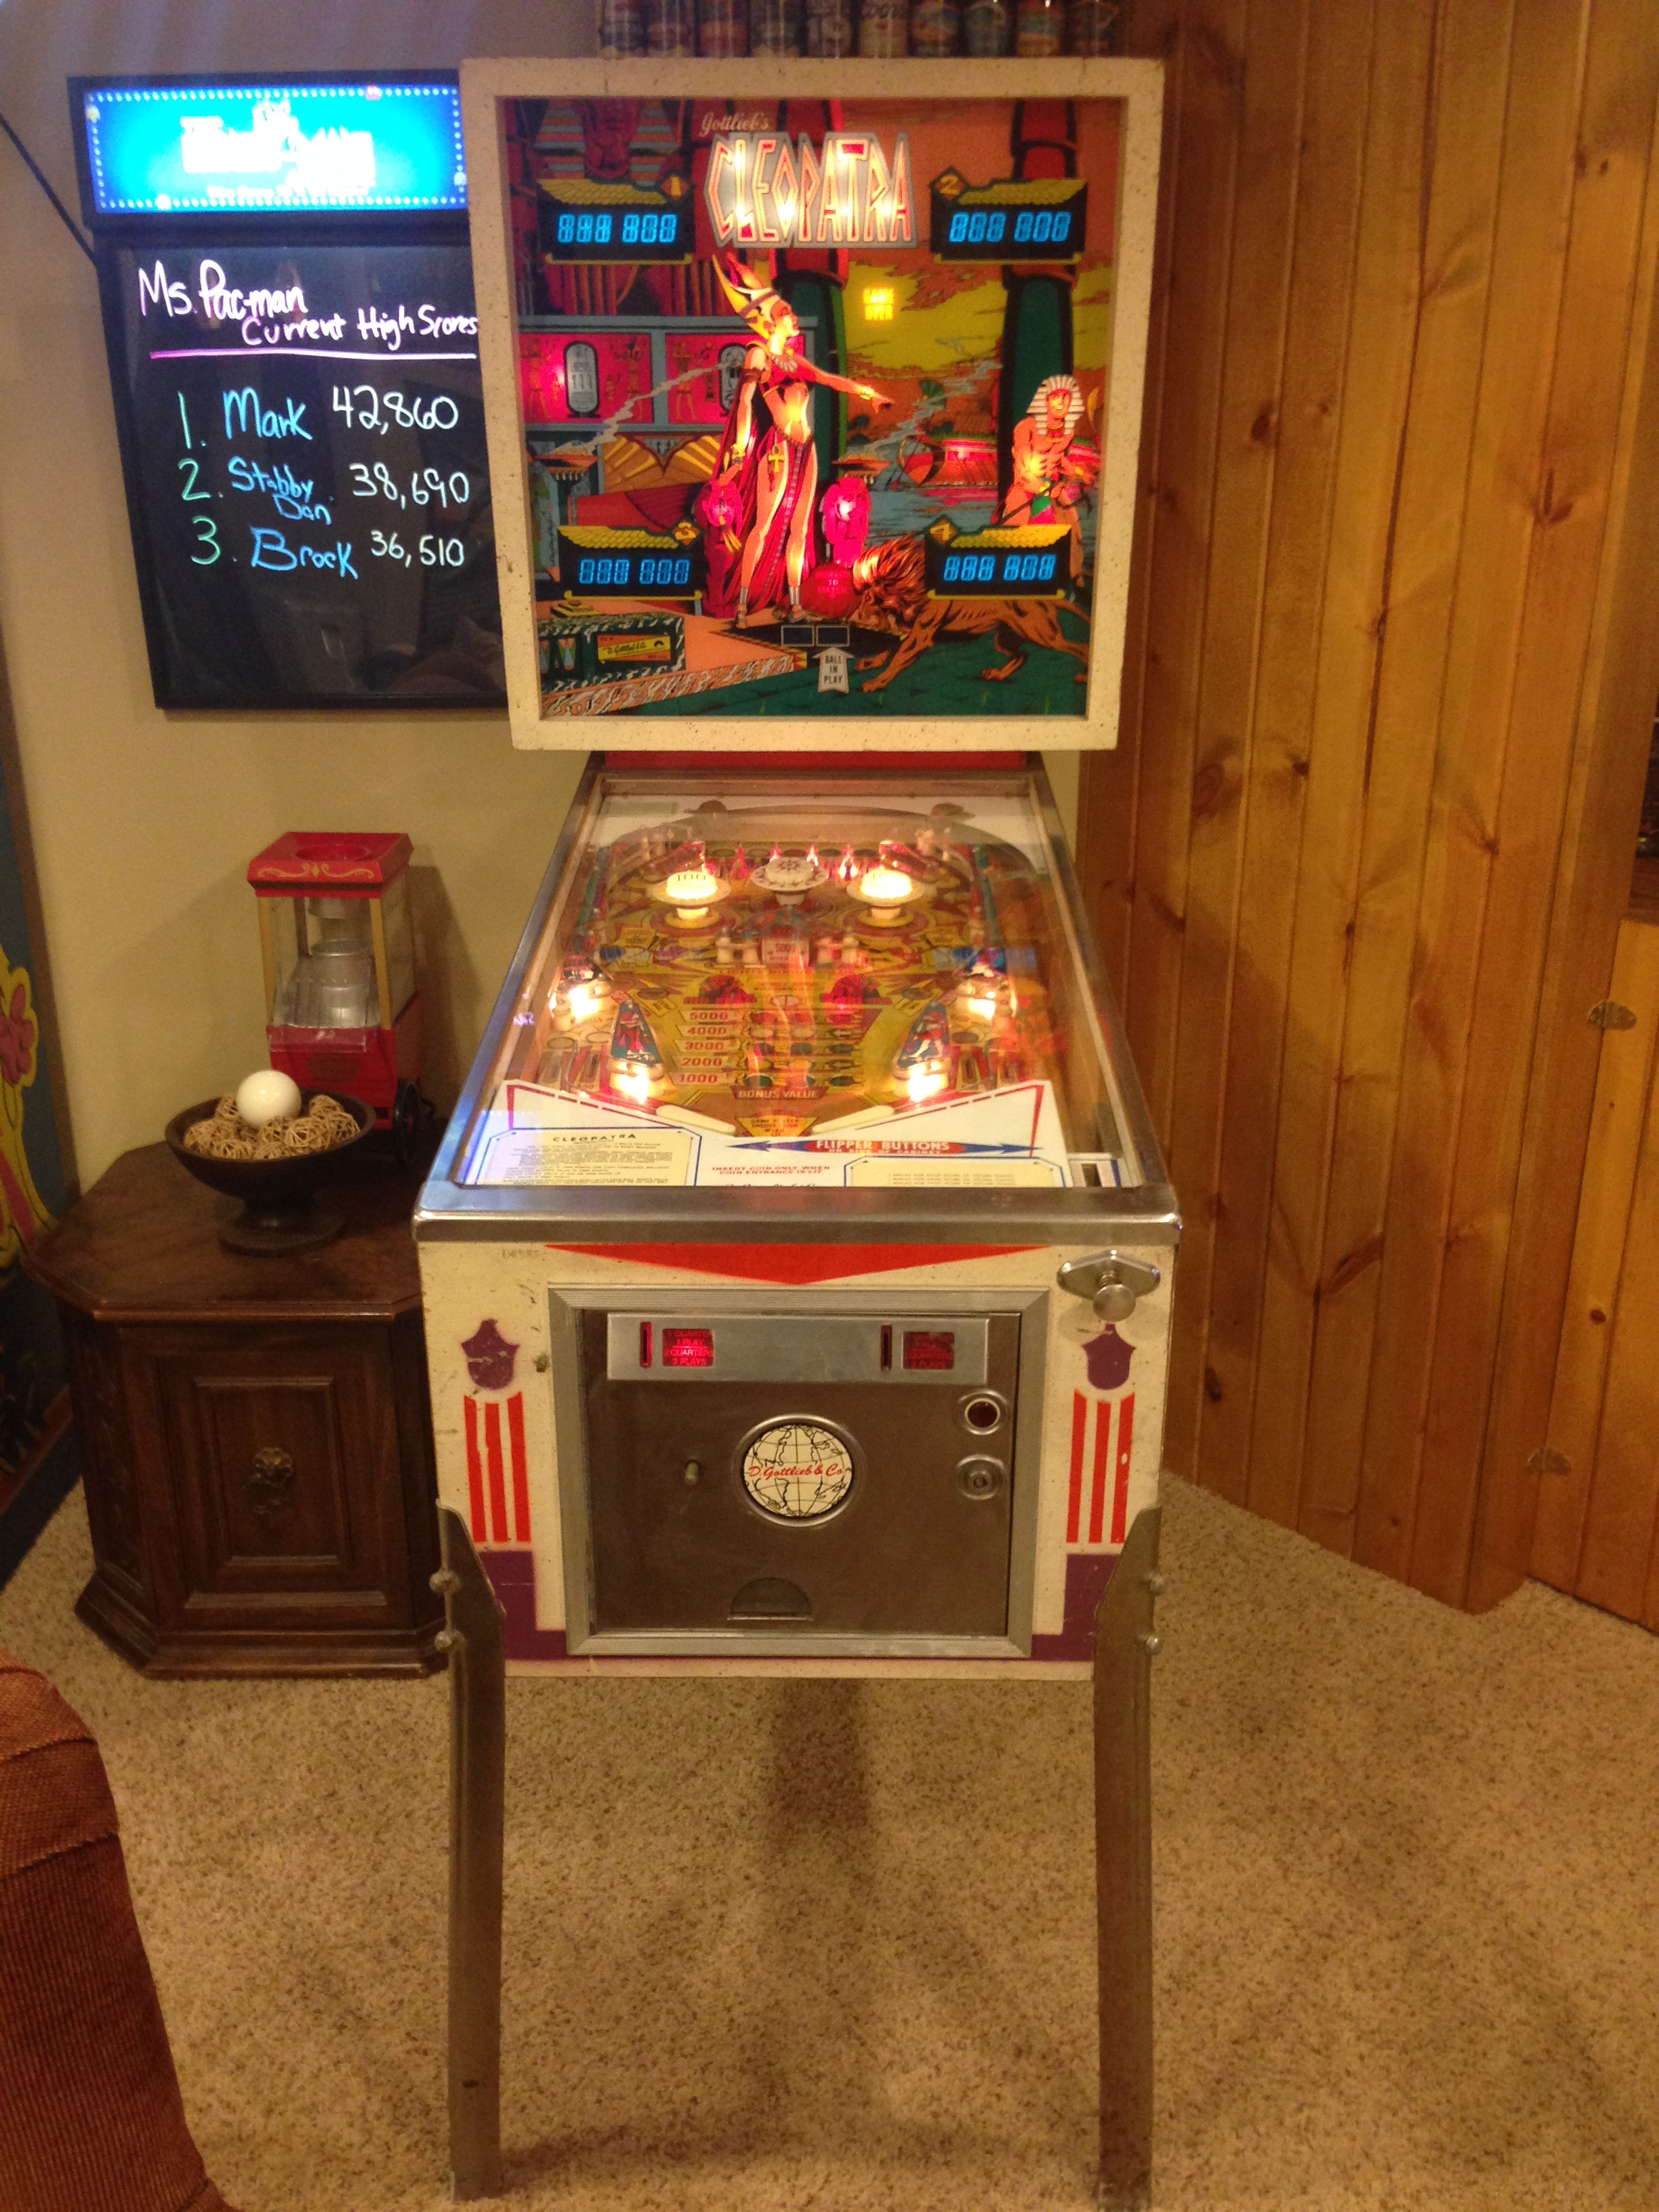
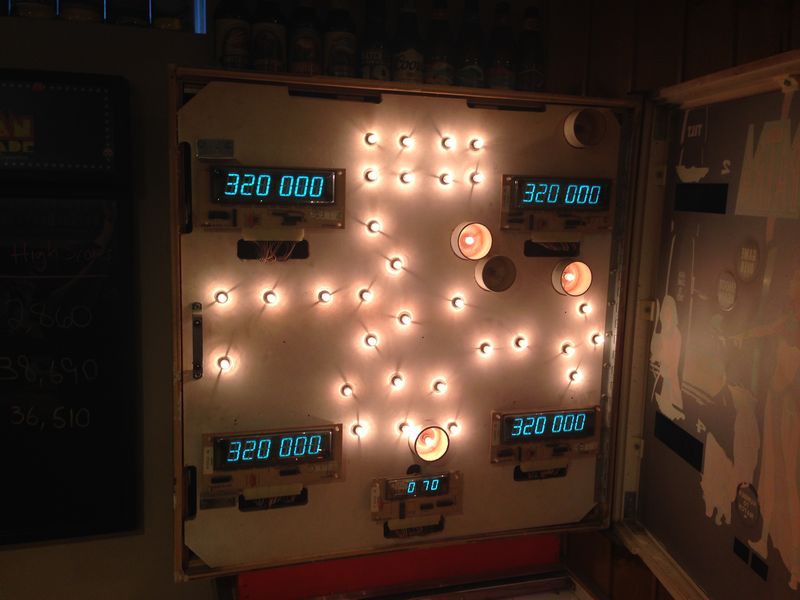
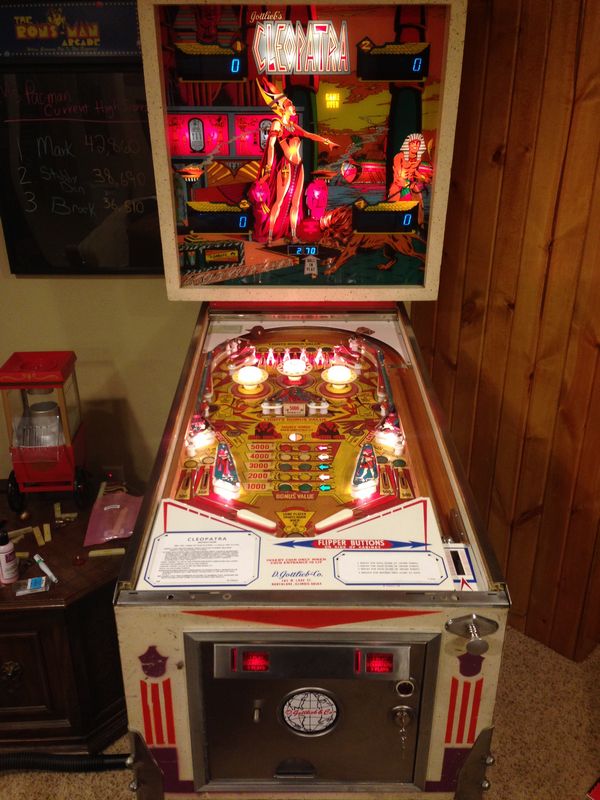
Here is the pin at the start. It was
"complete" in that it wasn't missing any pieces, but it would not boot
up. You can see on the screen below the numbers are all wonky on
the score displays.

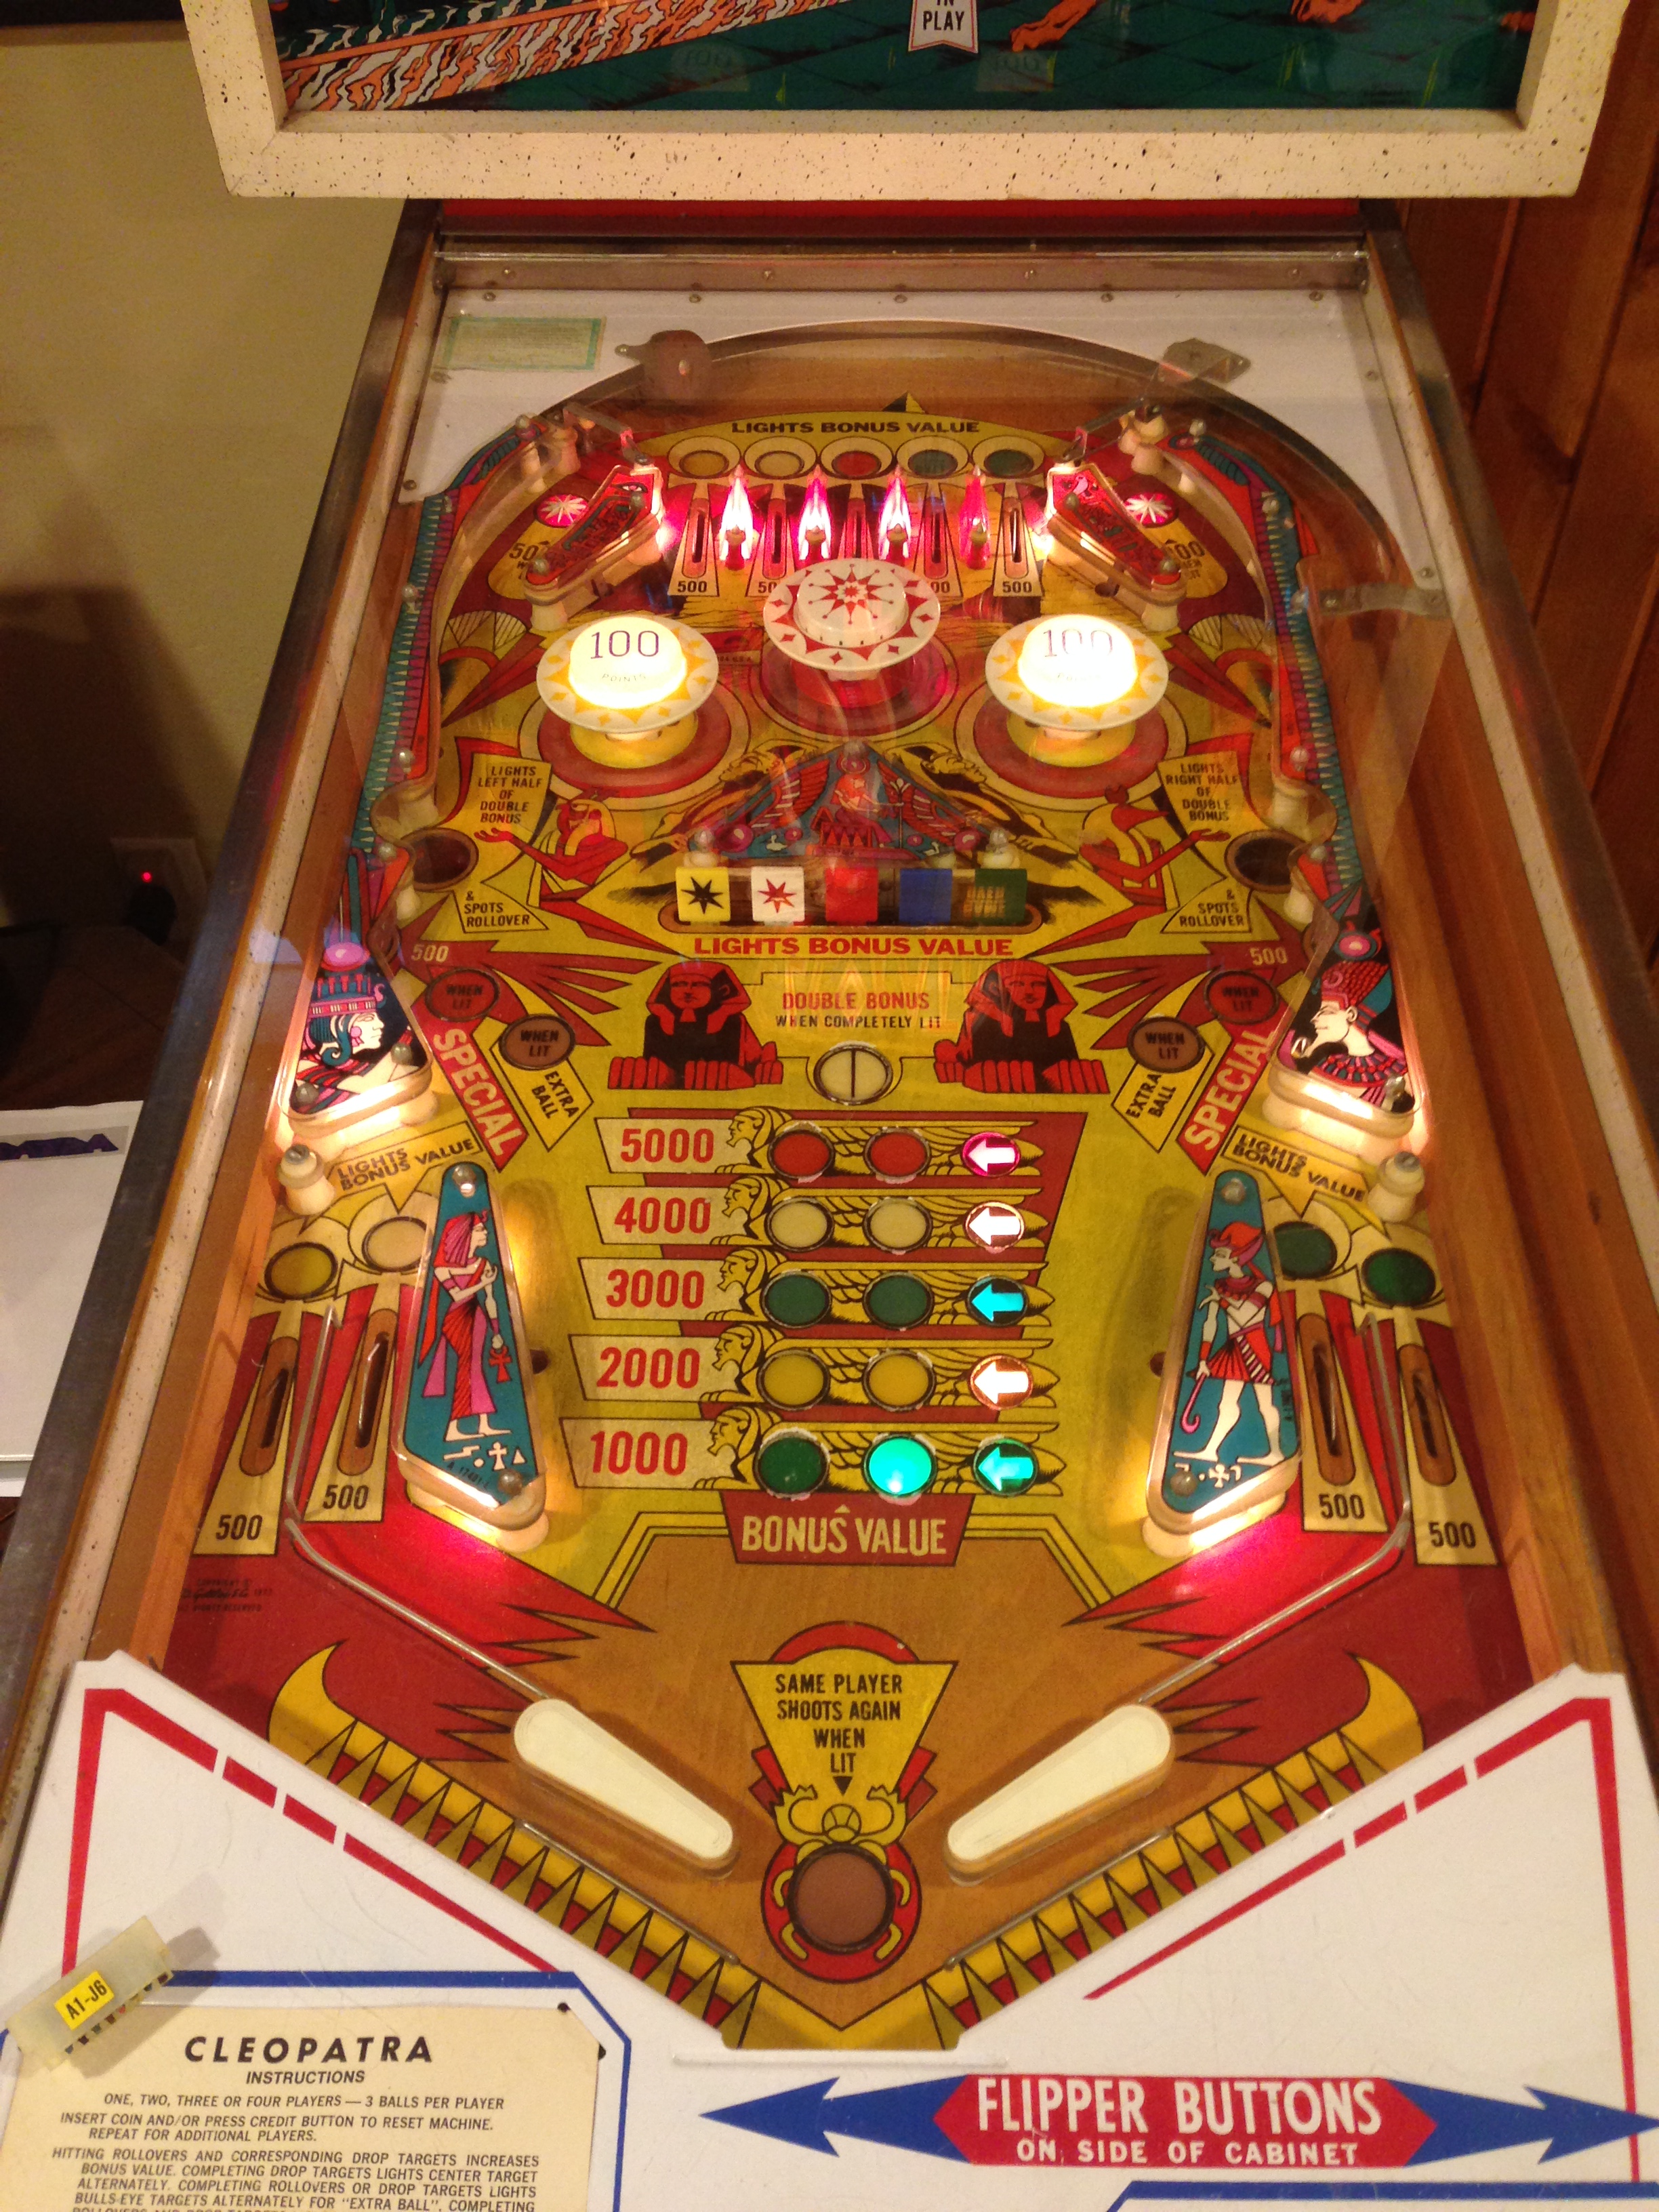
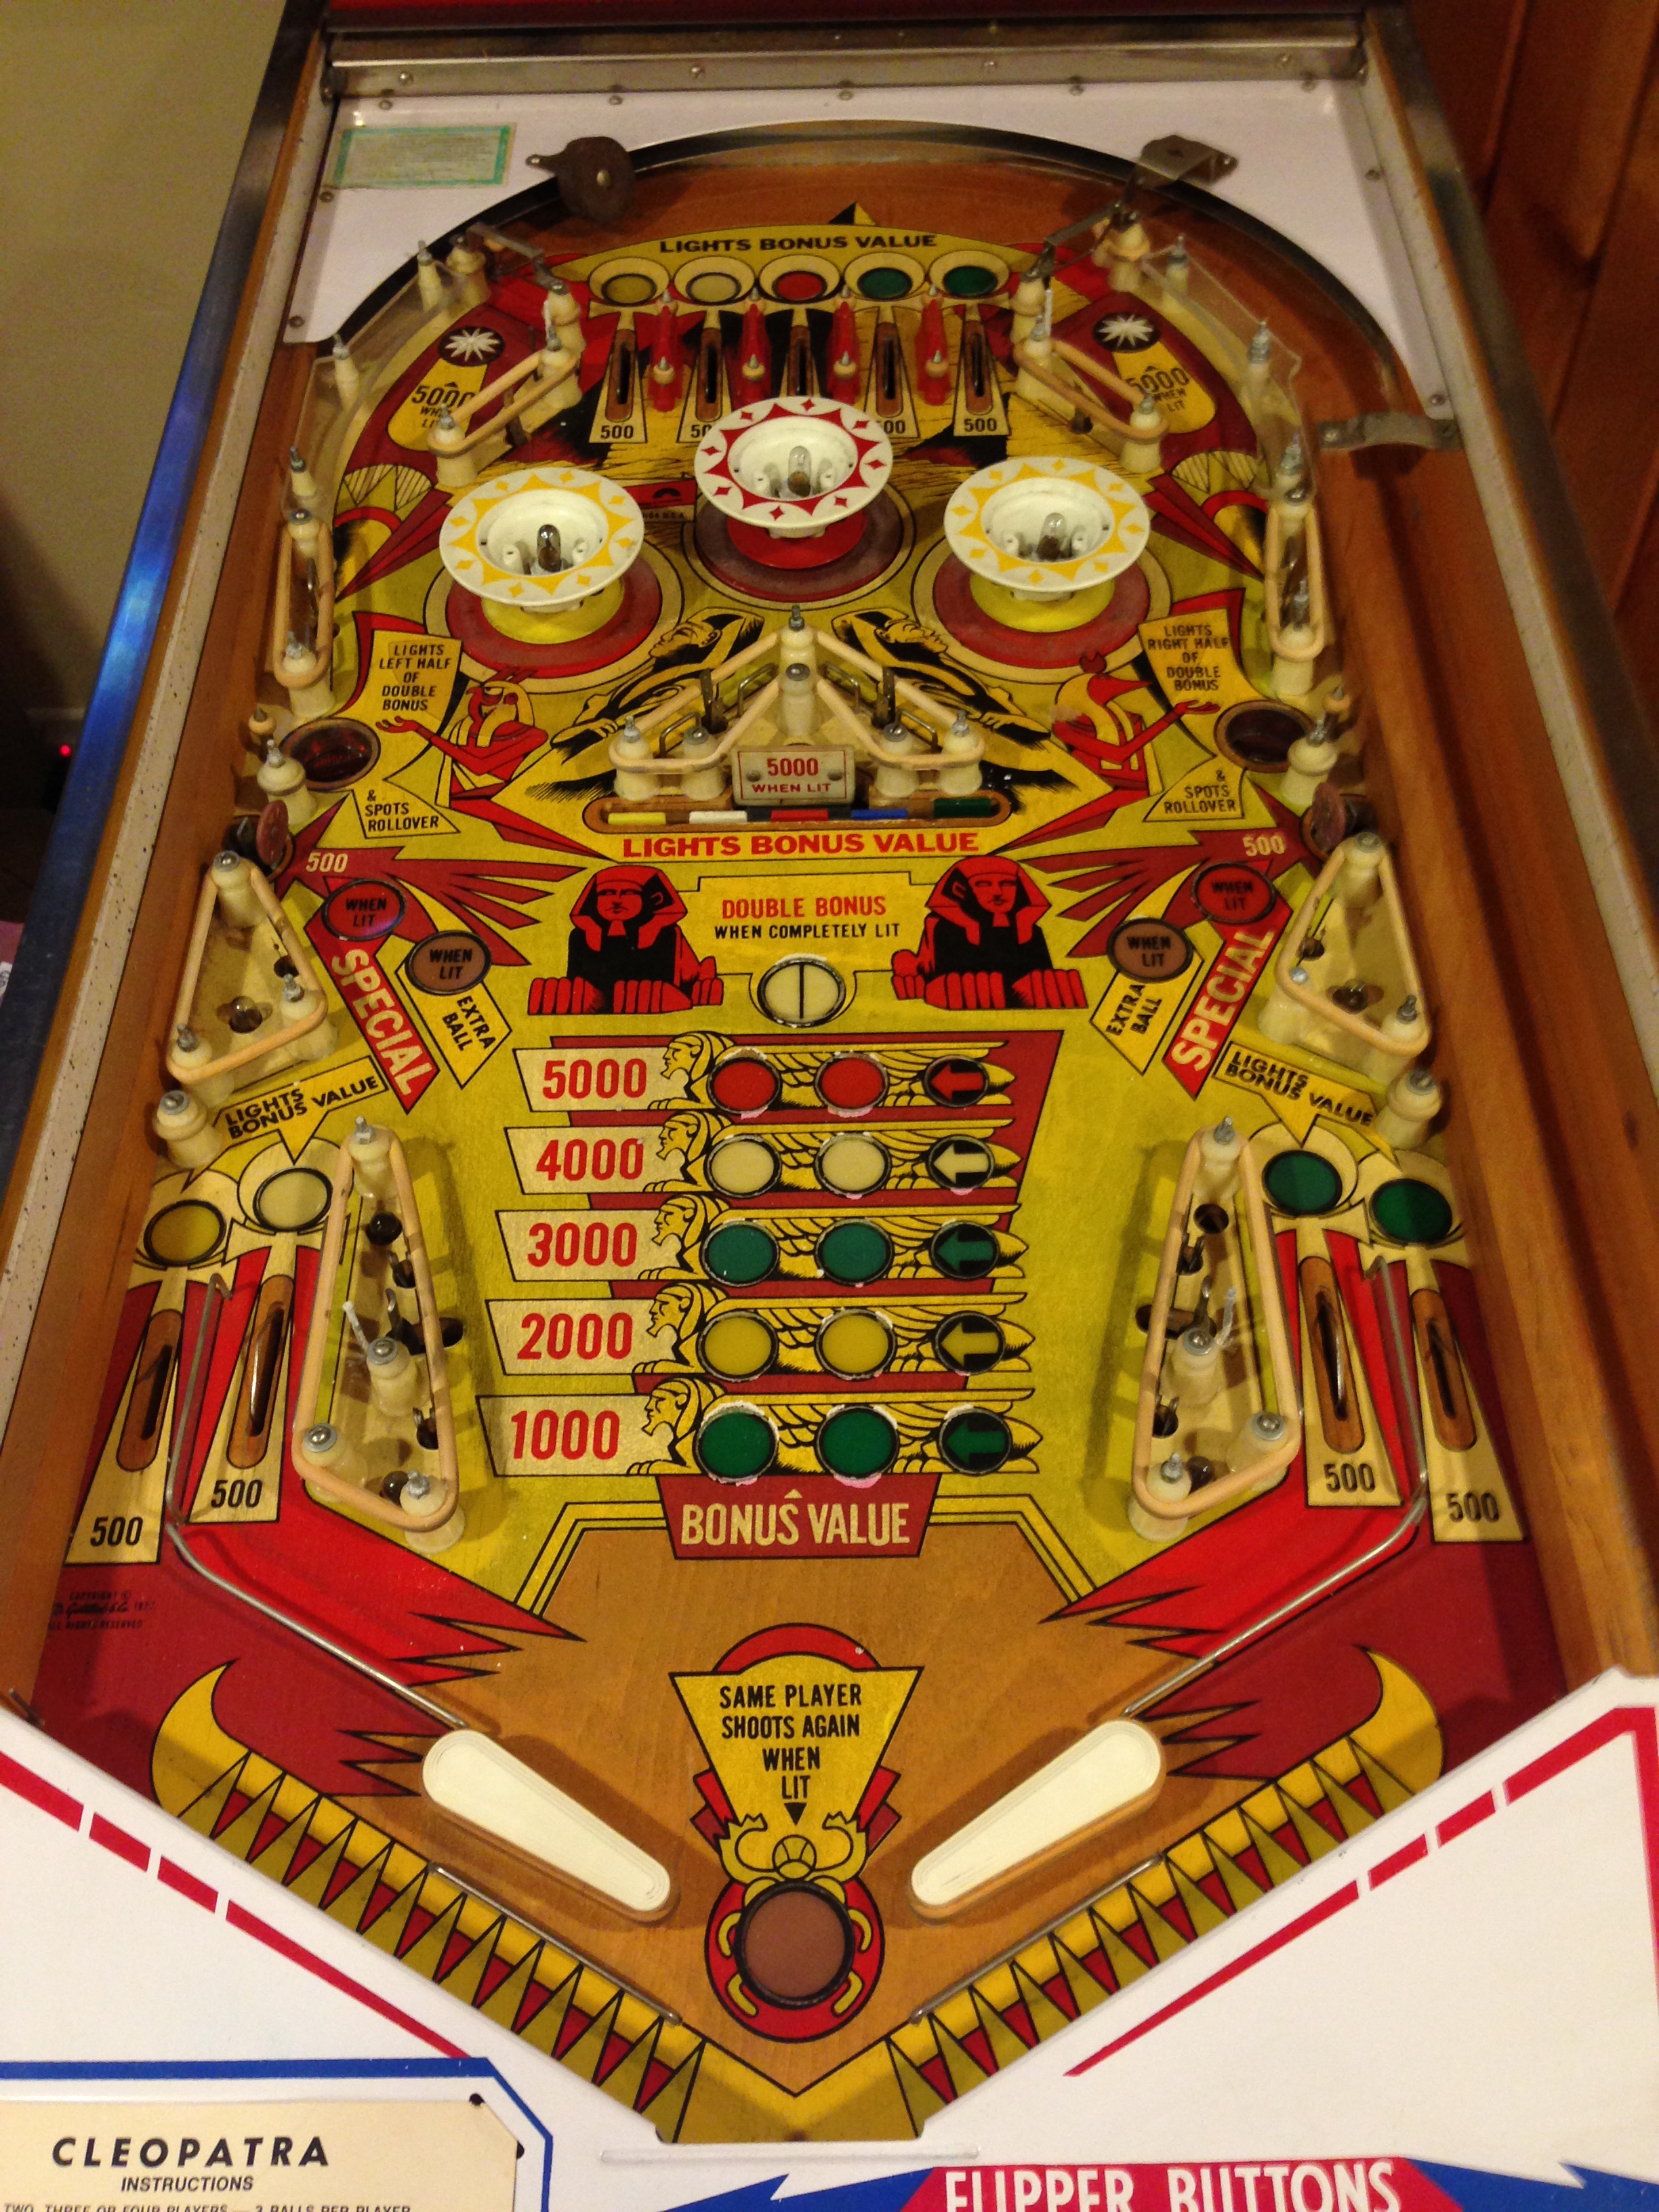
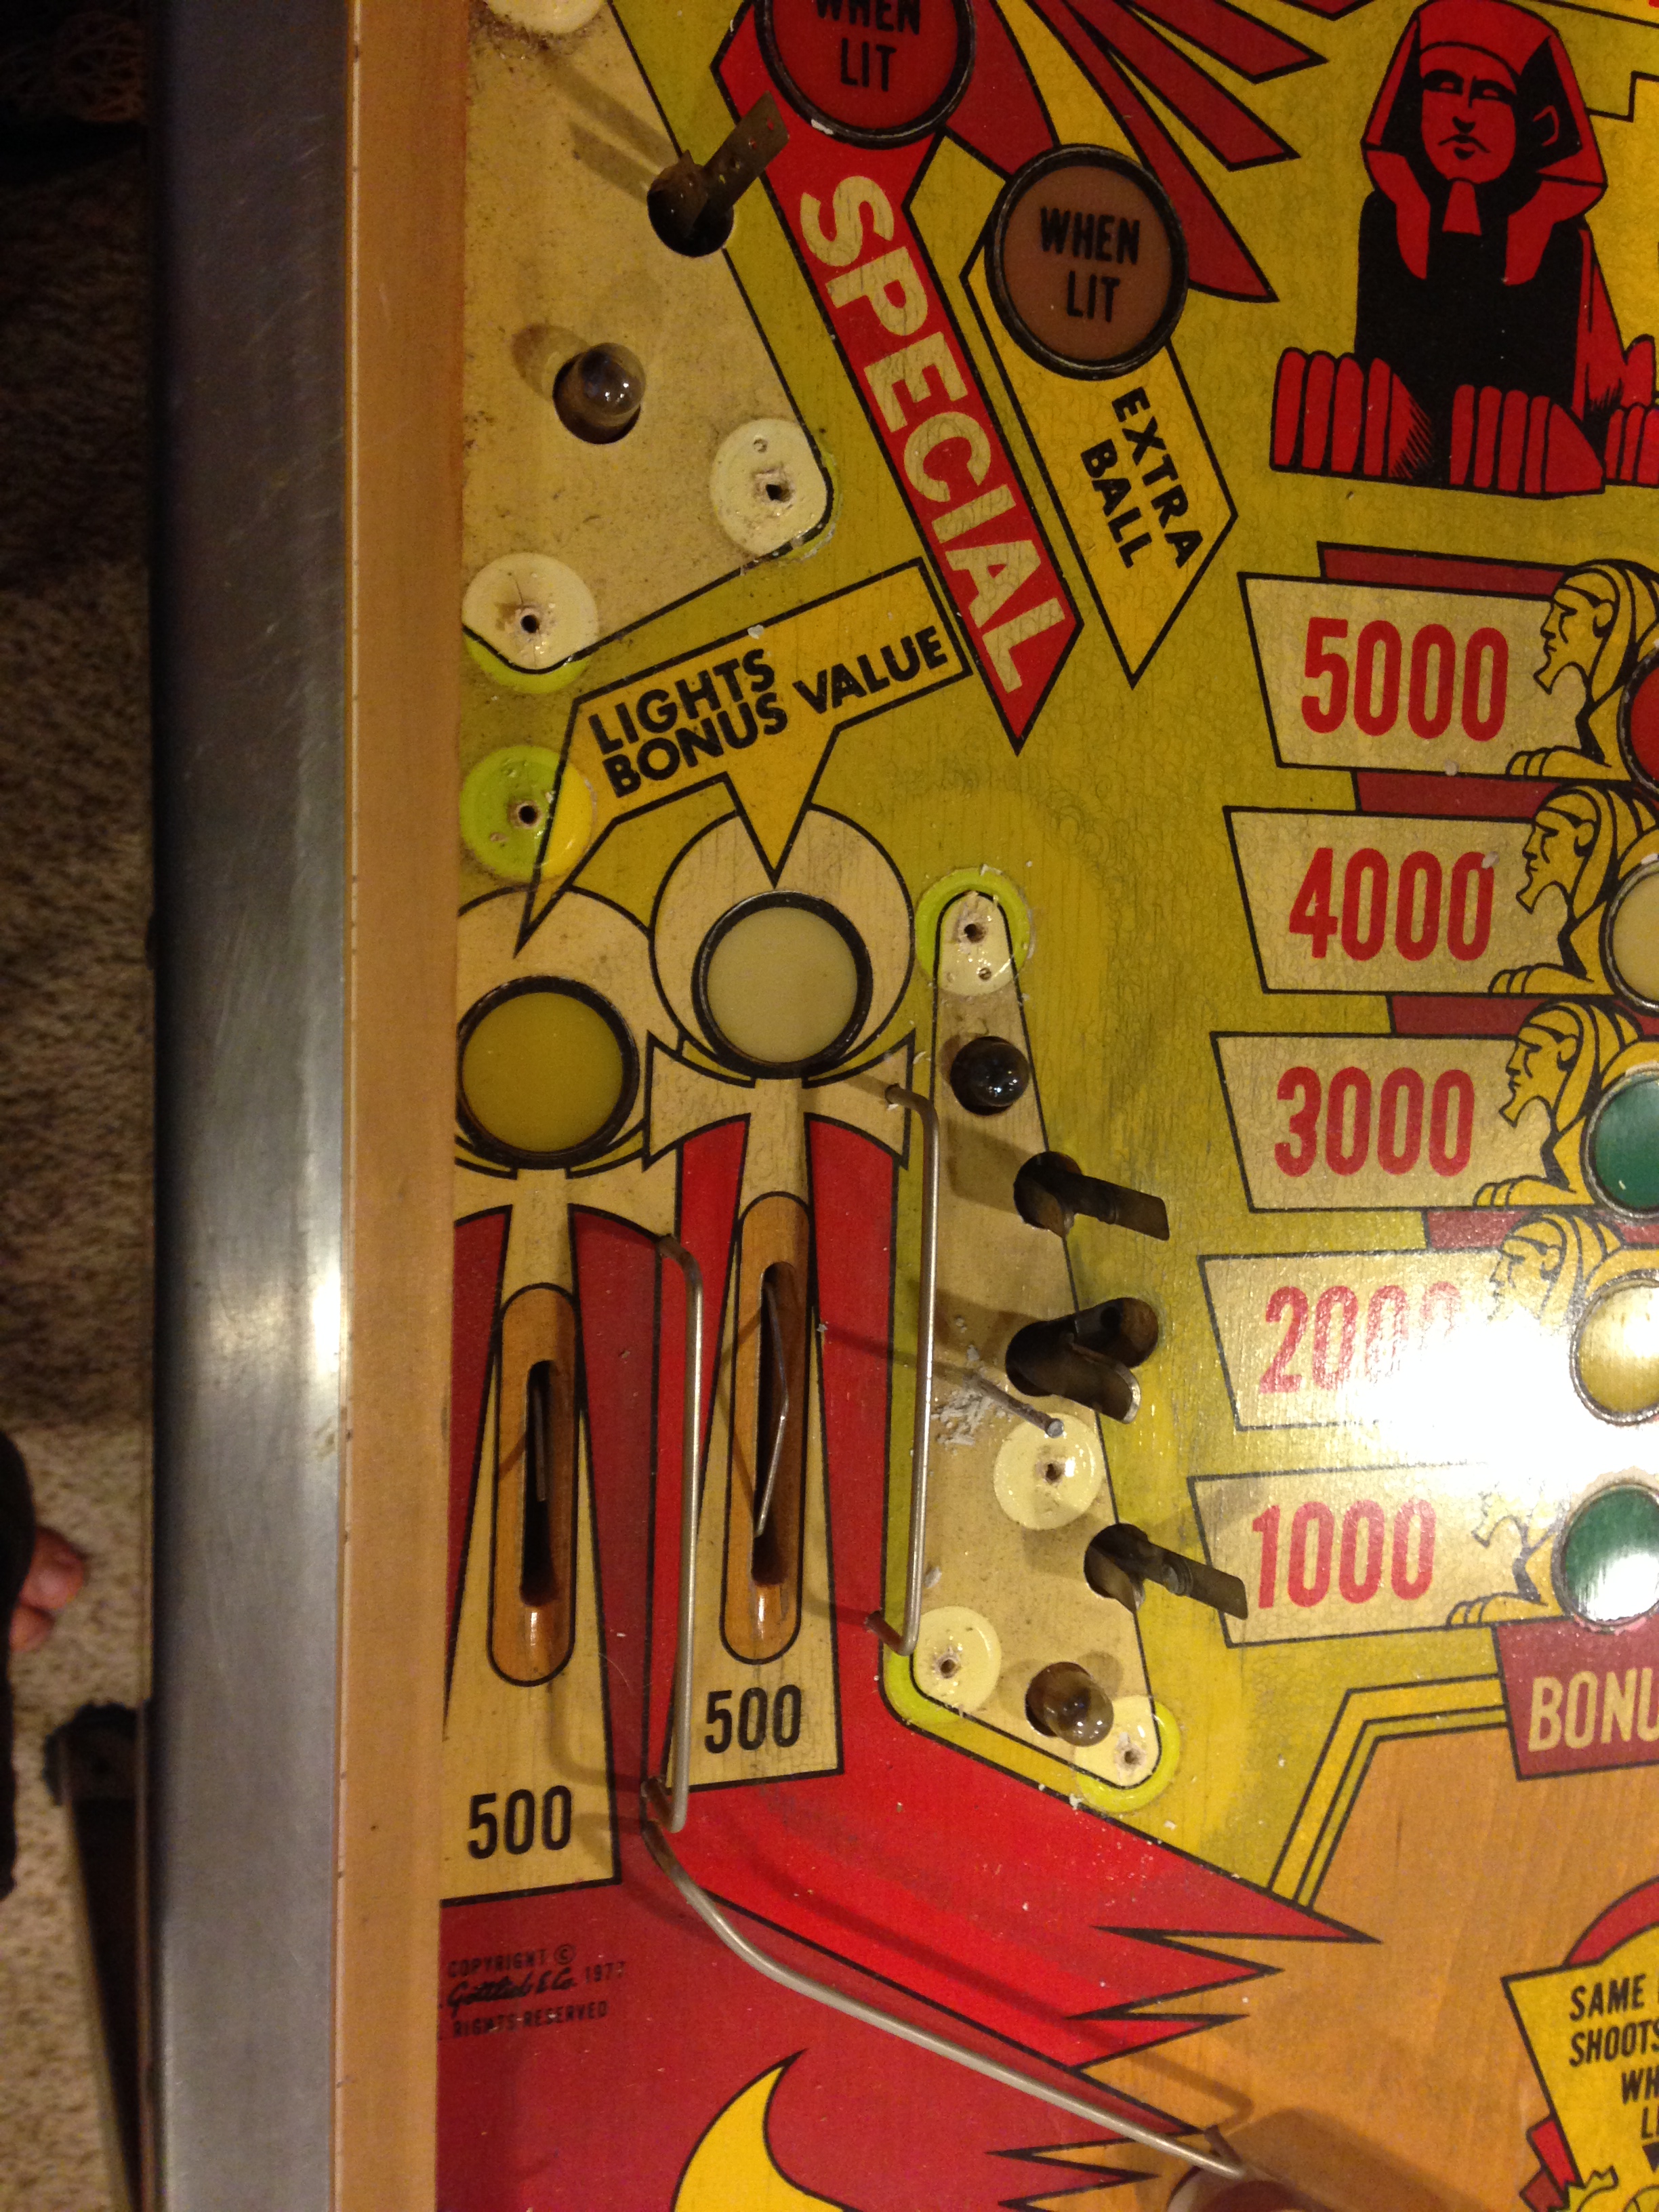
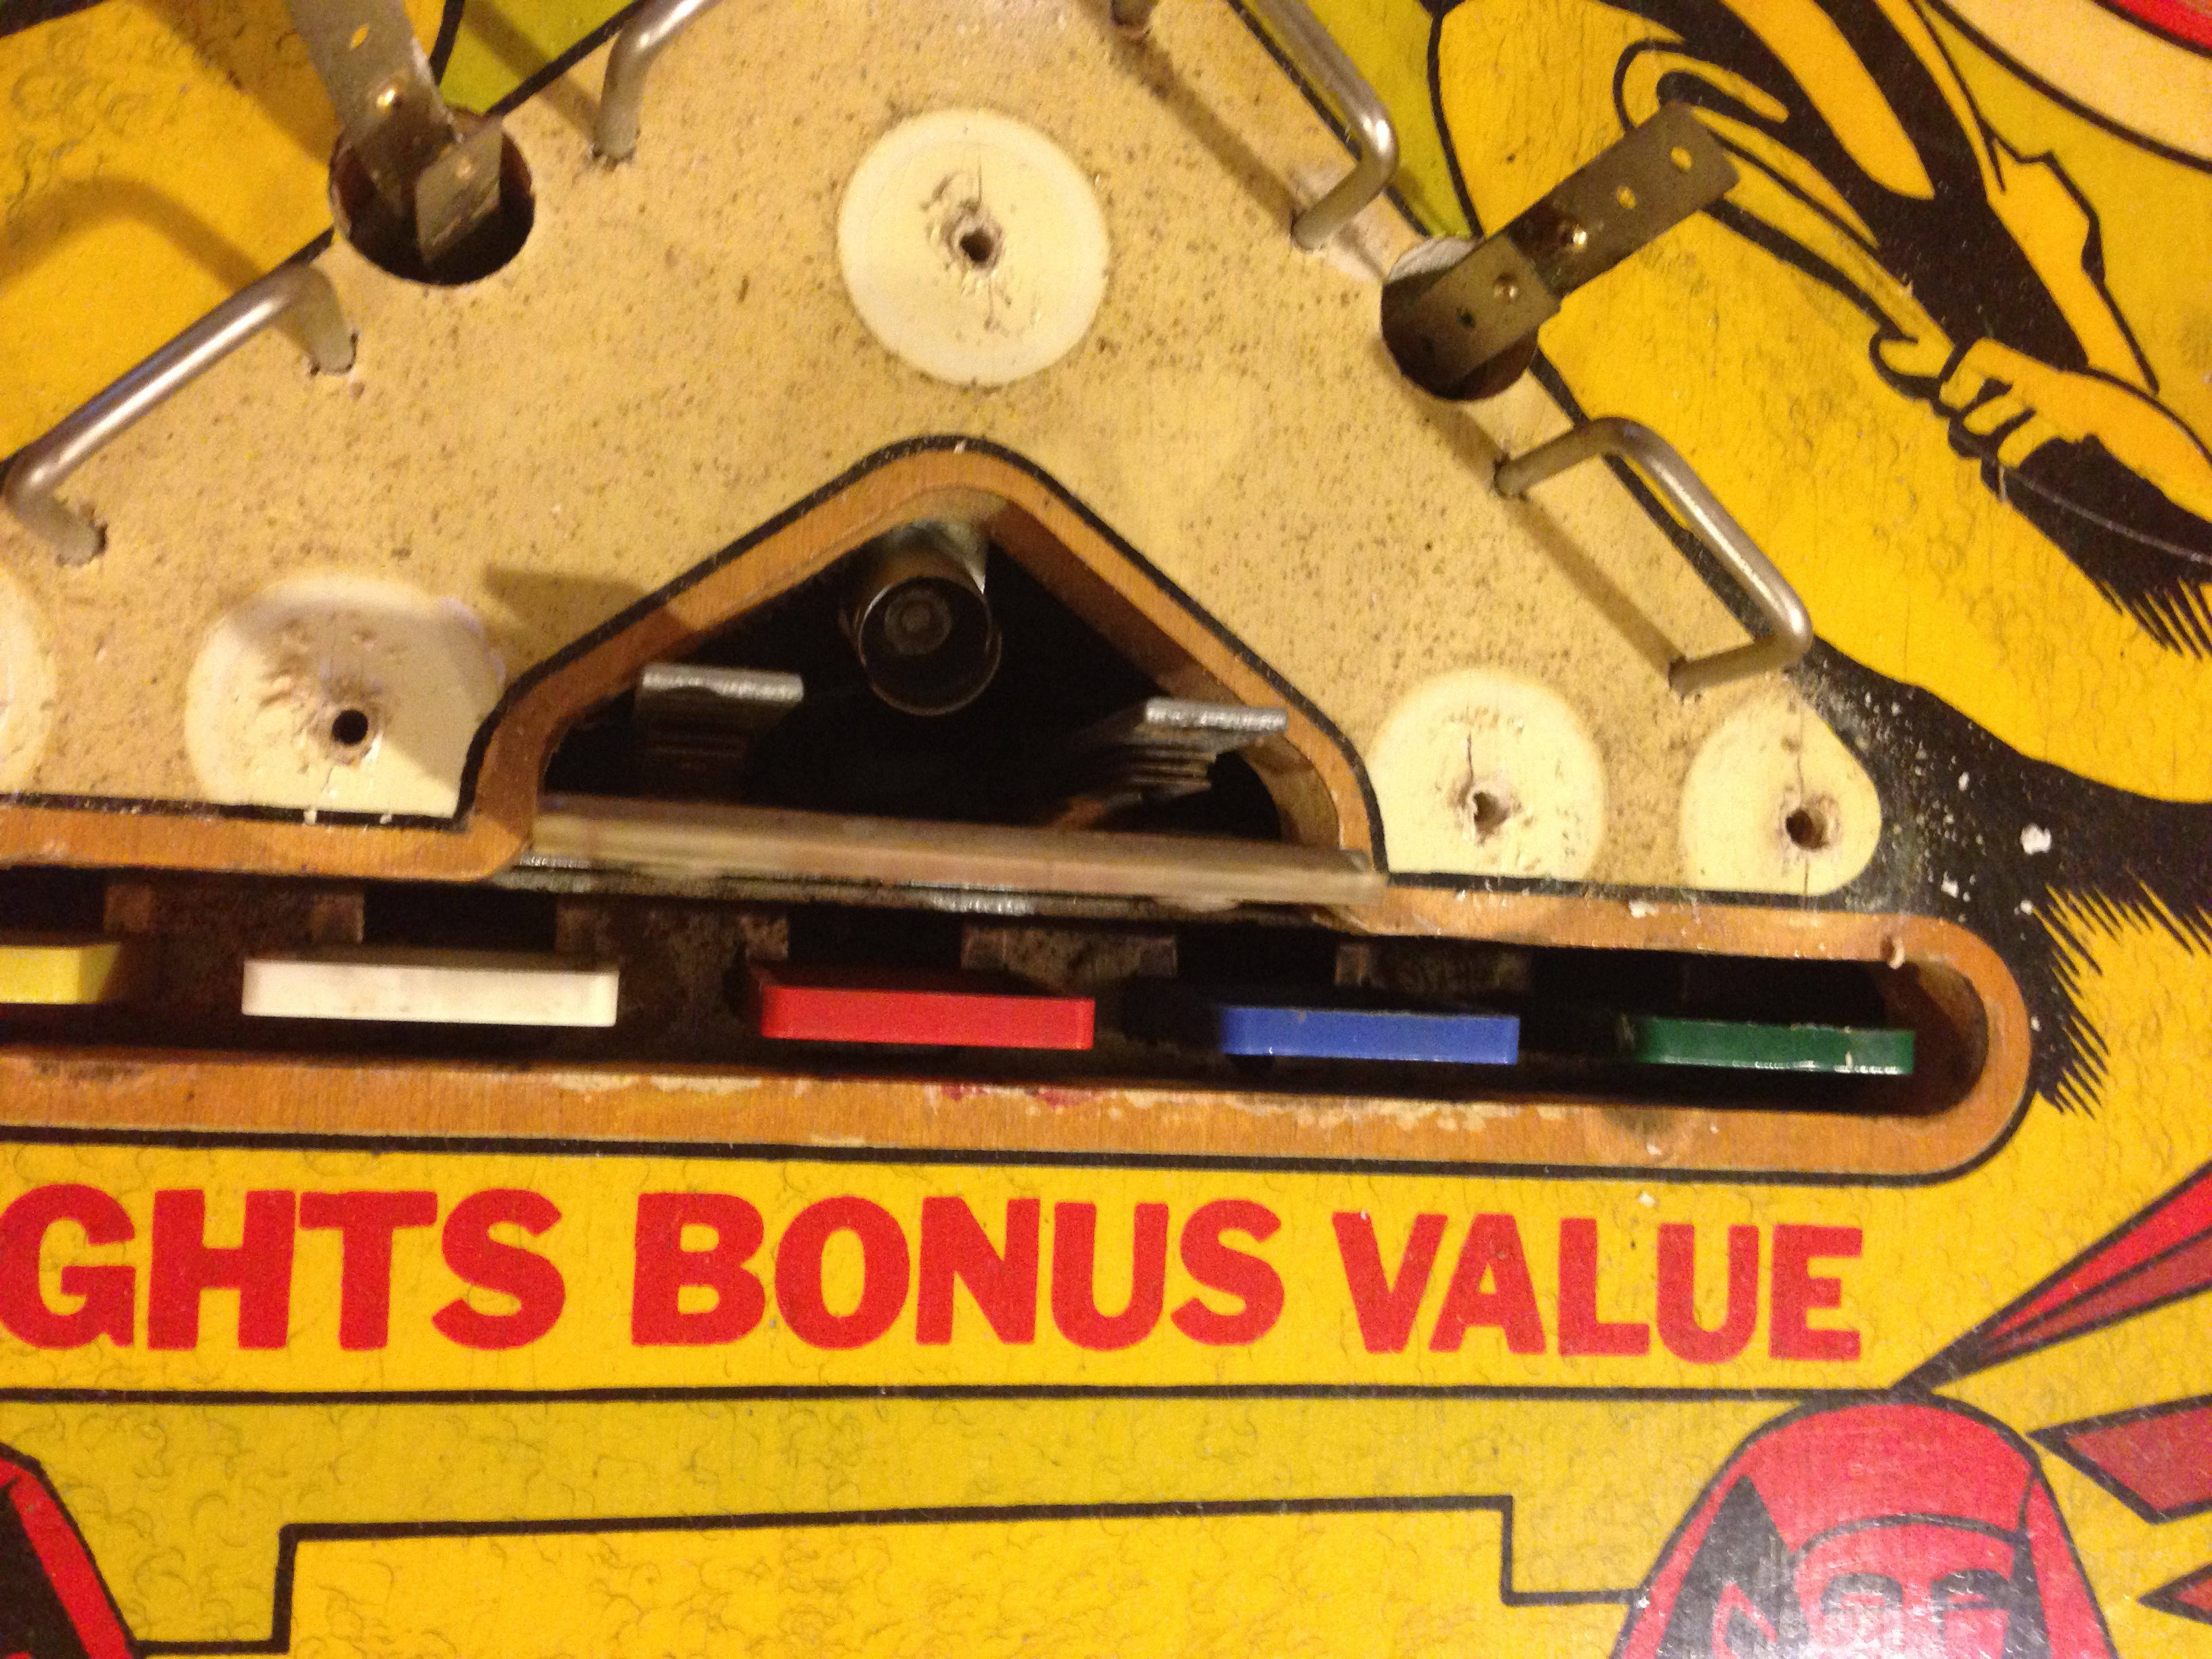
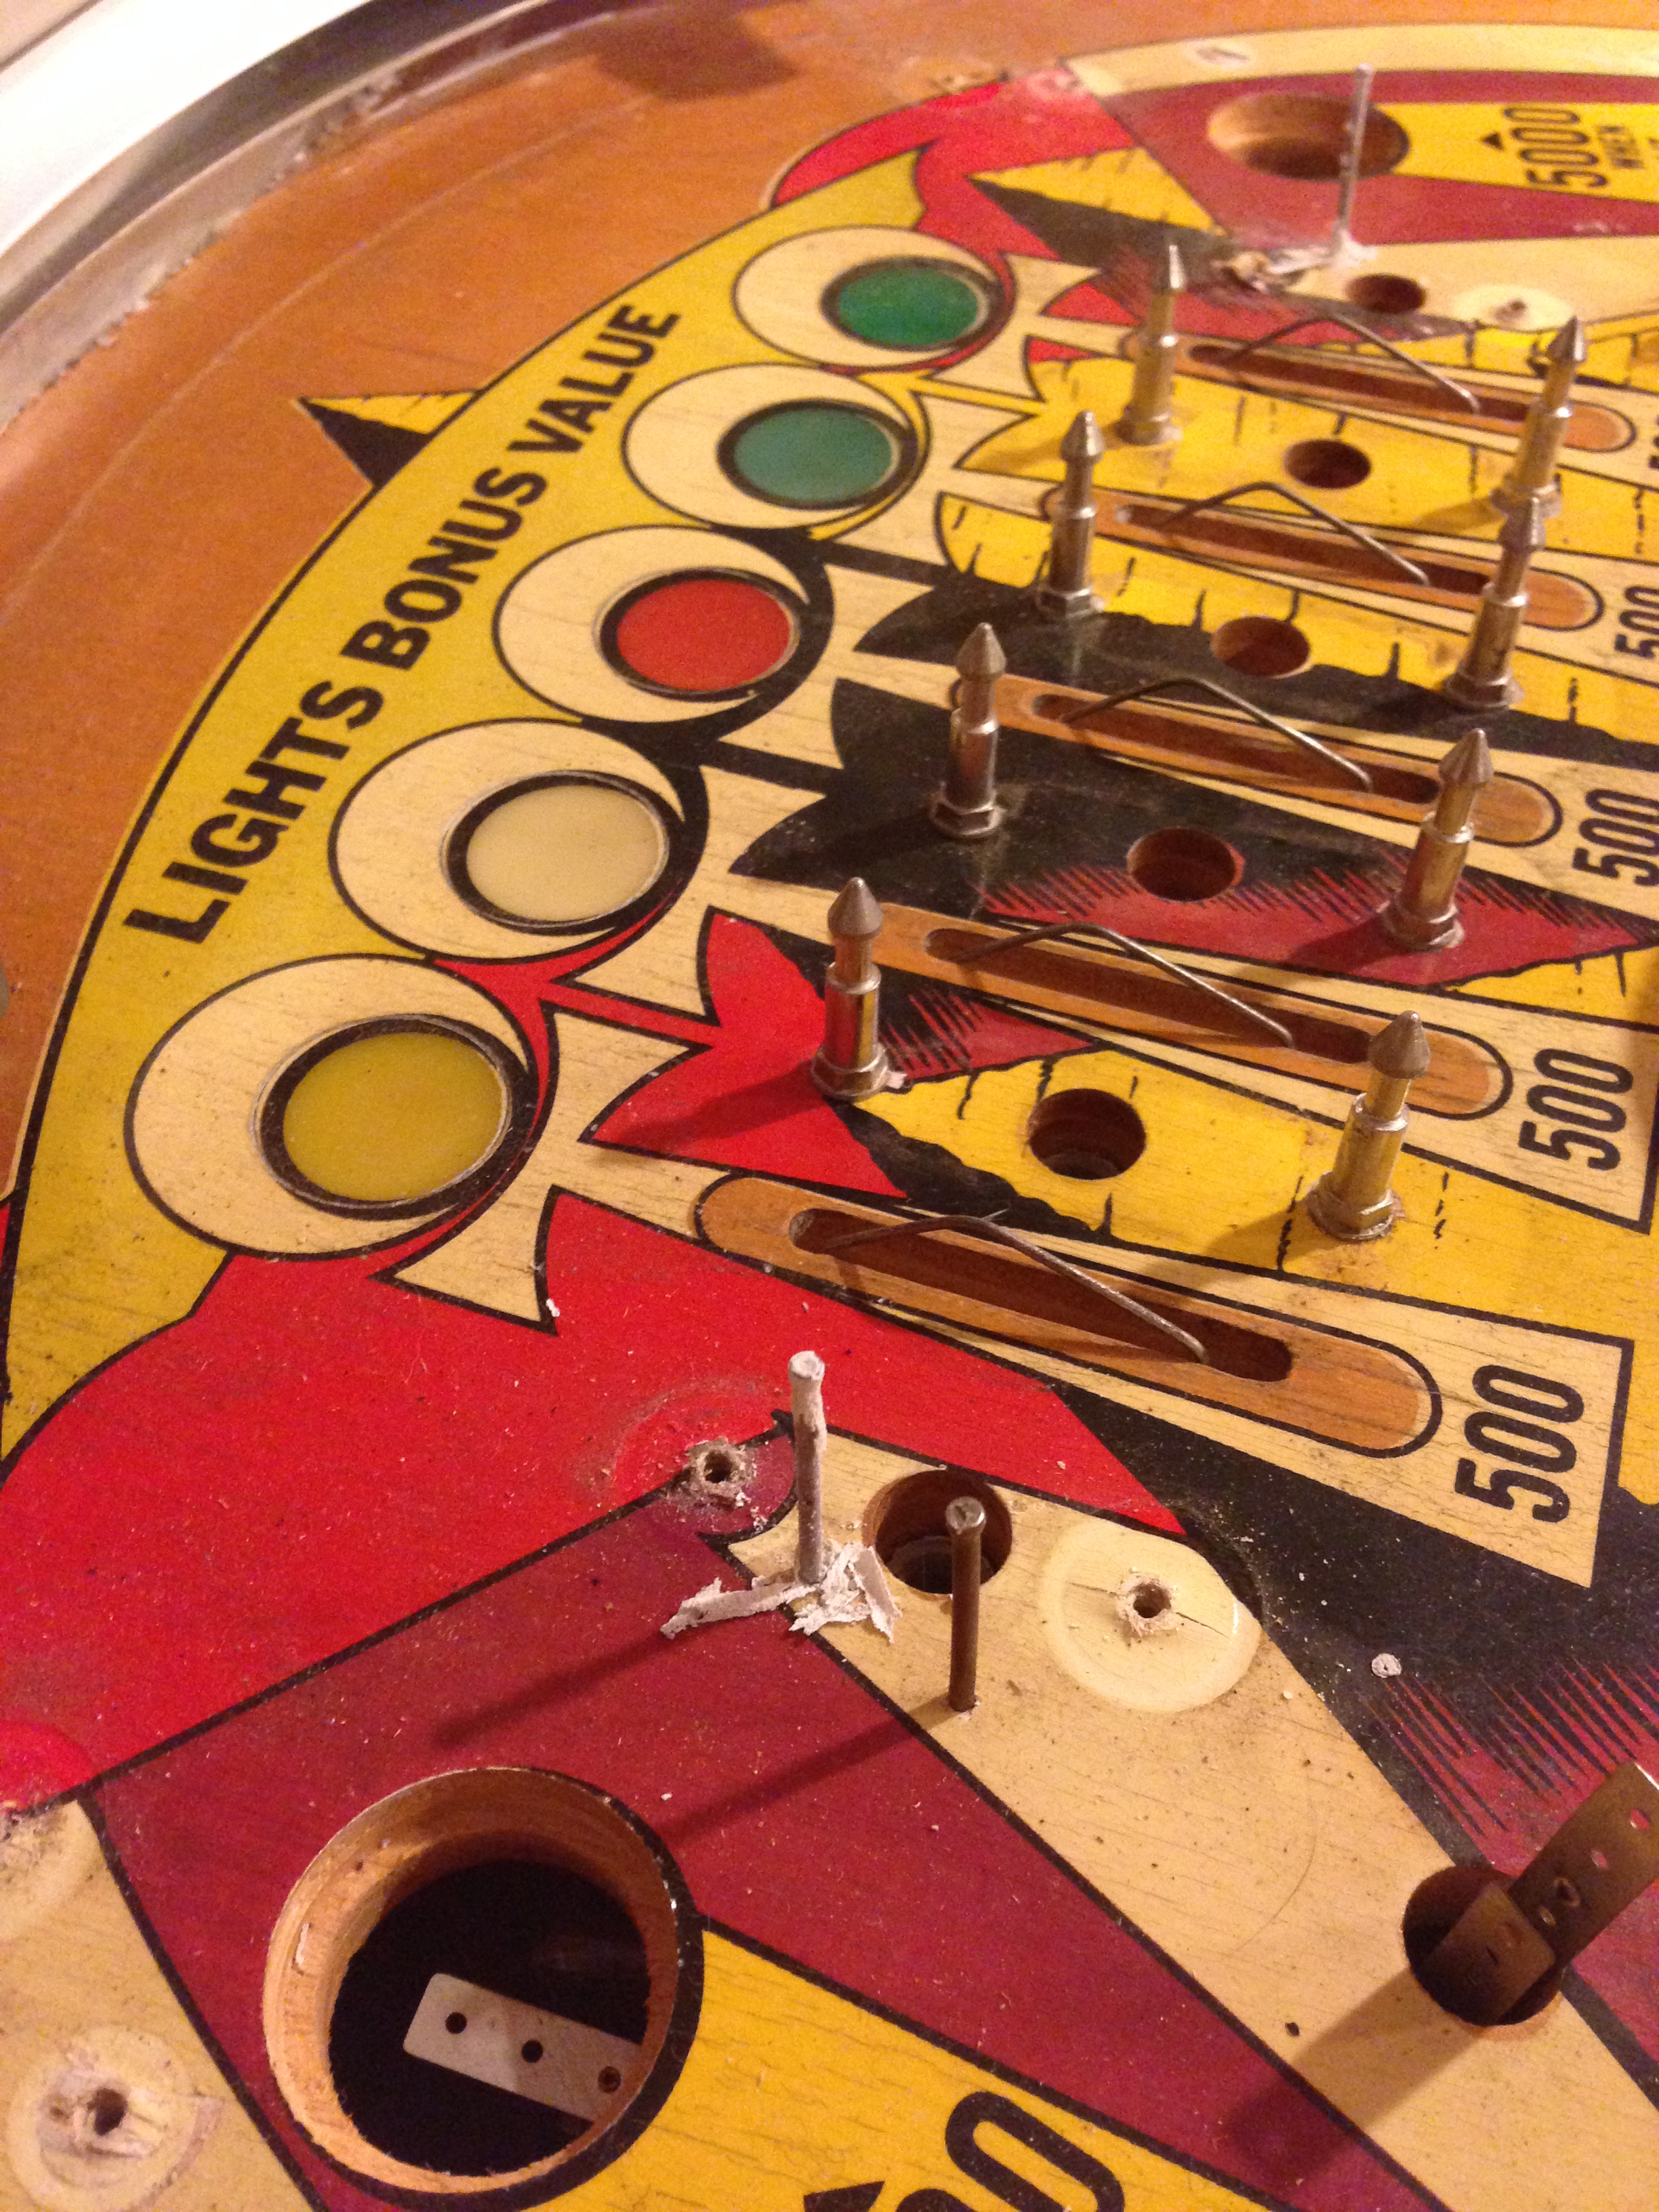
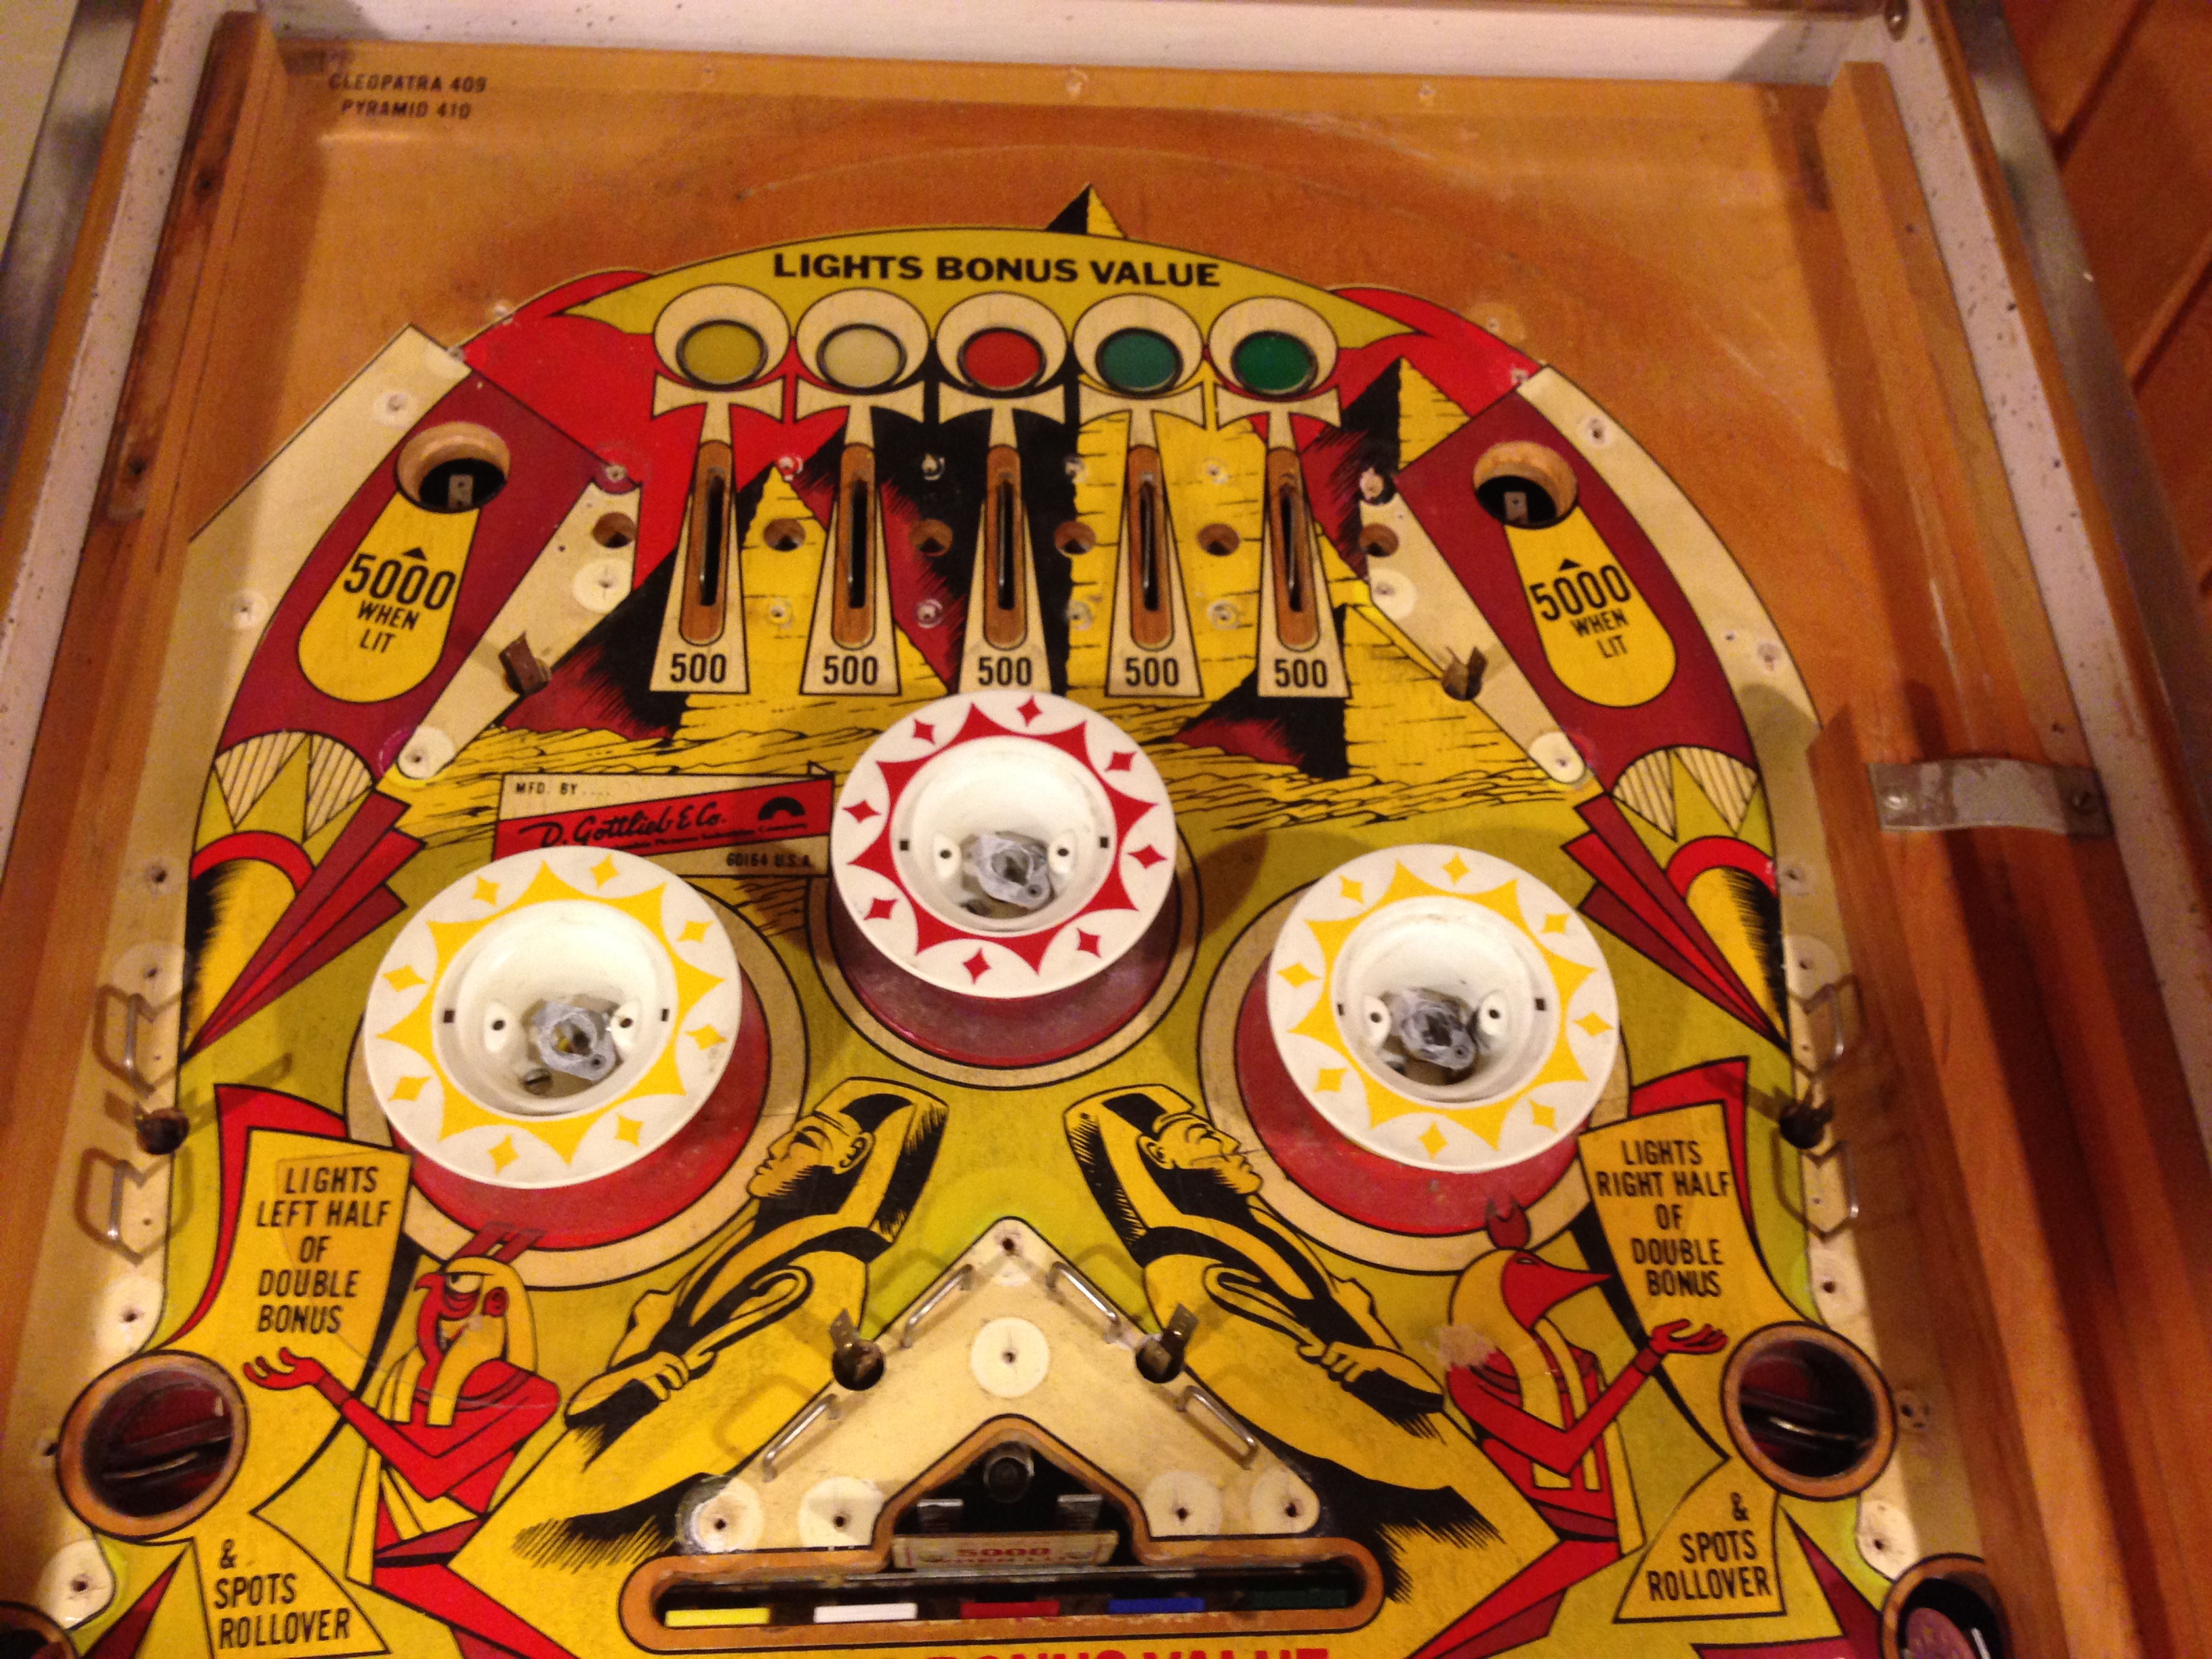
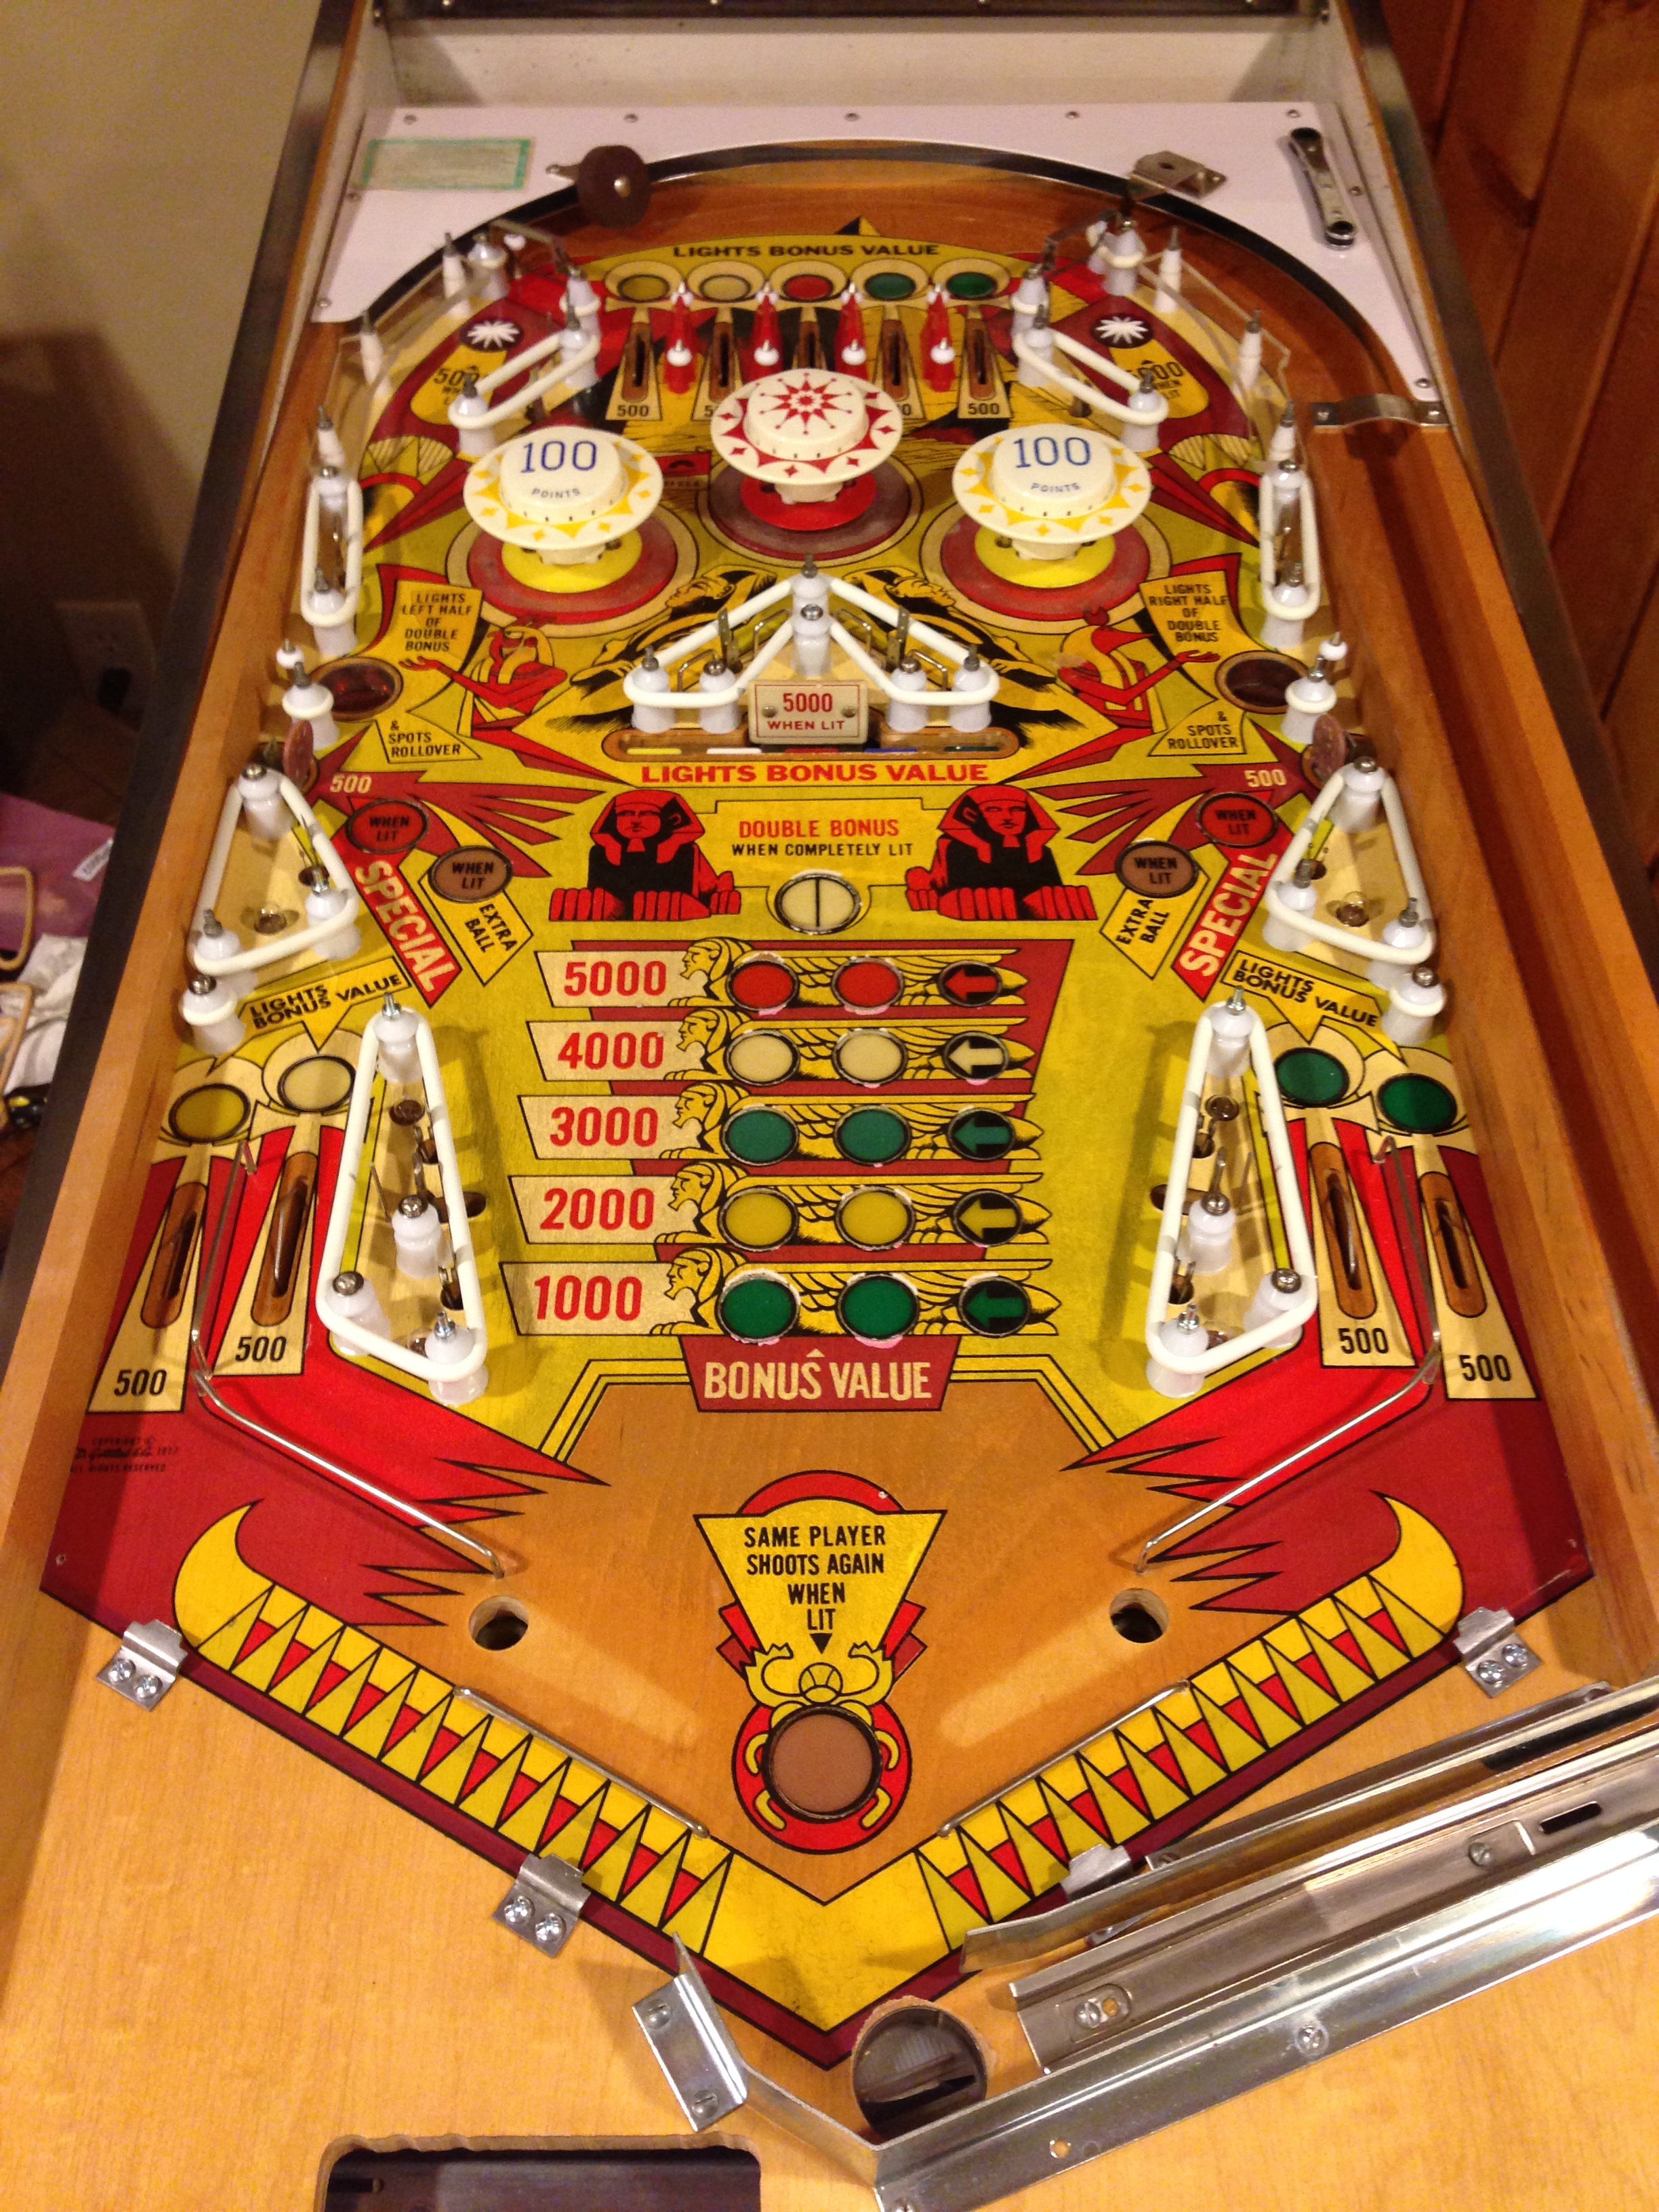
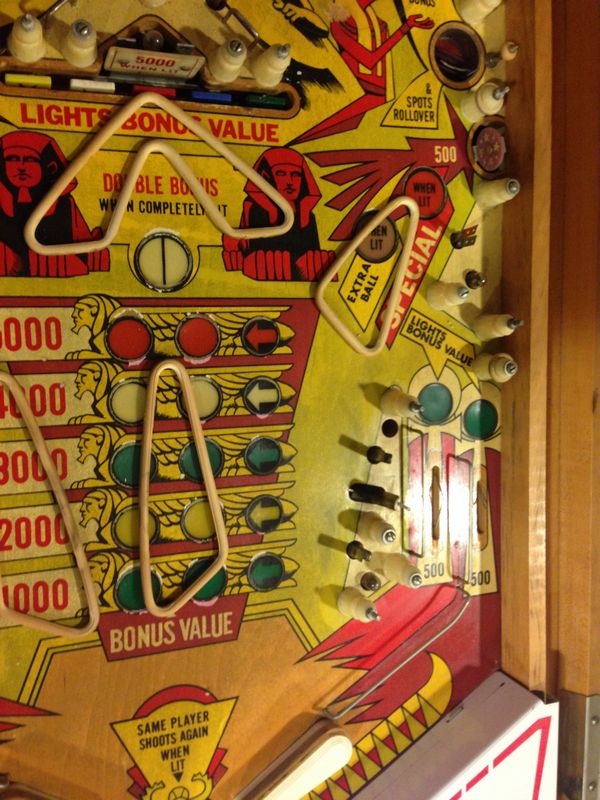
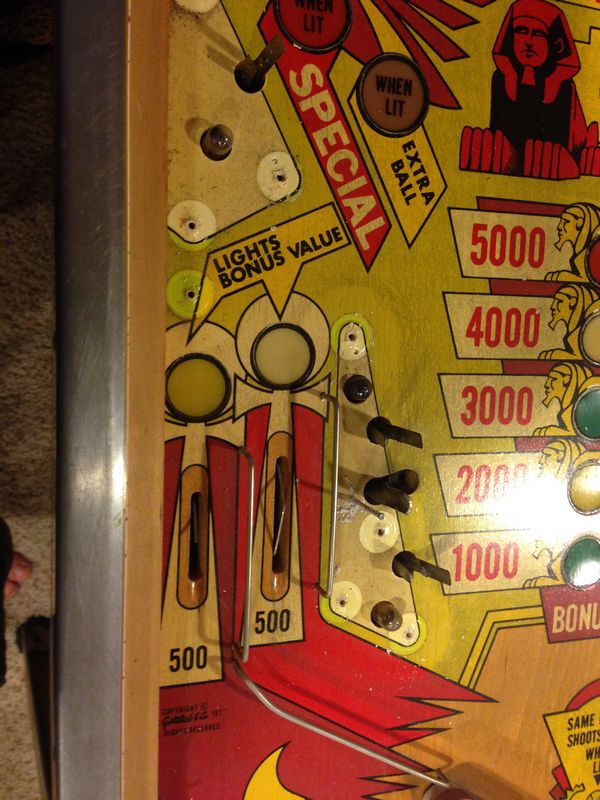
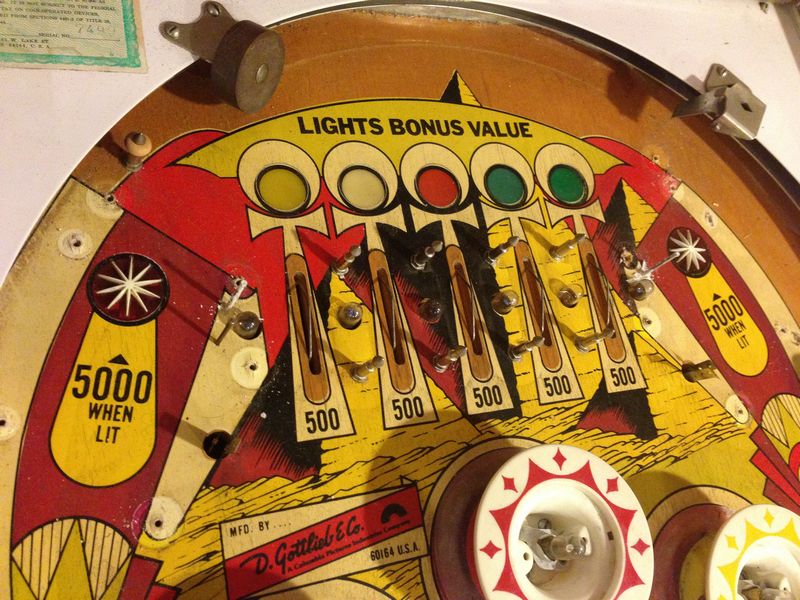
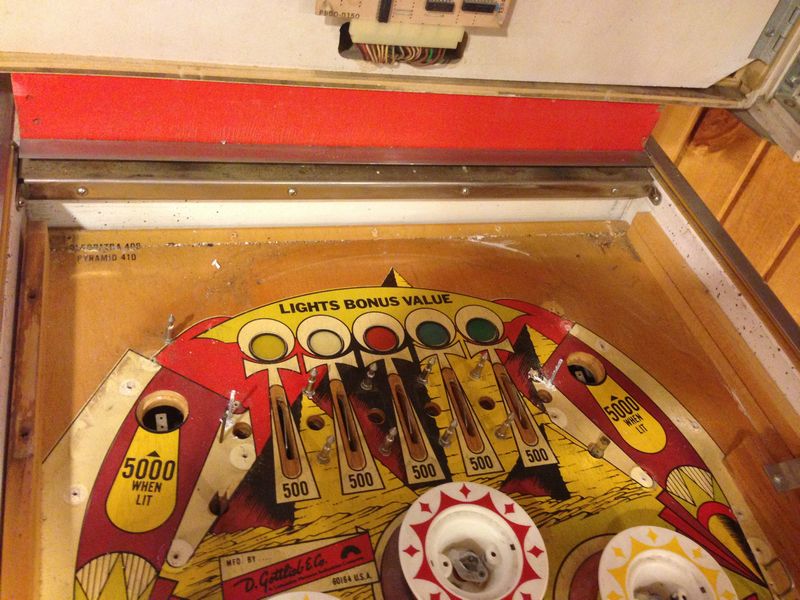
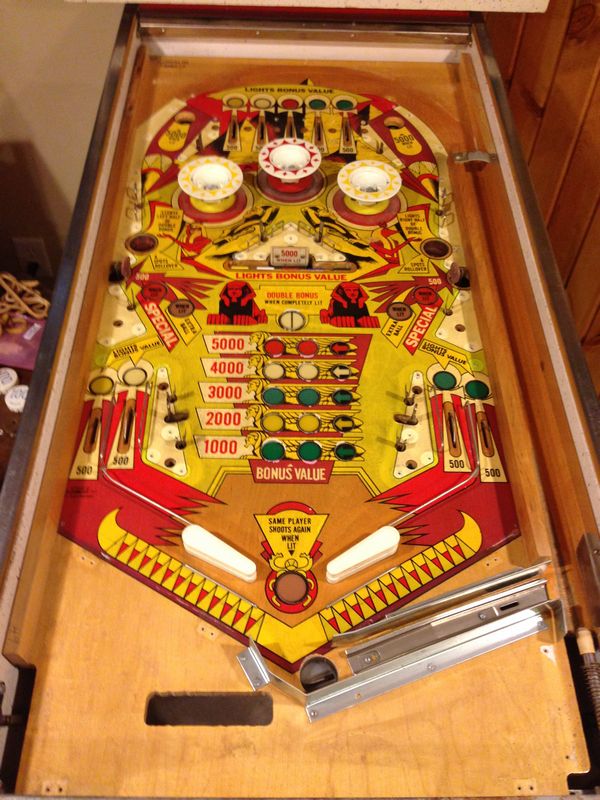
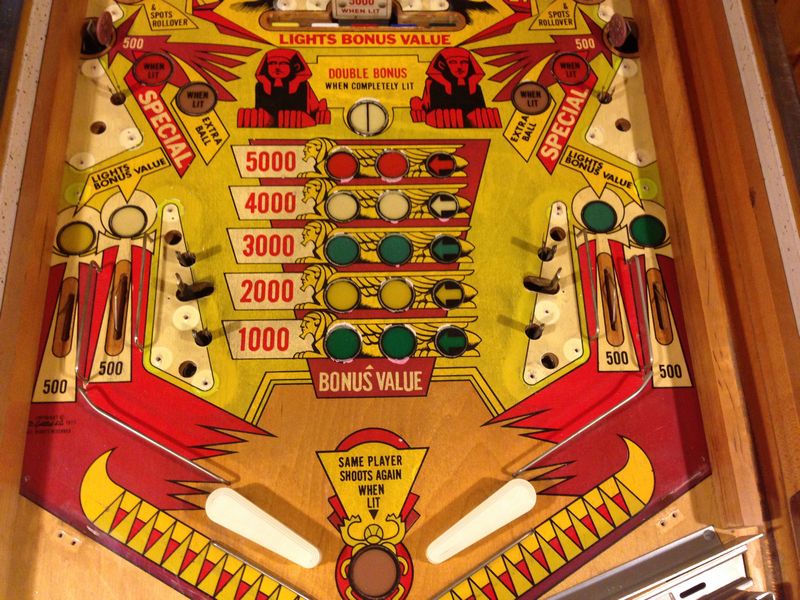
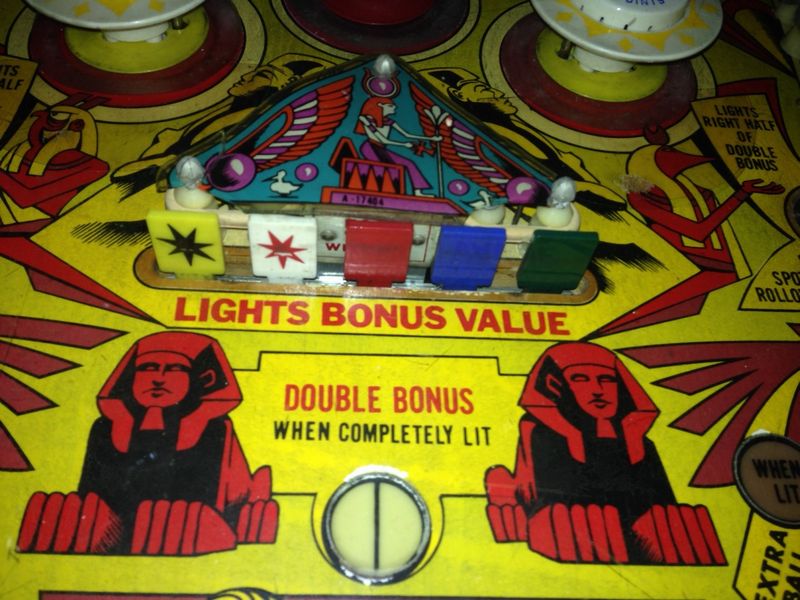
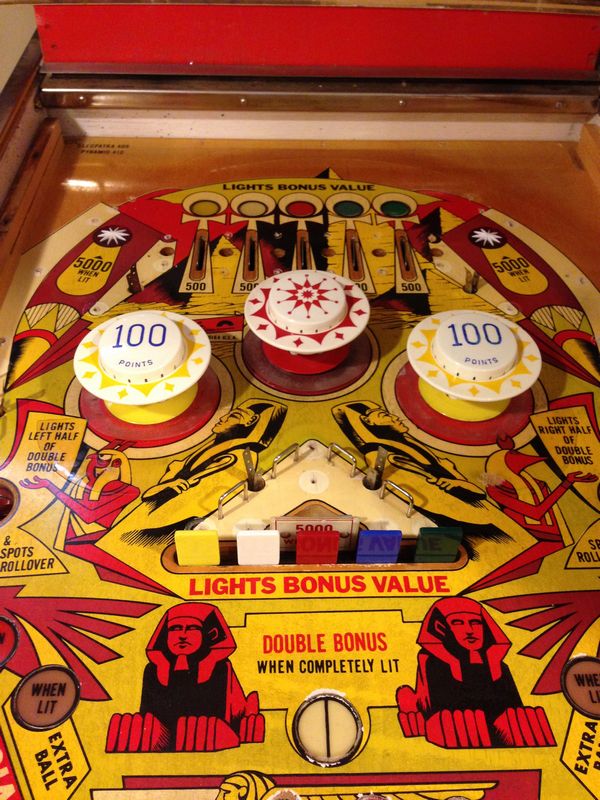
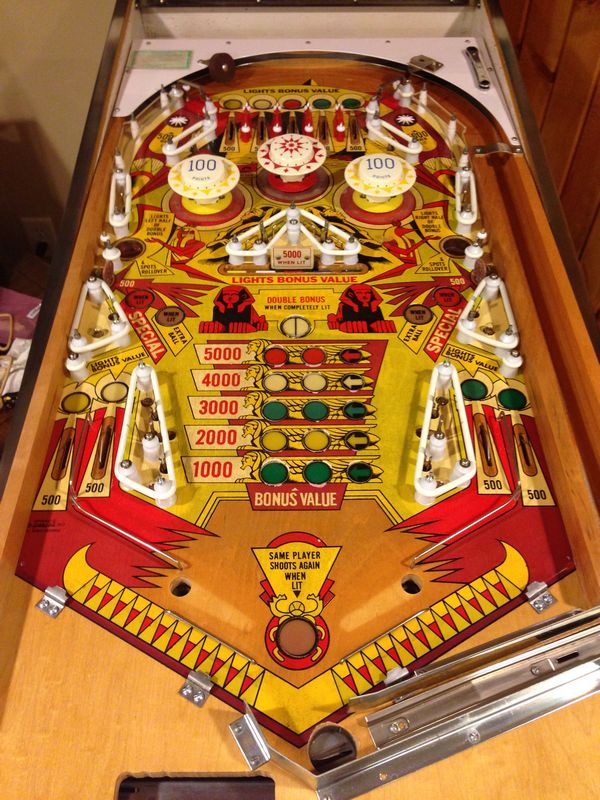
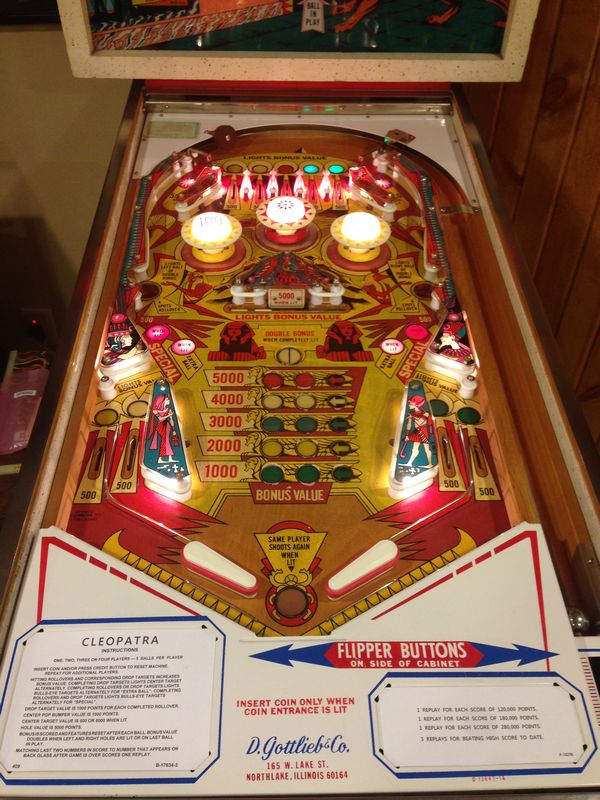
Here's the playfield. Several burnt
out lights, but otherwise in pretty good condition:
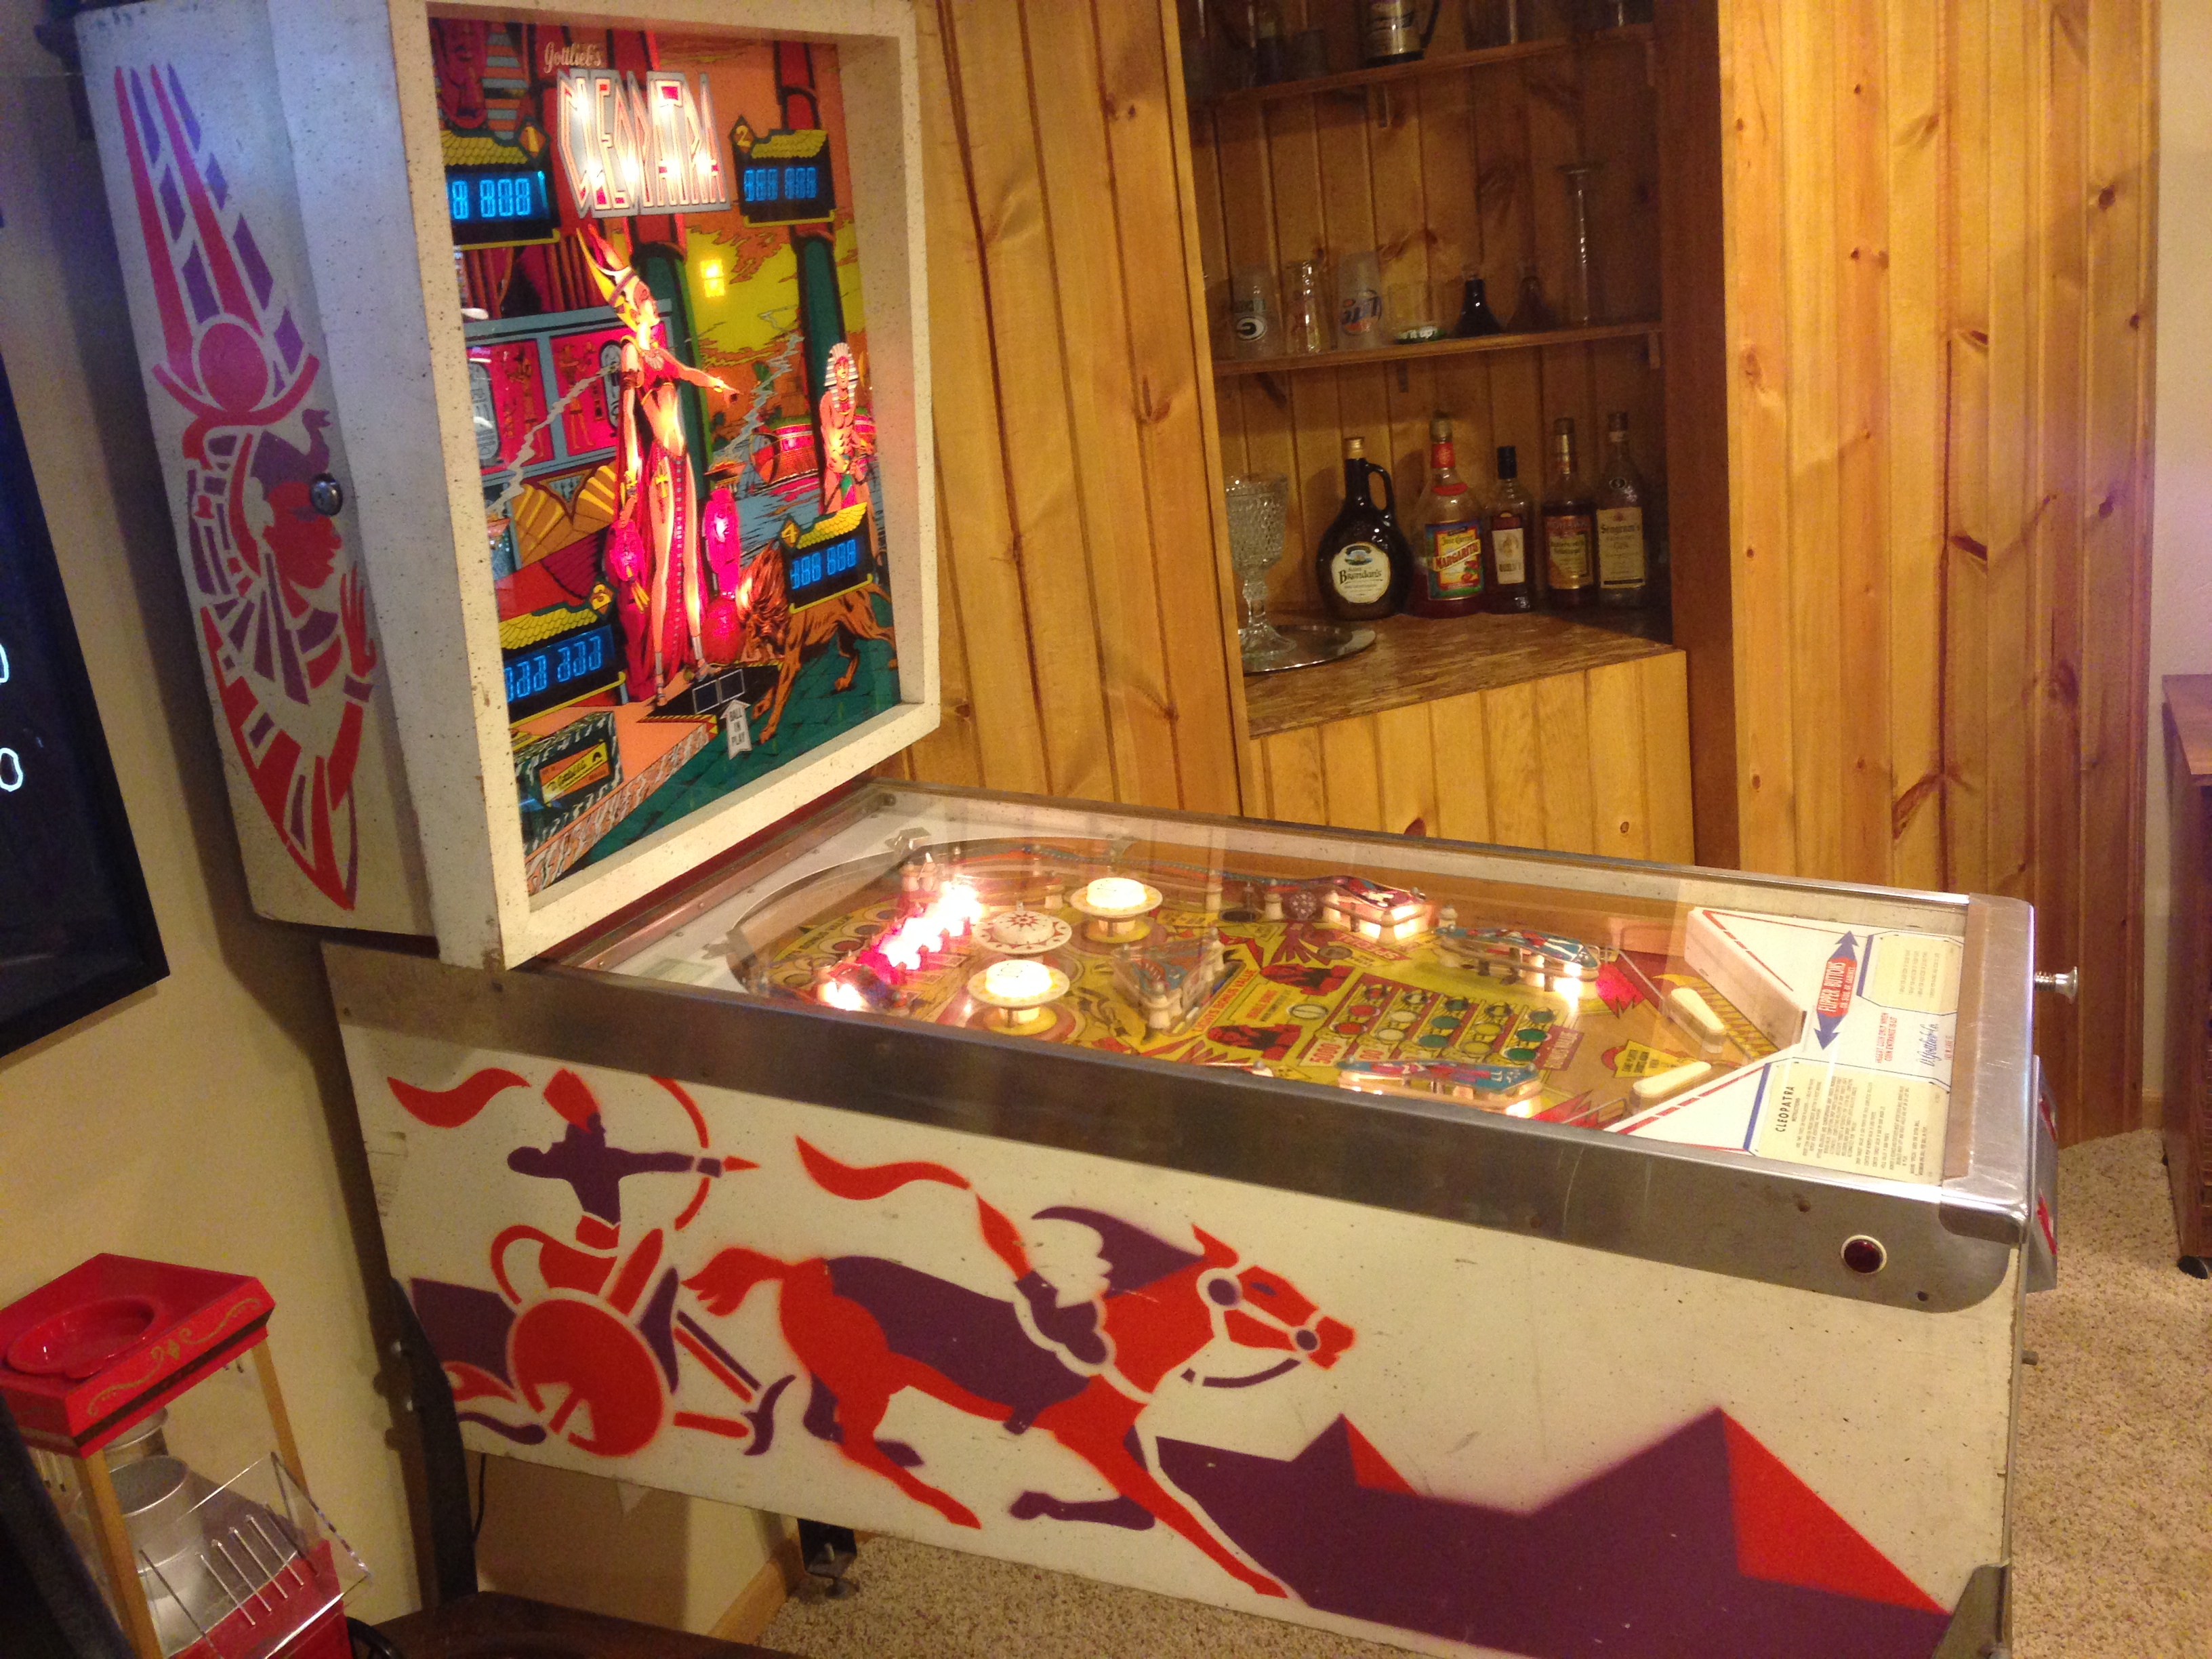
Here's a side view:

A closer view of the backglass.
It's in really good shape!
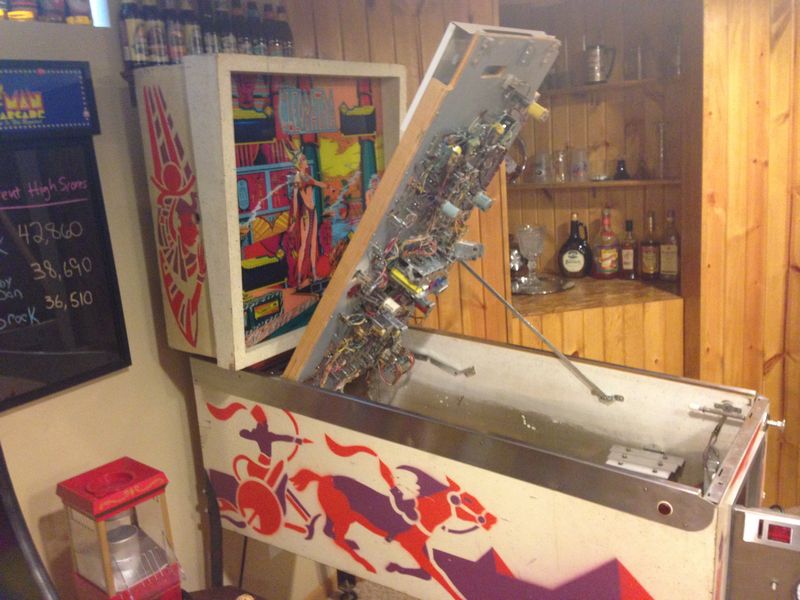
Just in case you've never seen a pin opened up
before, here it is:
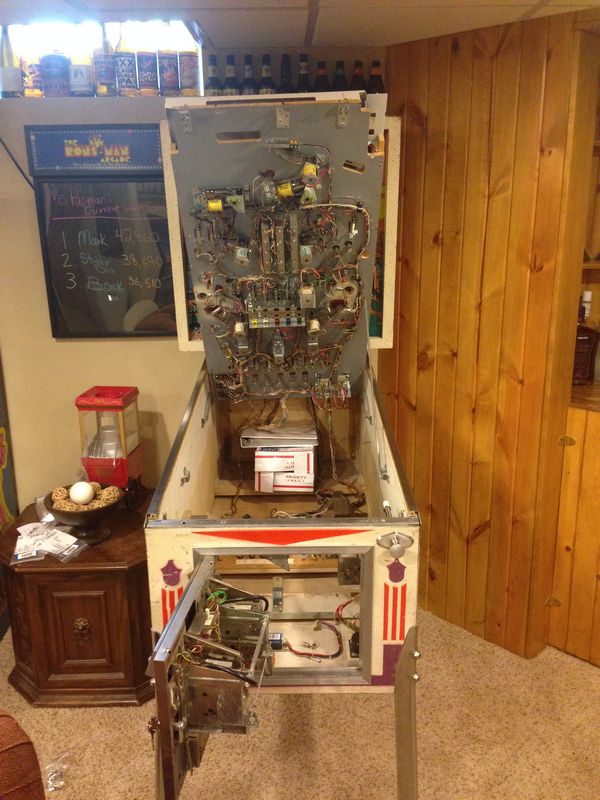
And a side view with it all opened up:
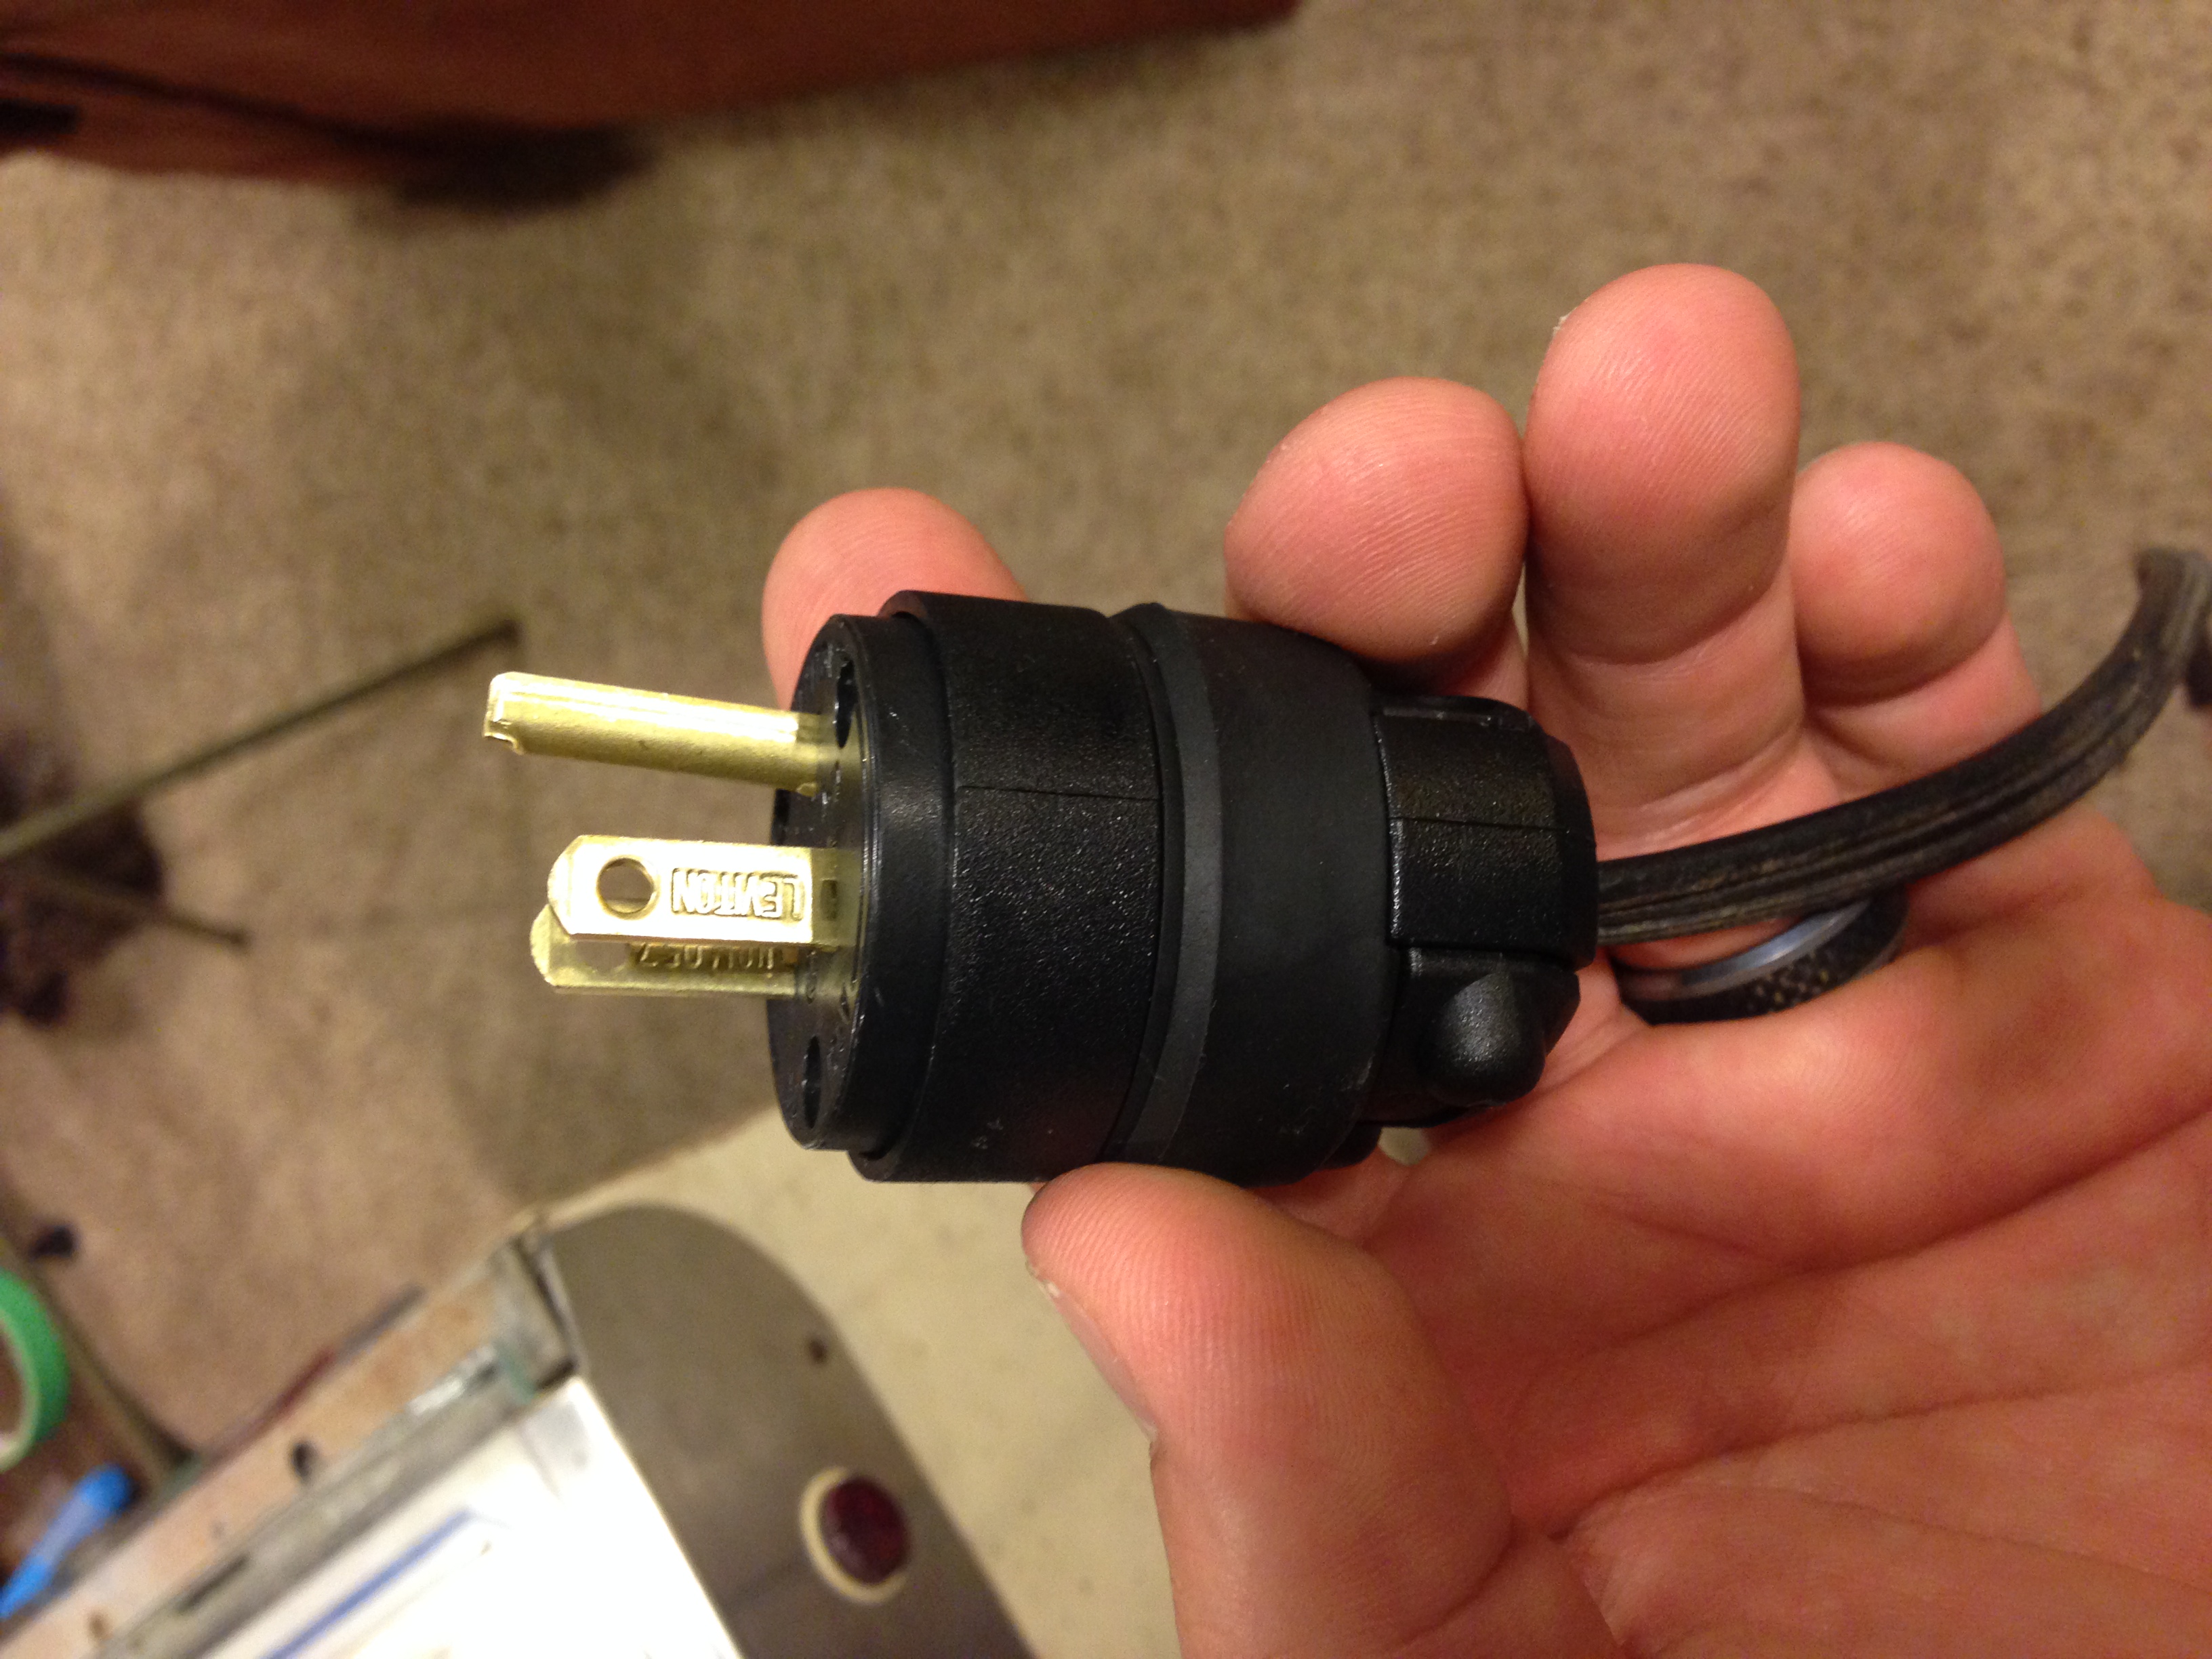
The first thing I did to repair it was replace
this ratty old electrical cord. You can see it's got electrical tape
covering up bad parts of the wire:
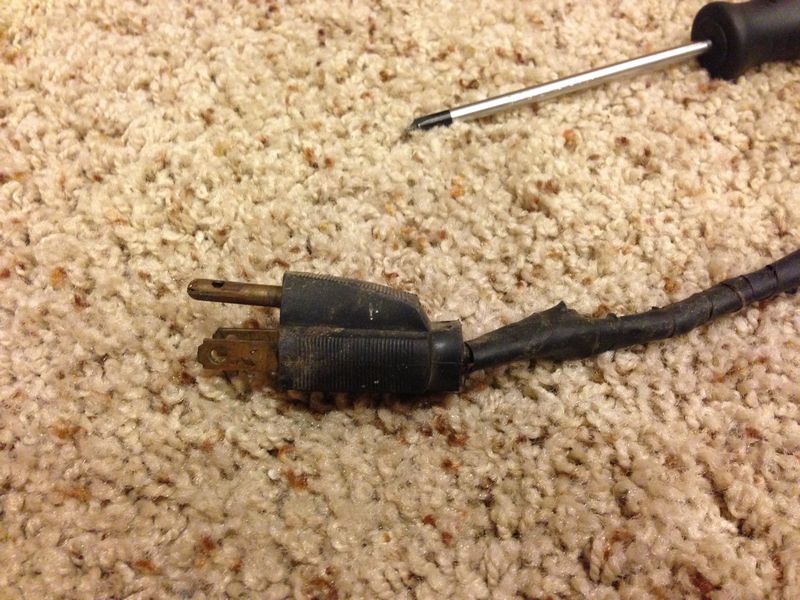
I cut off the bad wire and replaced the plug
with this shiny brand new one:

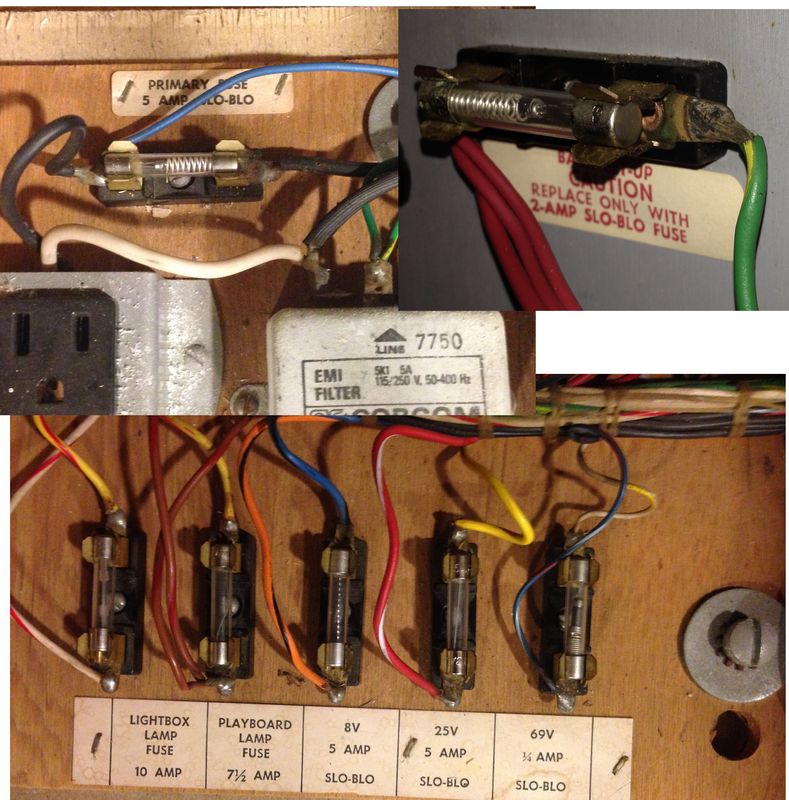
The next simple task I did was replace all of
the existing fuses in the machine. Here's a picture of all 7
fuses in the game:
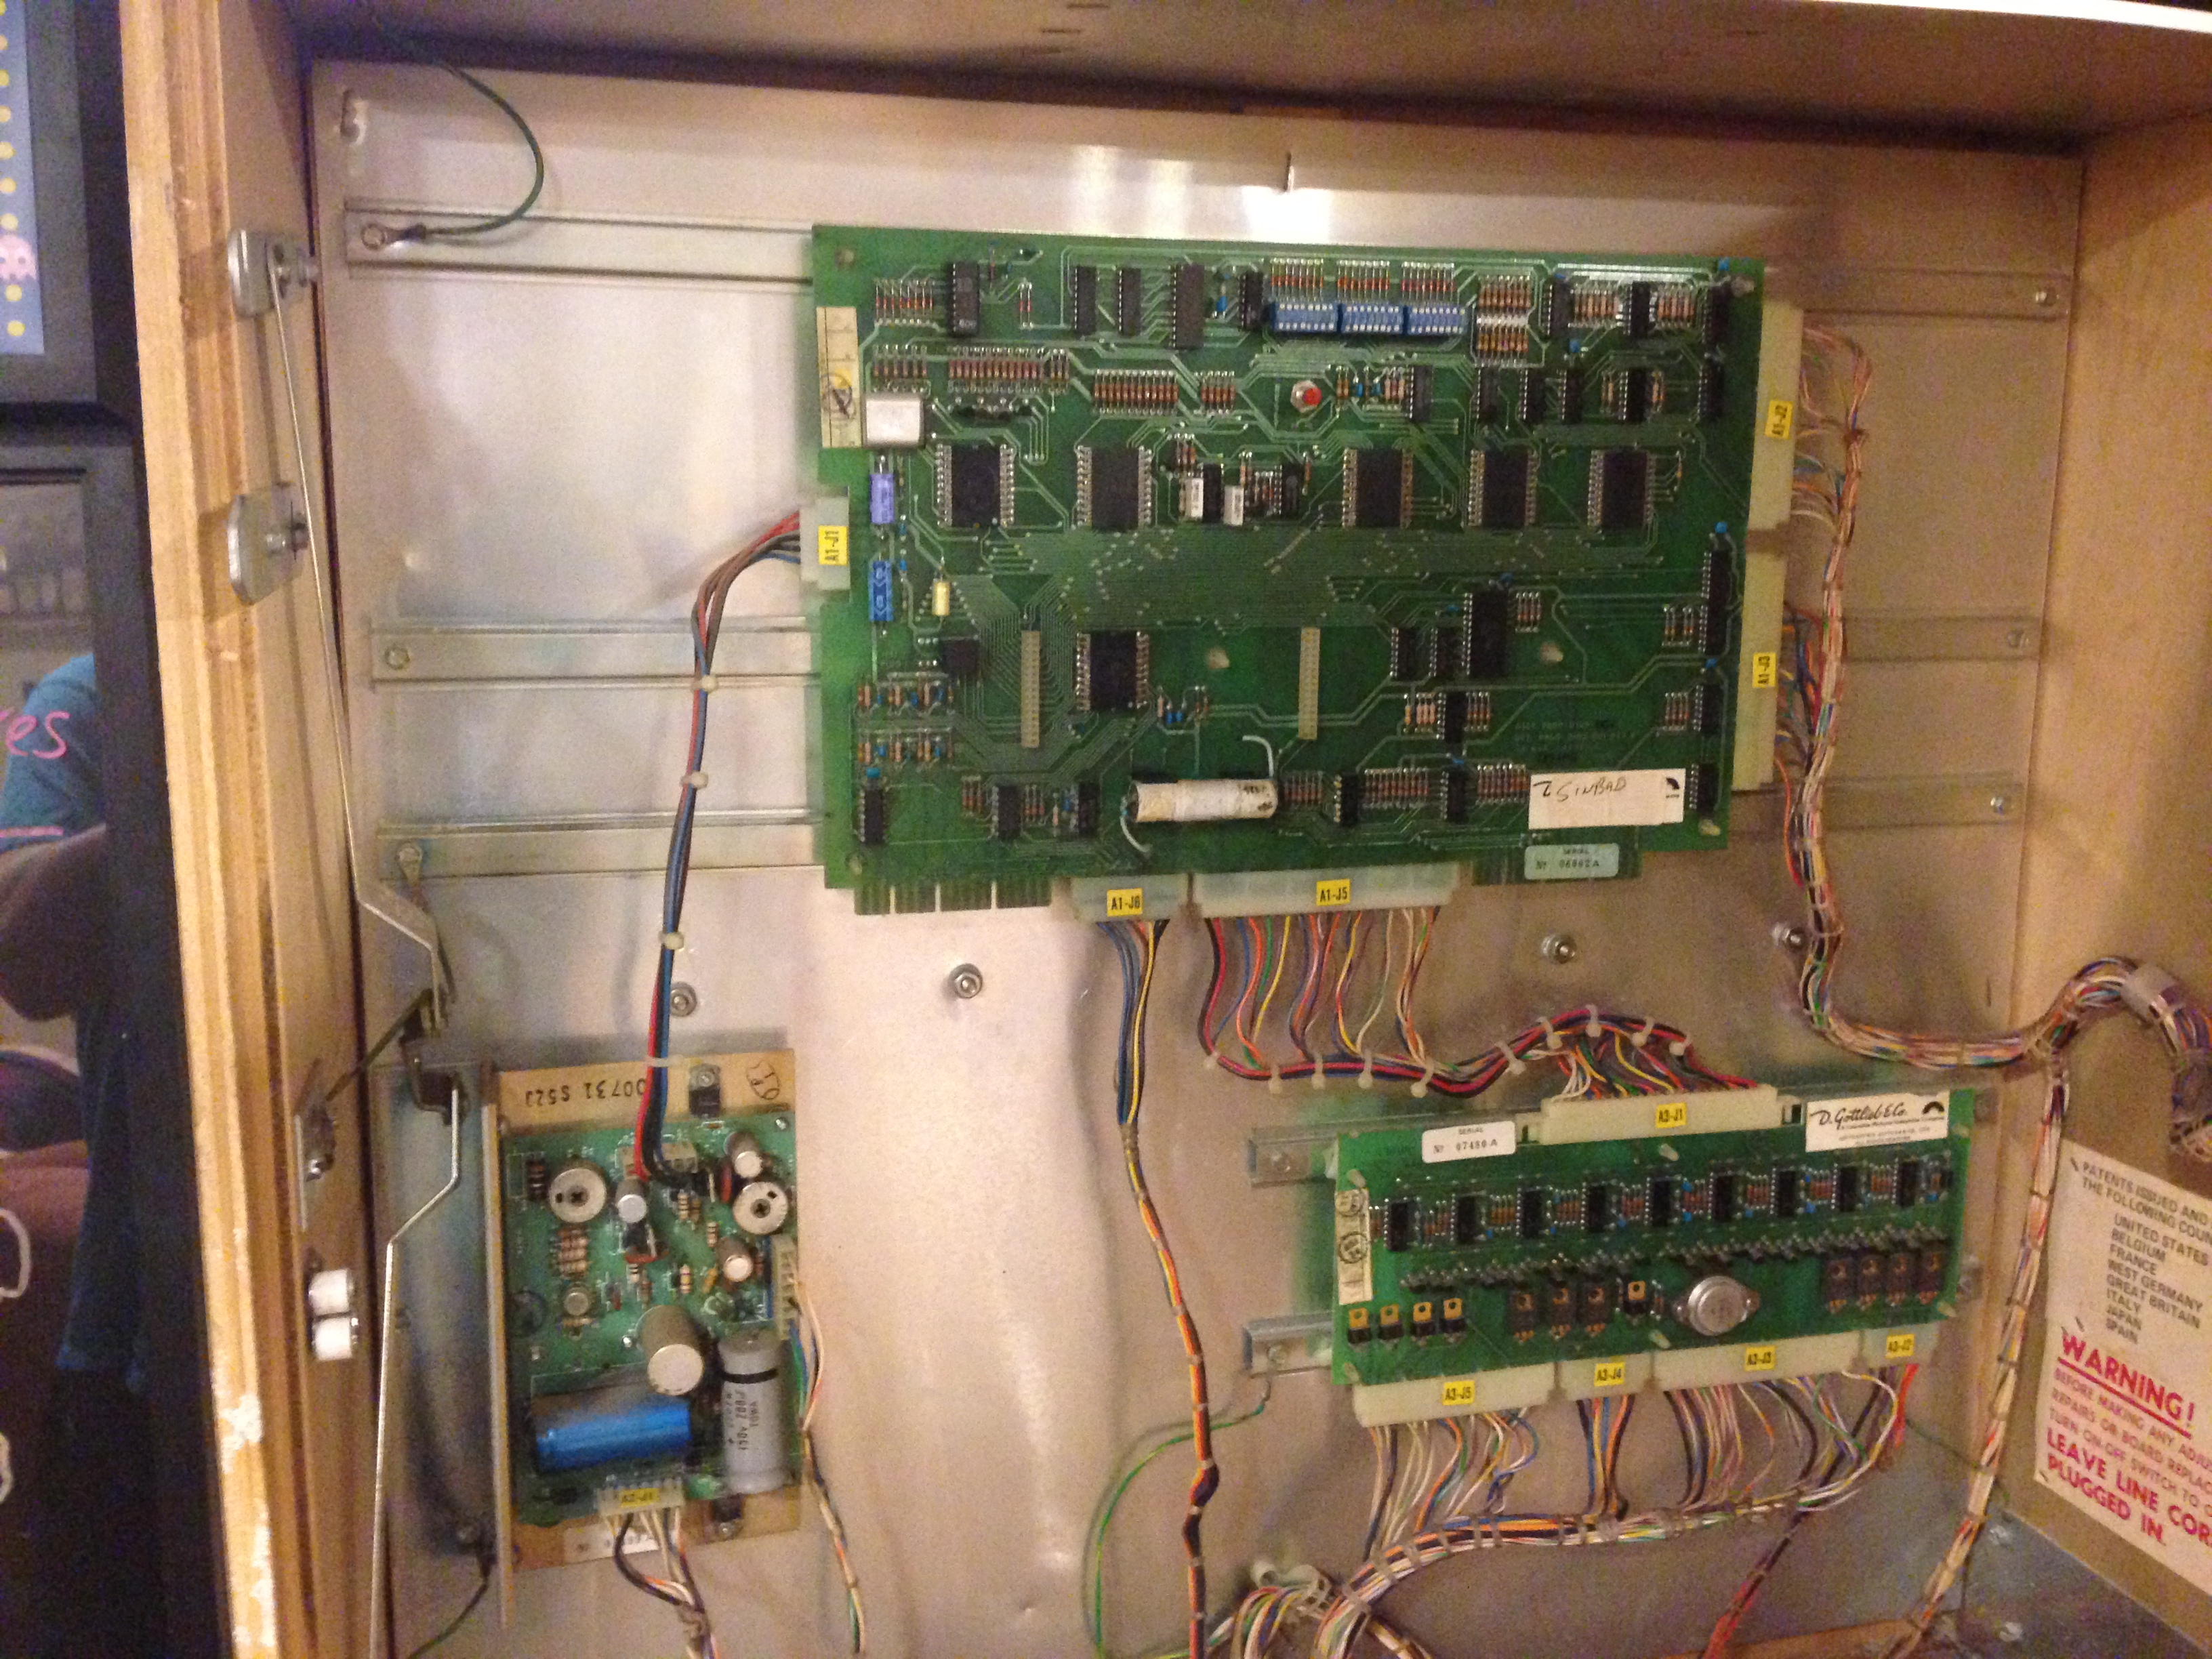
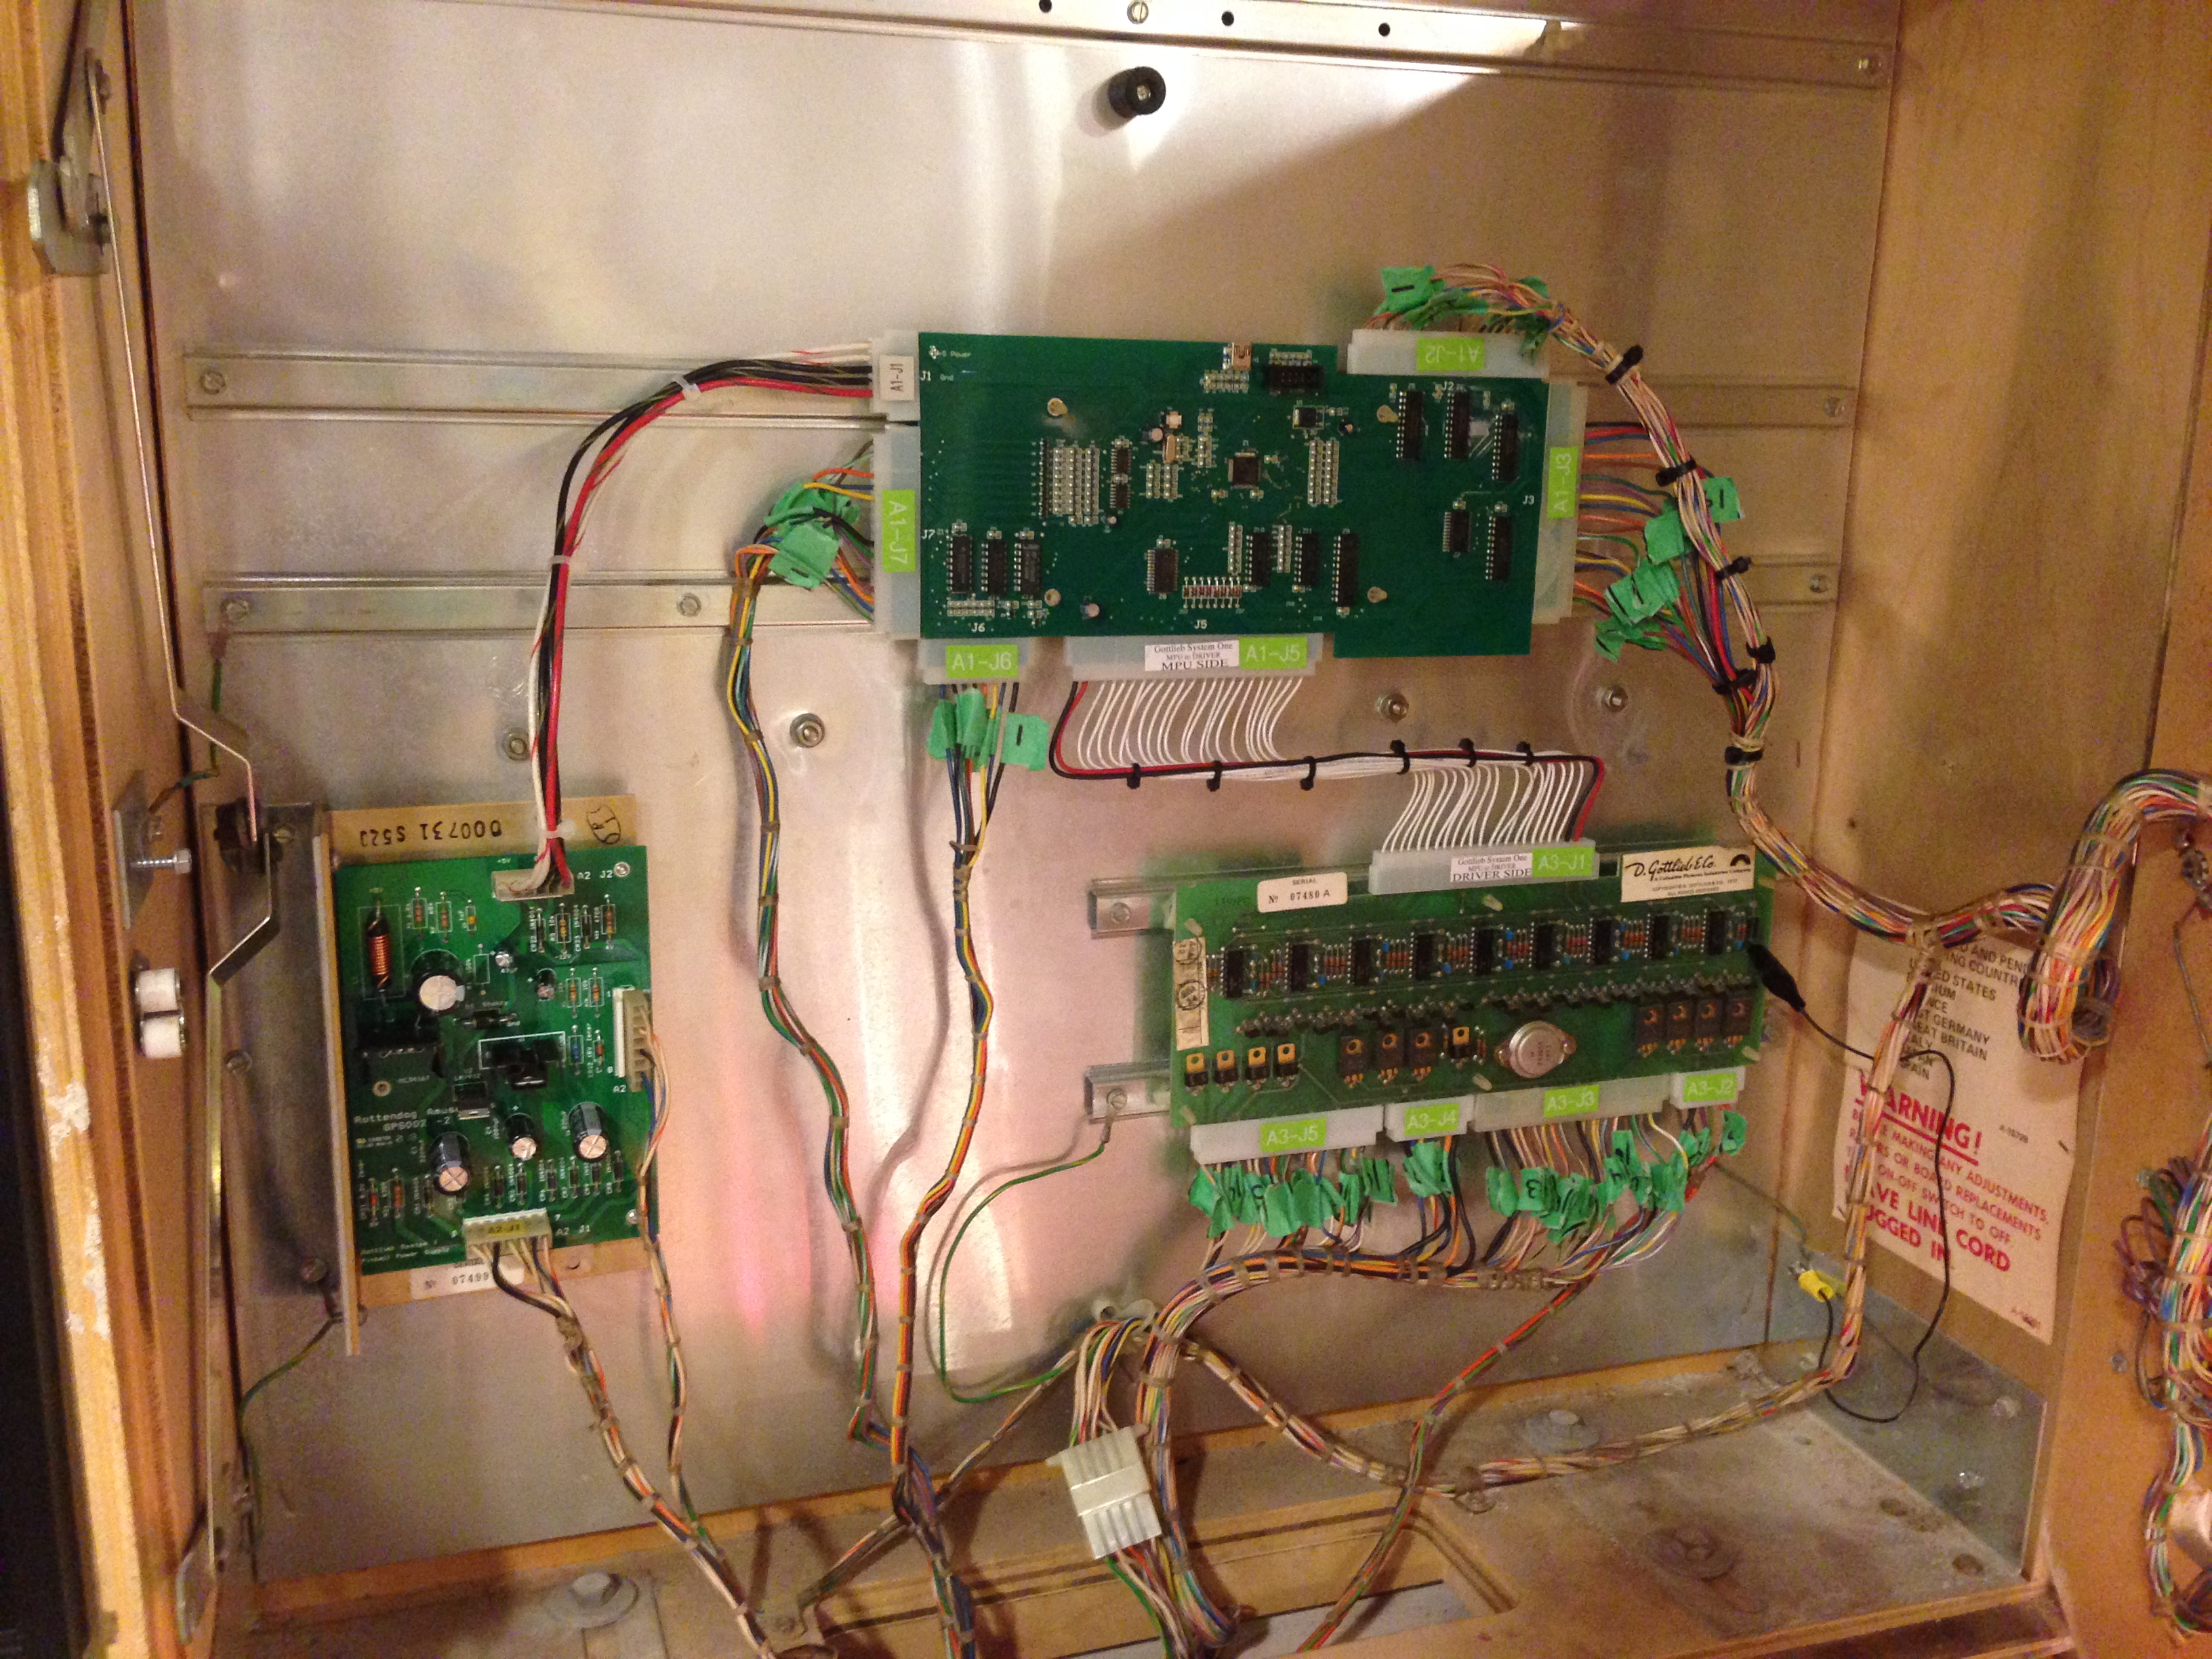
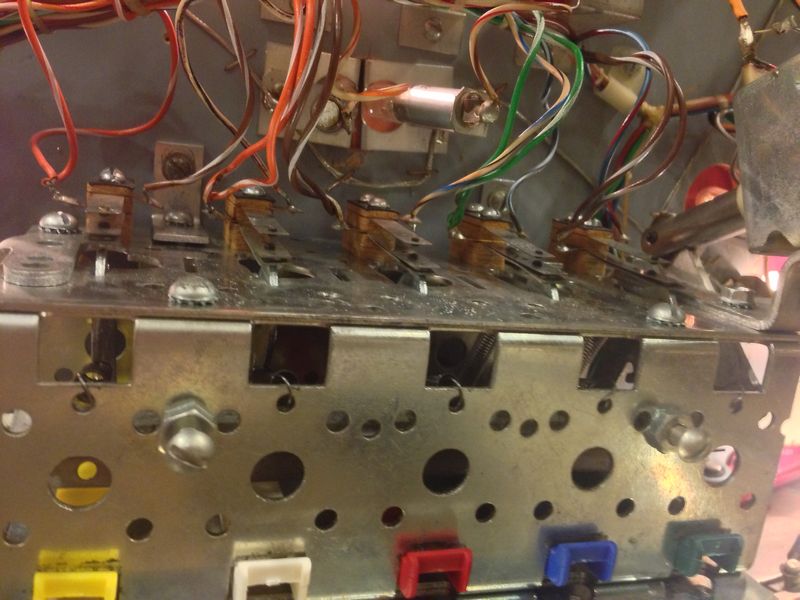
The game still would not boot up, so it was
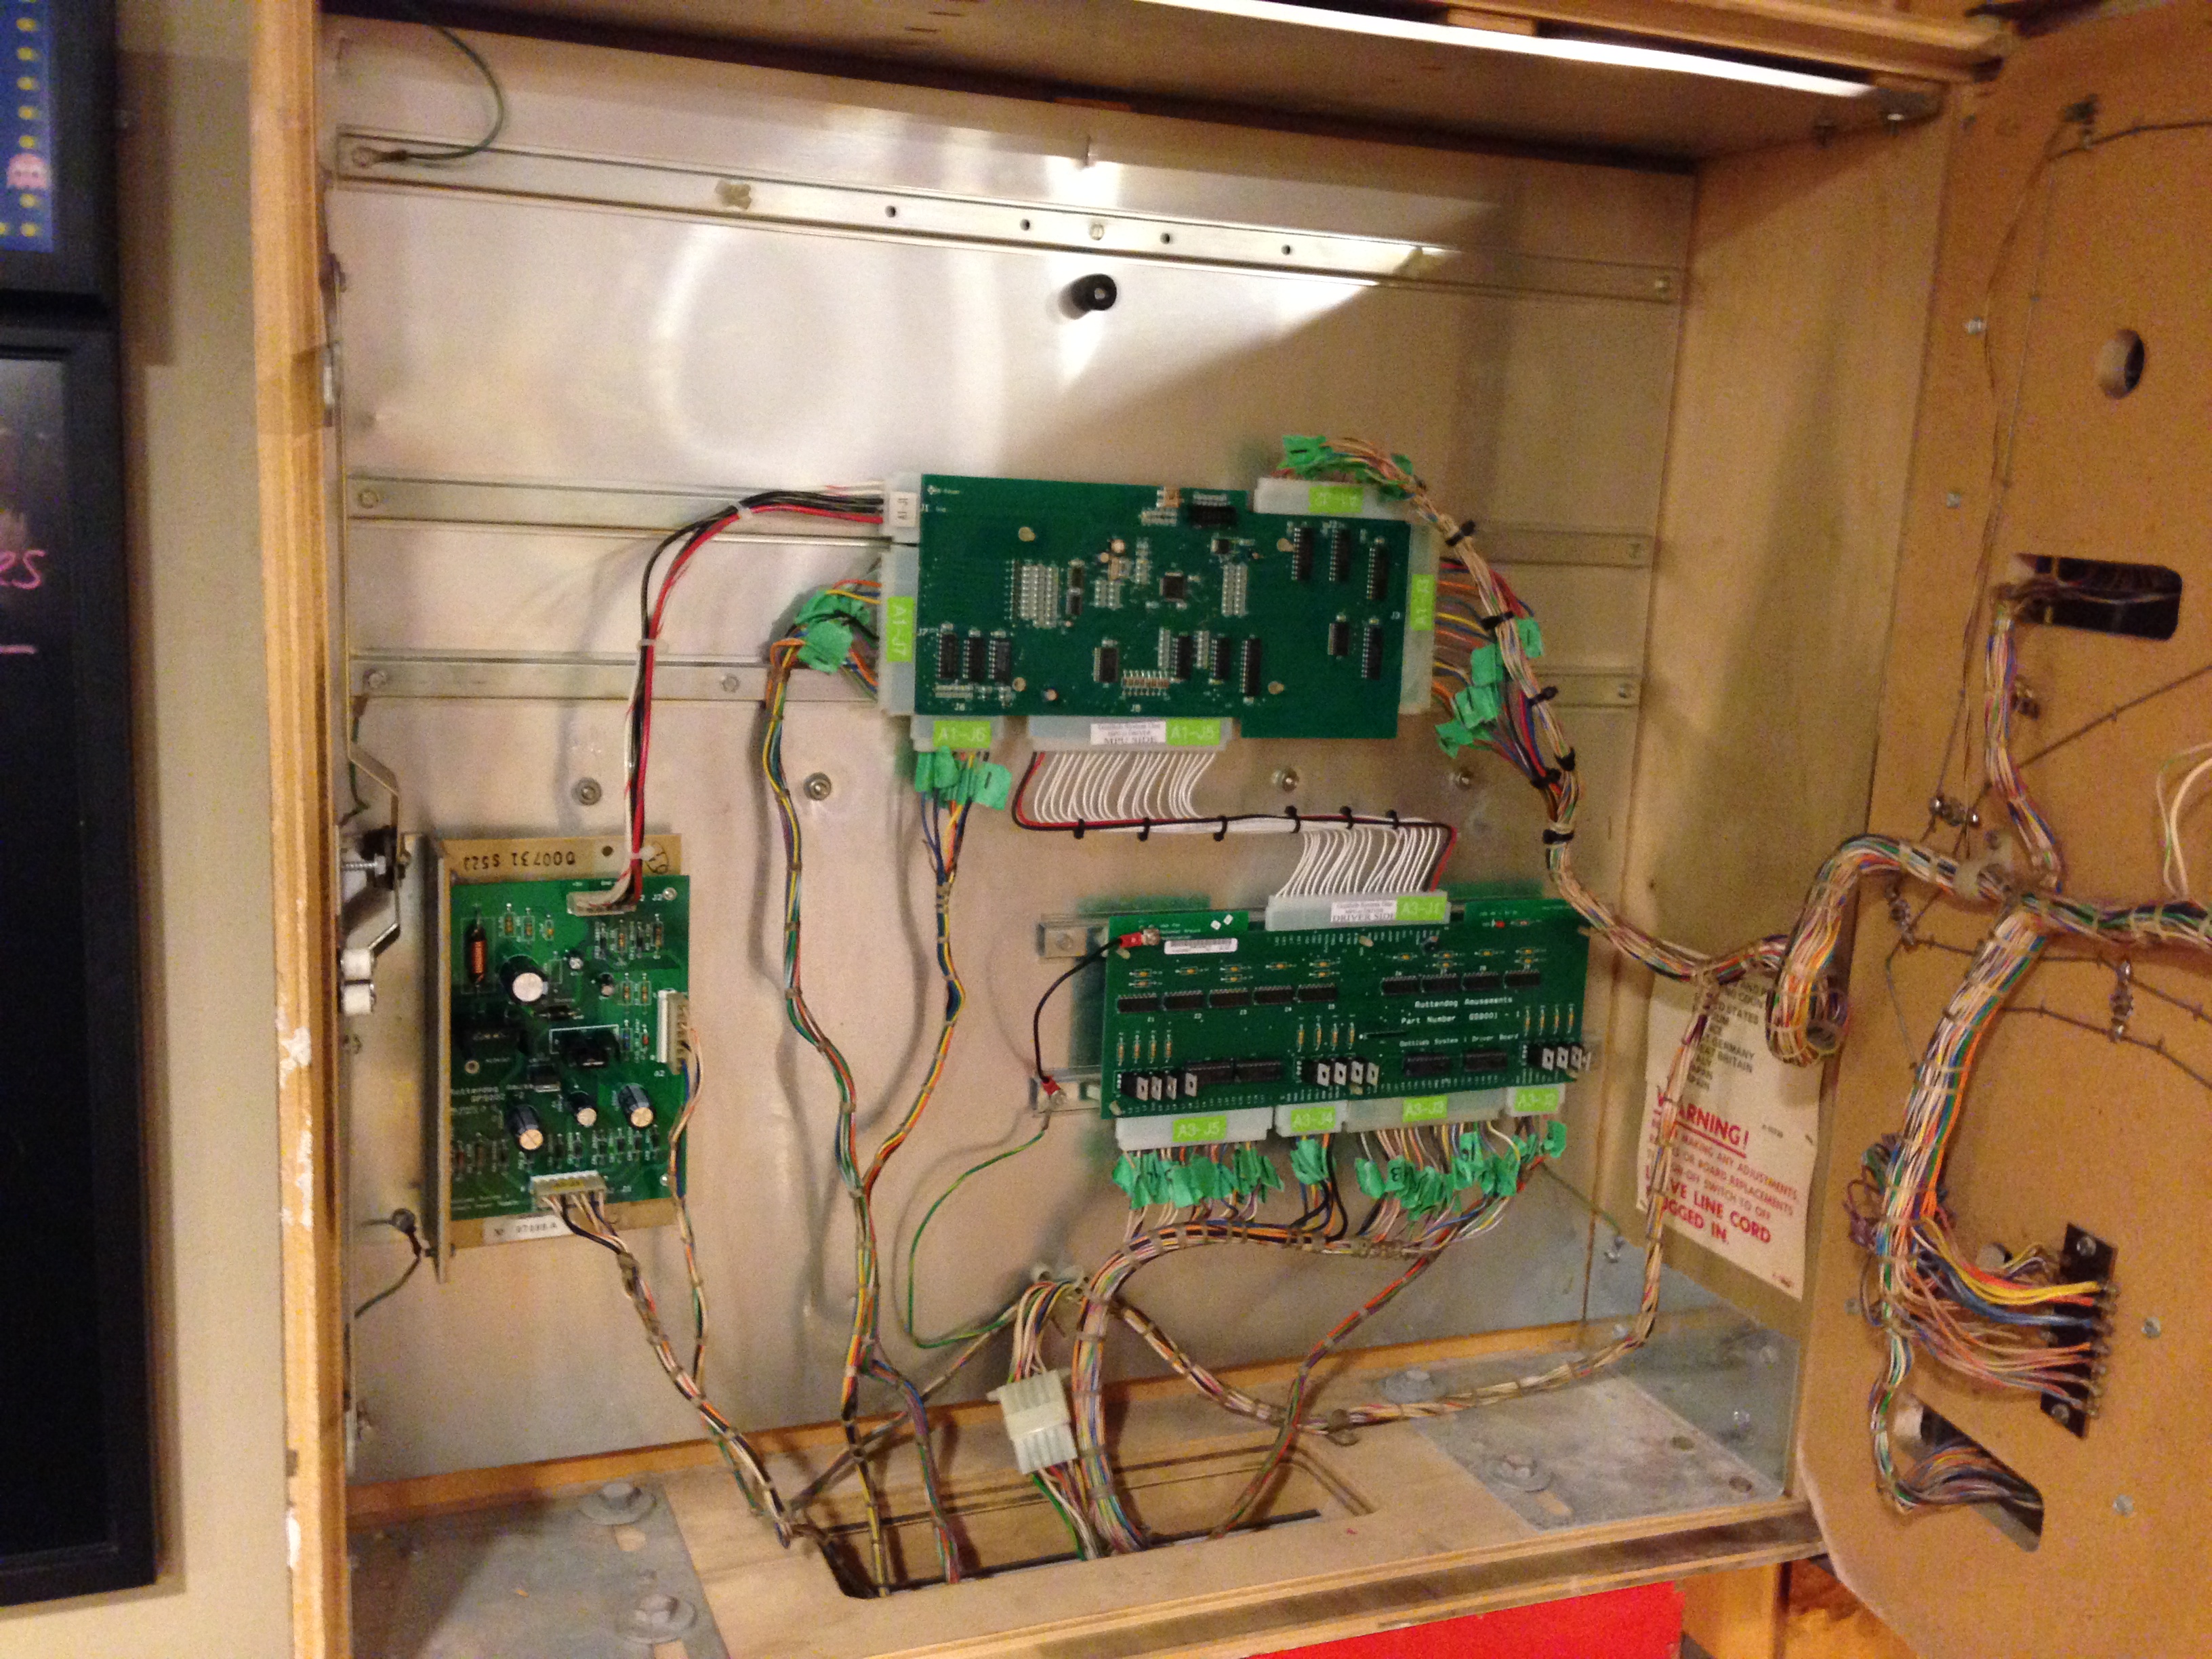
finally time to look at the boards inside the backbox. The
big one up top is the main CPU board. The bottom left is the power
supply. The lower right is the driver board.

My problem was not hard to spot. A
common problem with the System 1 boards is the batteries that they used
to use. Over time they can tend to go bad and can spit corrosive
battery acid on the boards. That's precisely what mine
did. Here you can see the bad battery below.
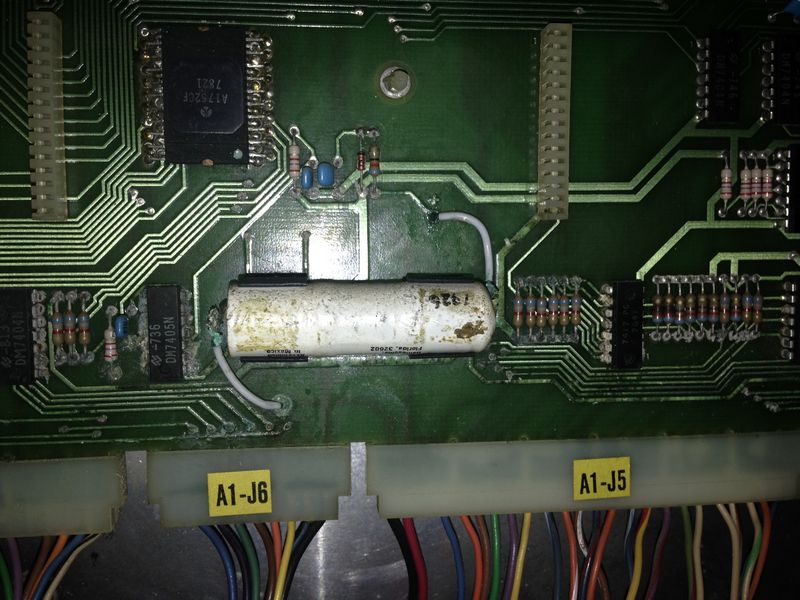
If you look a little closer you can easily see
that many of the lines, chips, diodes, resistors and etc were all
corroded.
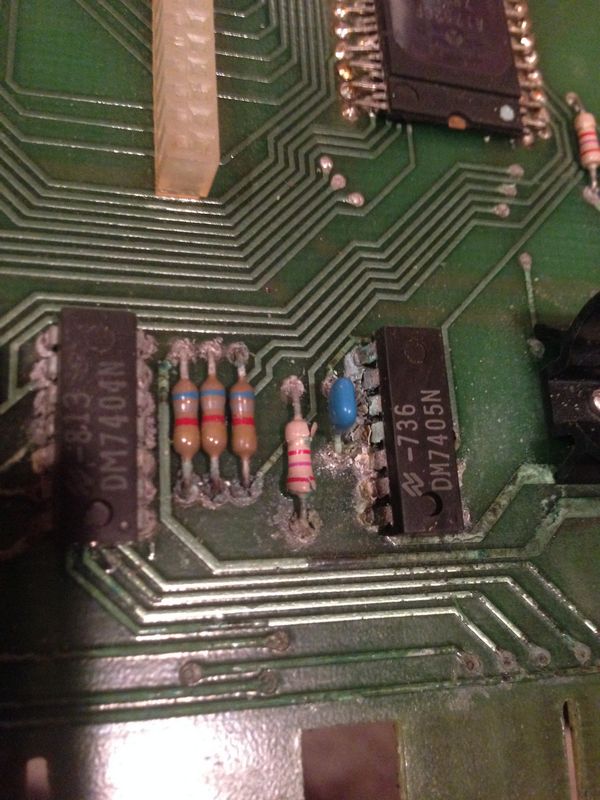
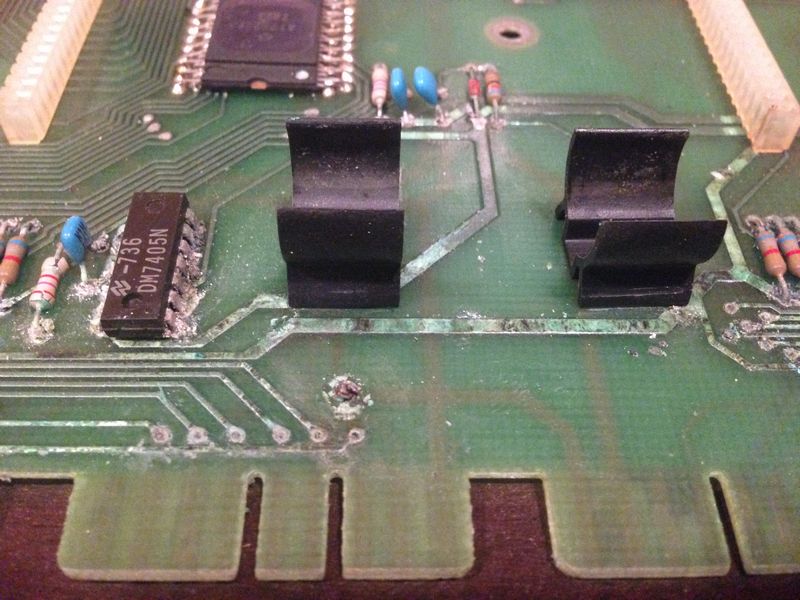
Here's more:
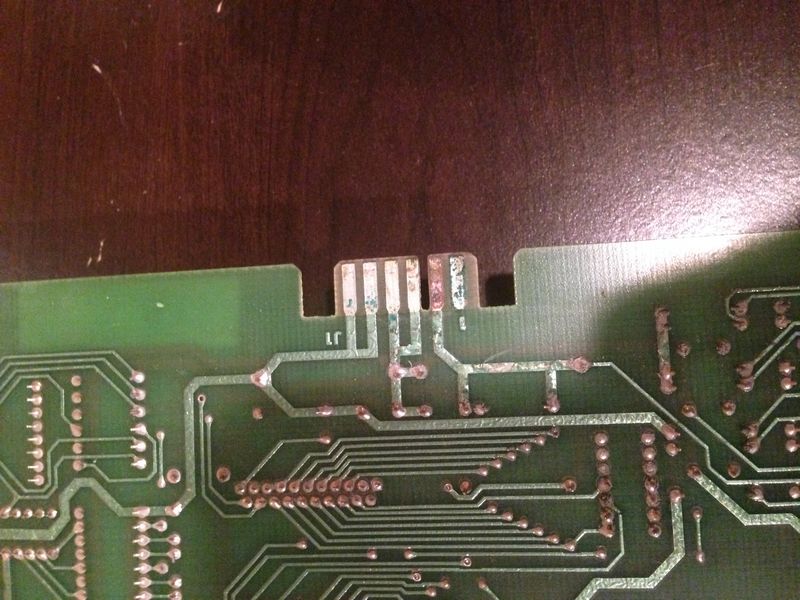
Additionally all the edge connectors were
corroded as well. Which is not uncommon, but it is
unfortunate. If the corrosion is on the edge connectors,
then it's also on all the wiring inside of the plastic molex connectors
as well:
I've never really had much of a reason to
solder before, but all this solder work necessary to fix the CPU board
was beyond my skill level. Not to mention the fact that the cost
of mailing the board out to someone else to get repaired would be just
as much as it would cost to buy a replacement! So I decided to buy
a new replacement CPU board. More on that in a minute...
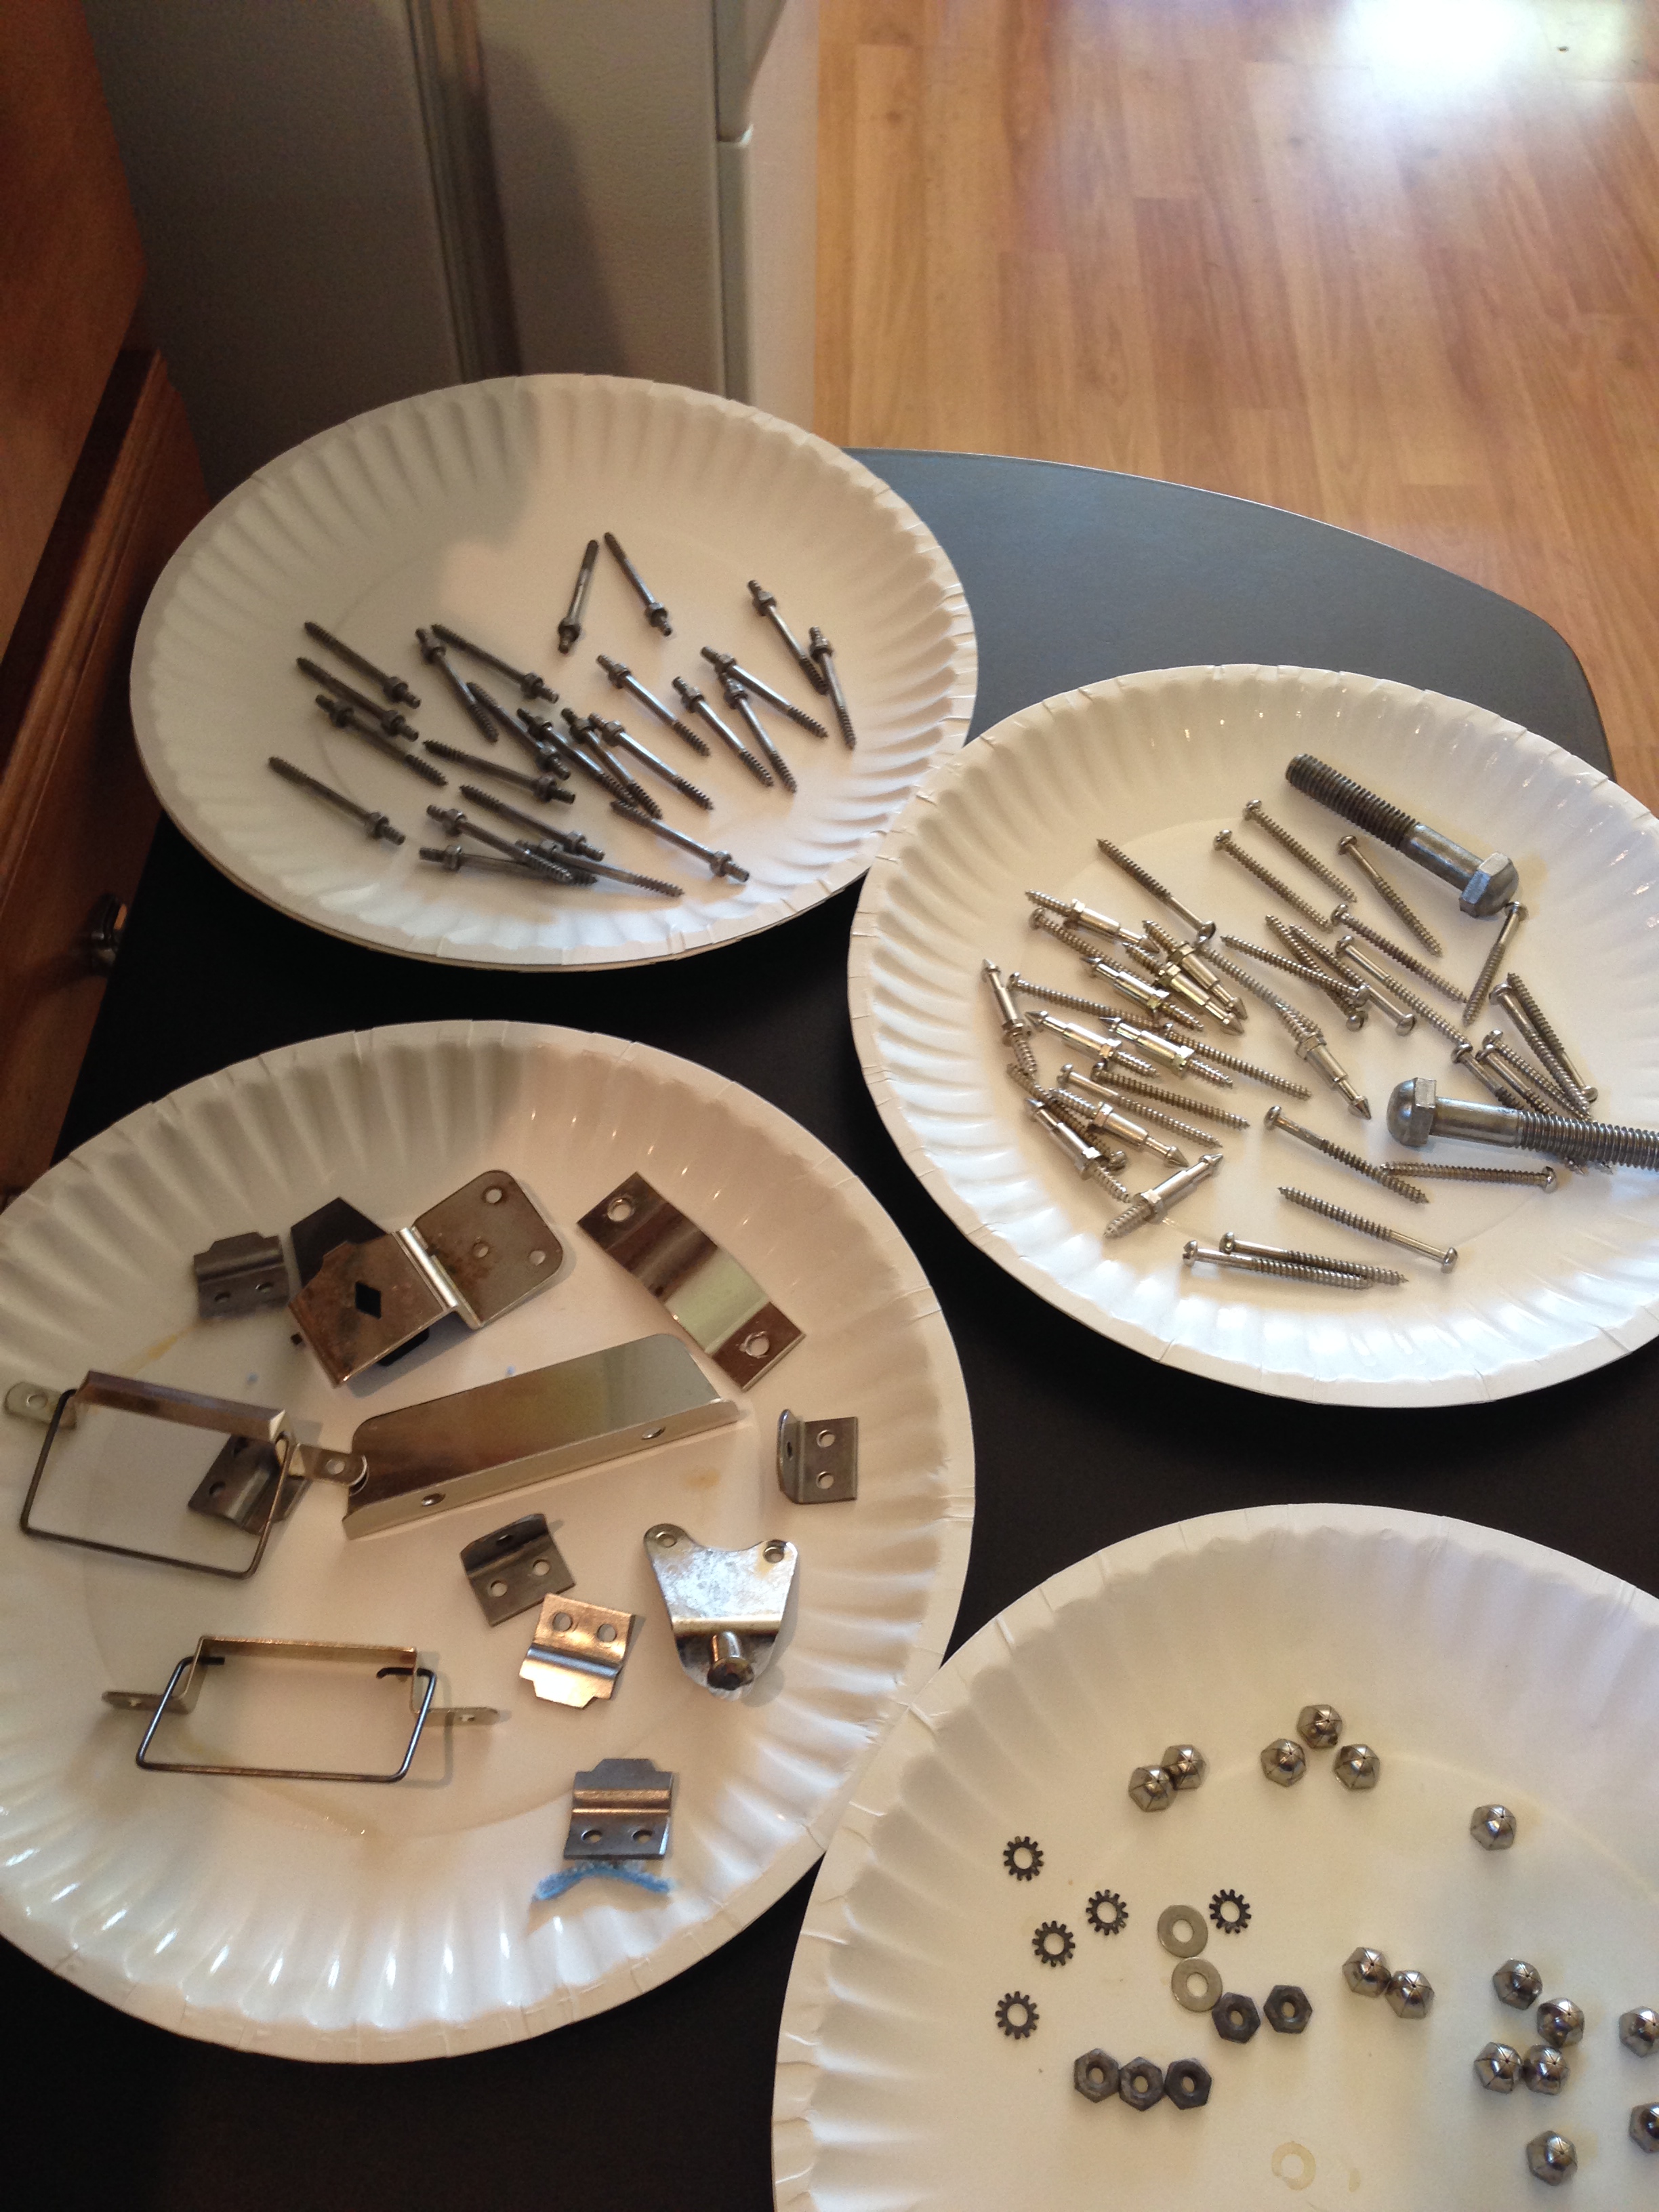
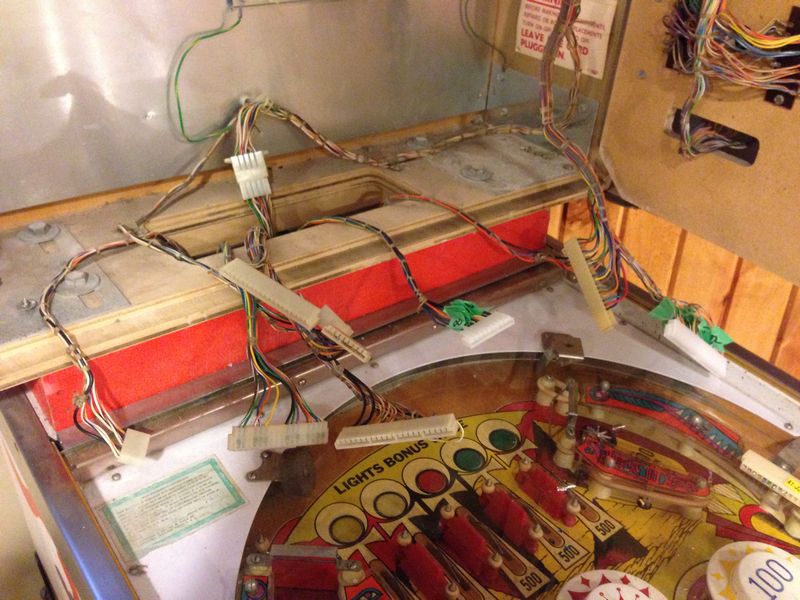
Here are all the molex connectors inside of the
back box. All of which need to be replaced. My hands
were aching by the end of all of this work:
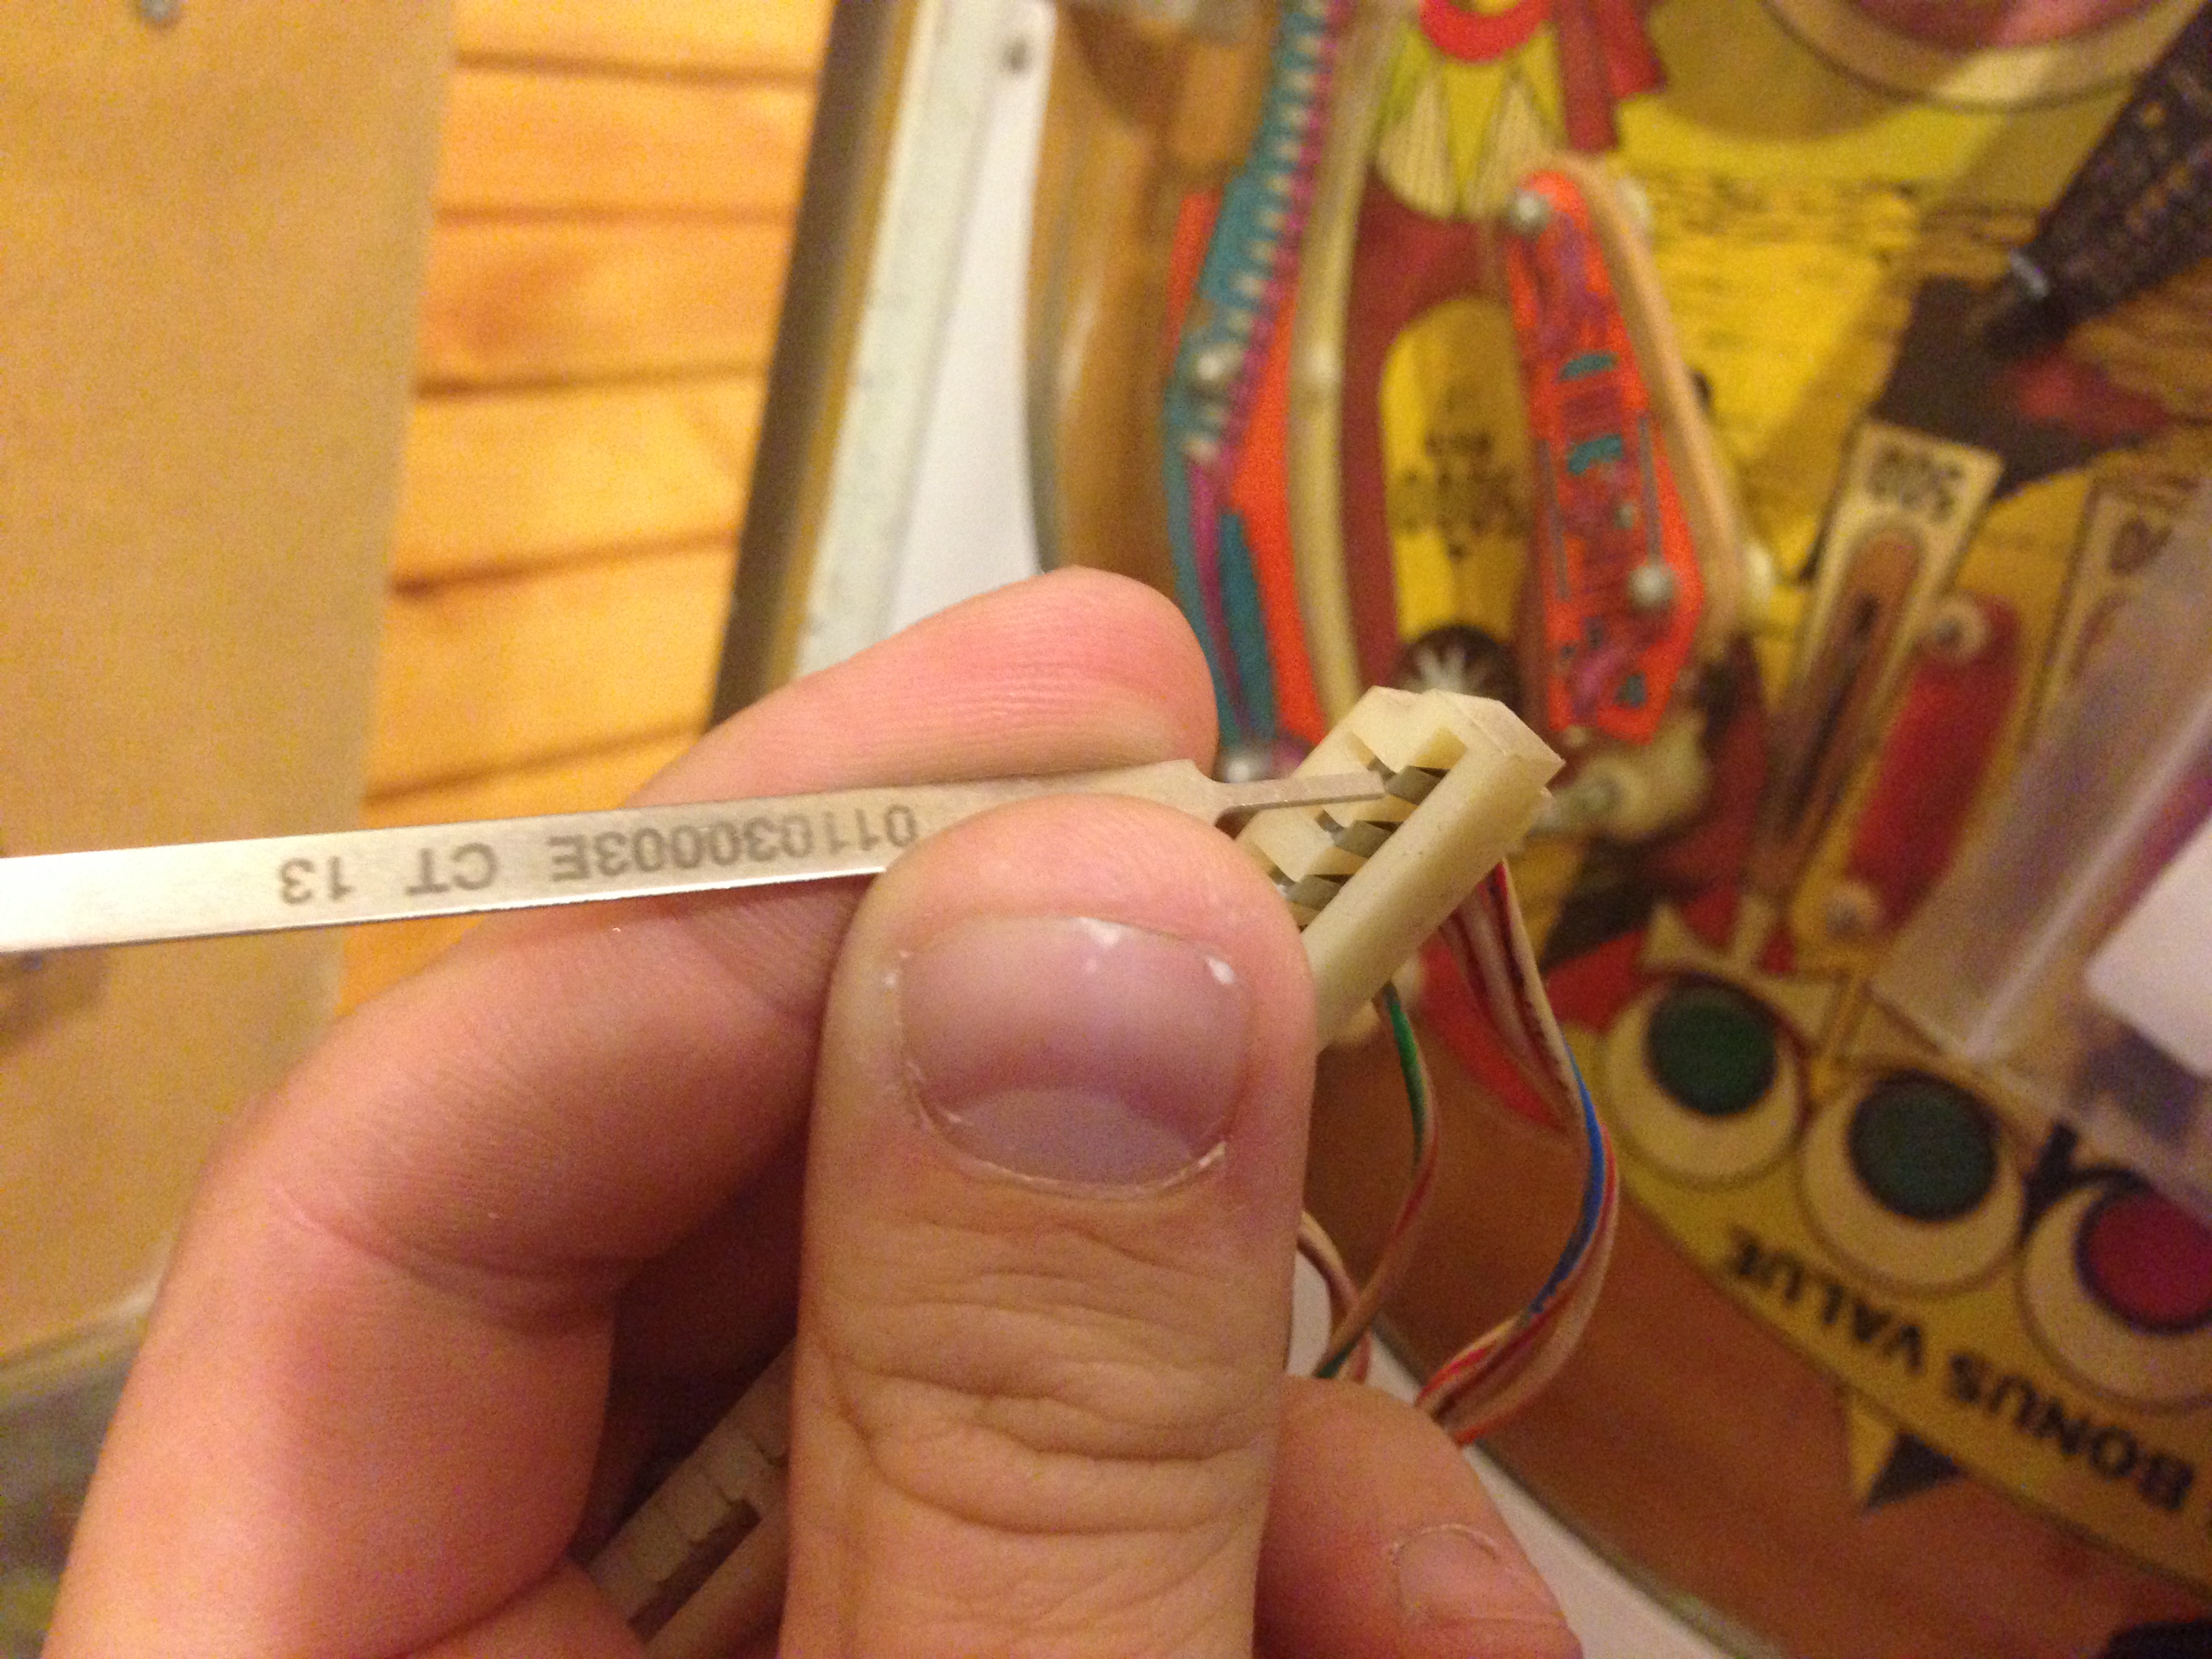
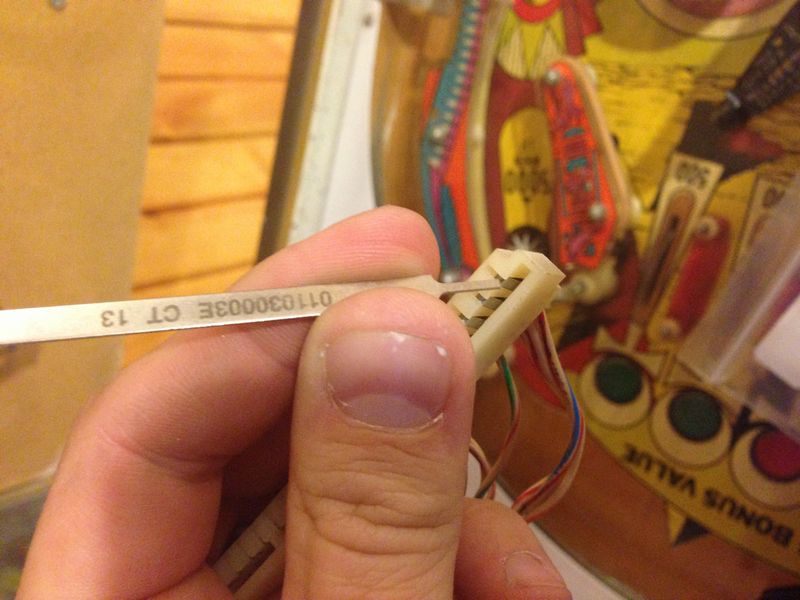
You're supposed to be able to remove the
existing pins using this fancy little removal tool. But I don't
think I was doing it properly and I ended up busting my removal
tool. That coupled with the fact that the wiring was all
corroded and did not want to be removed easily.
So I decided on a different approach. I
decided to replace the molex connectors with all new ones. They
are actually pretty affordable. So I wish I had thought of this to
begin with and saved myself the headache of trying to remove all the
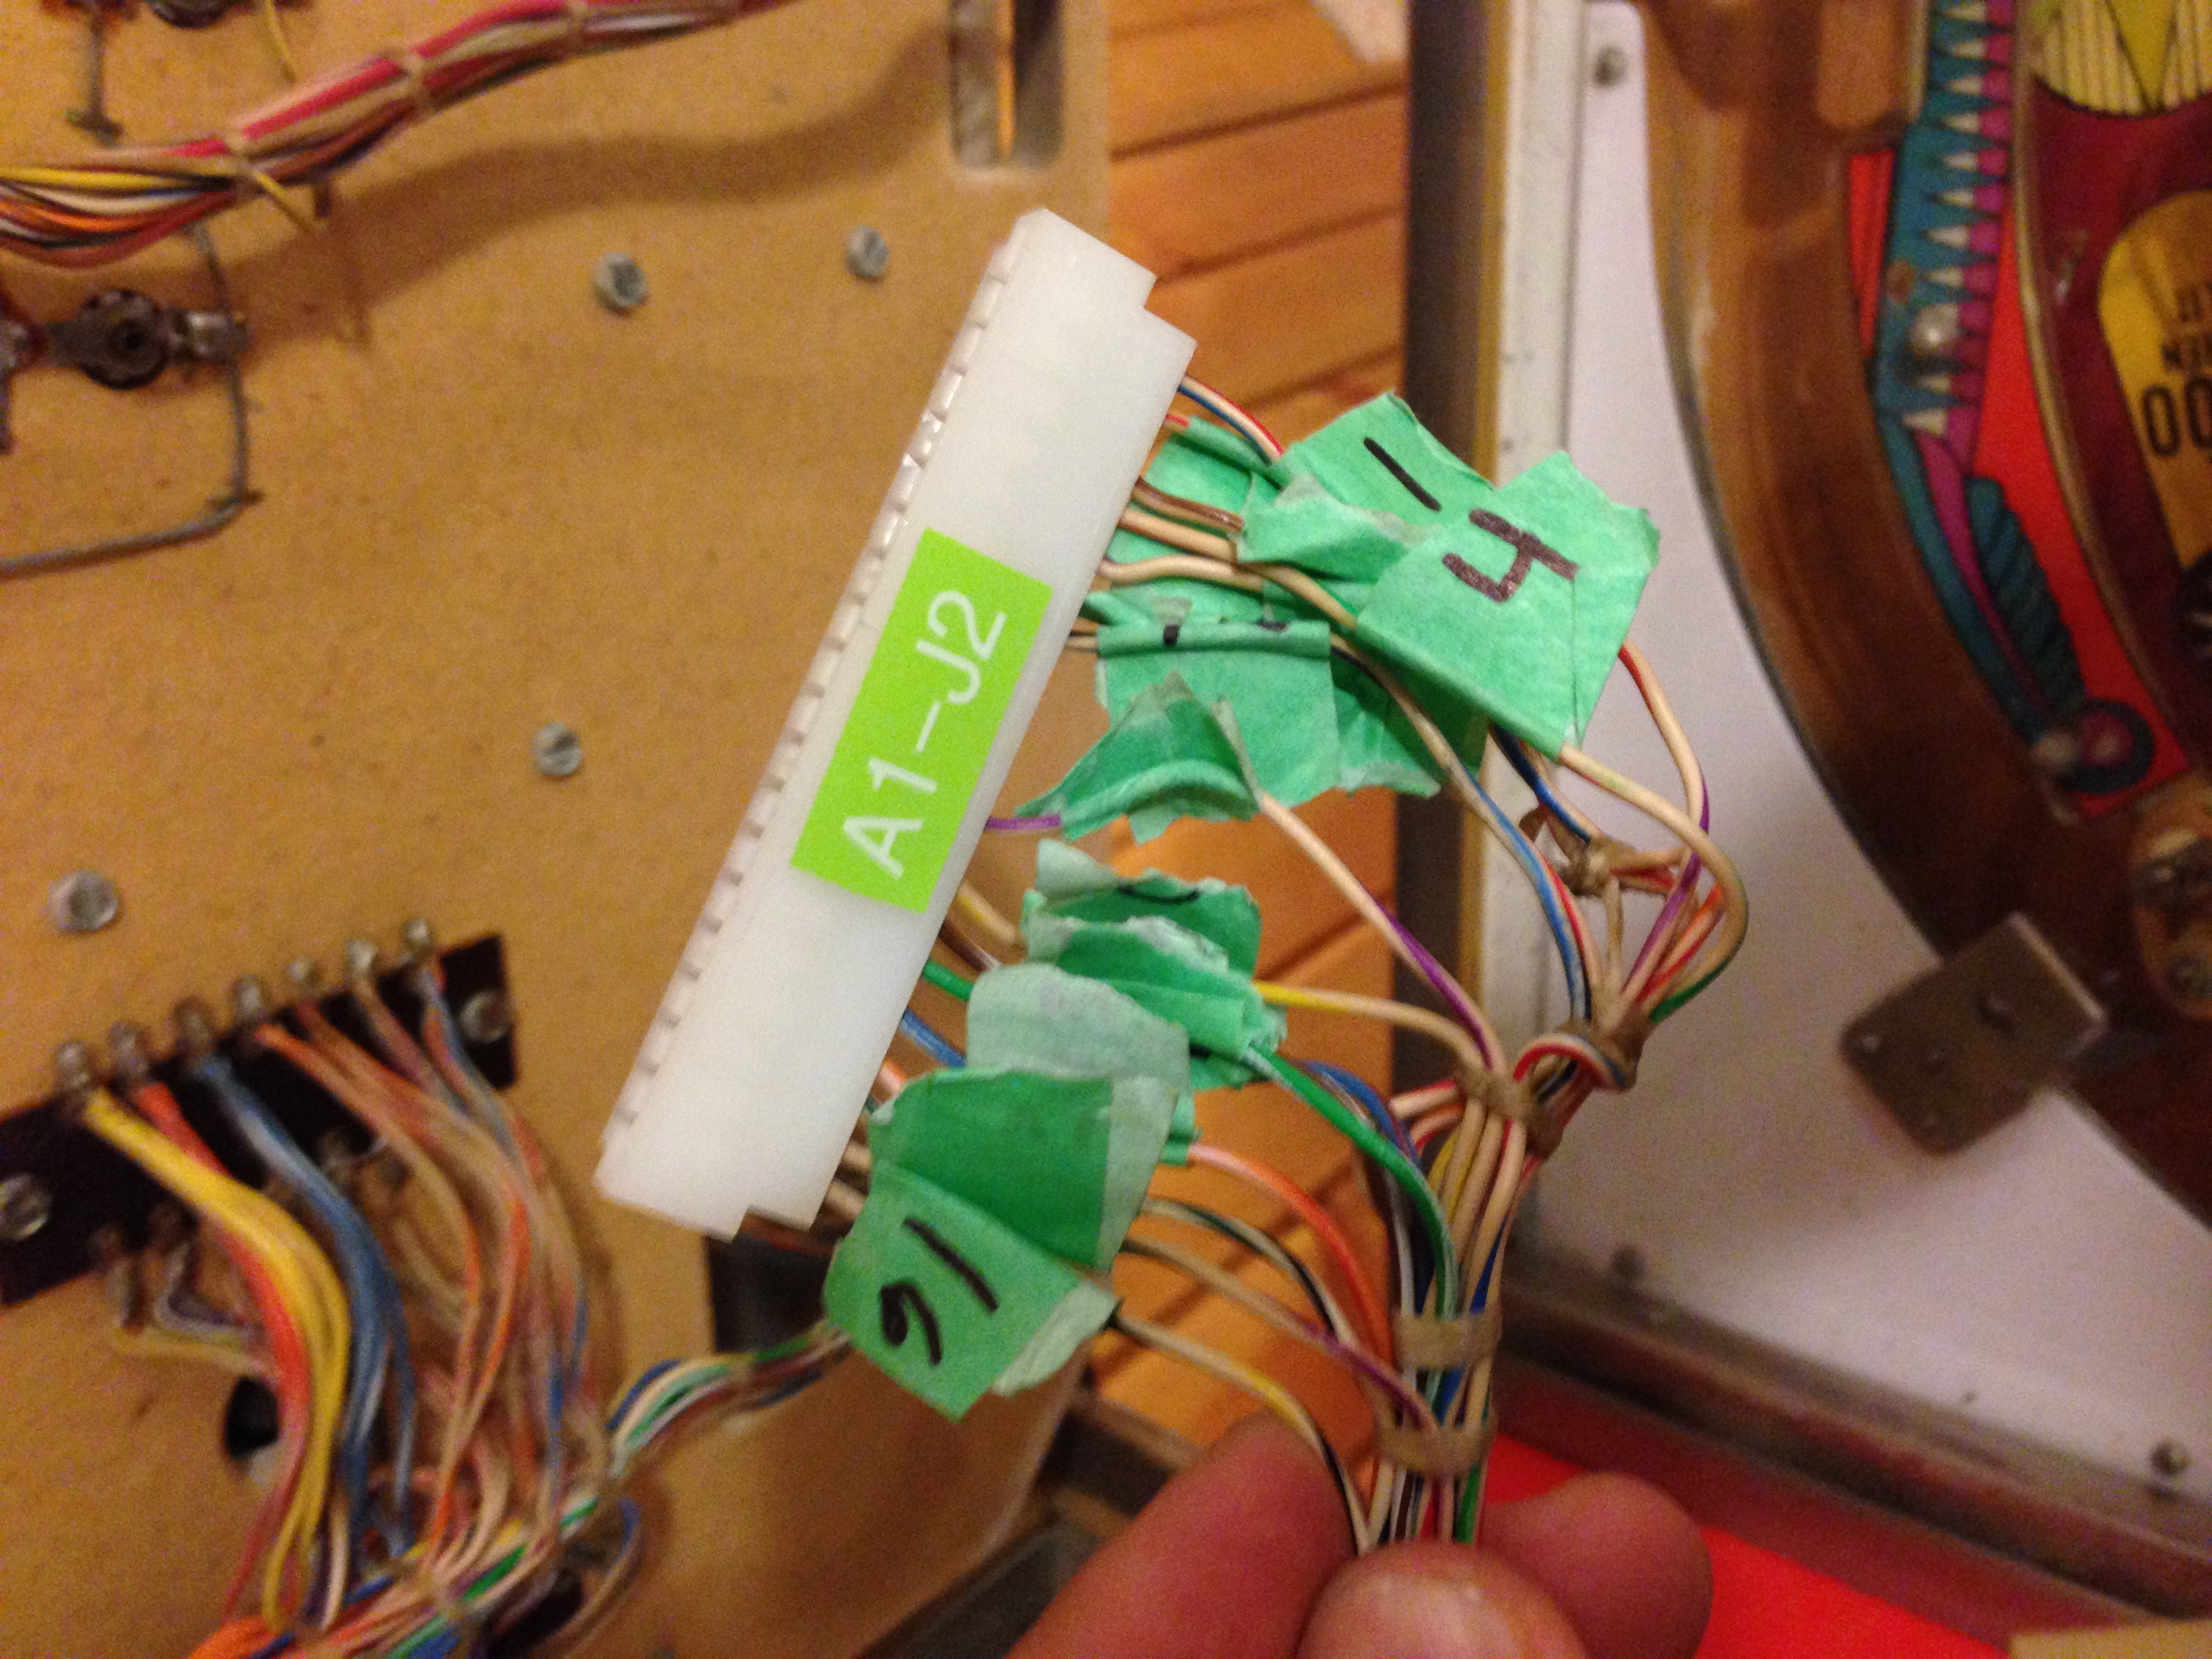
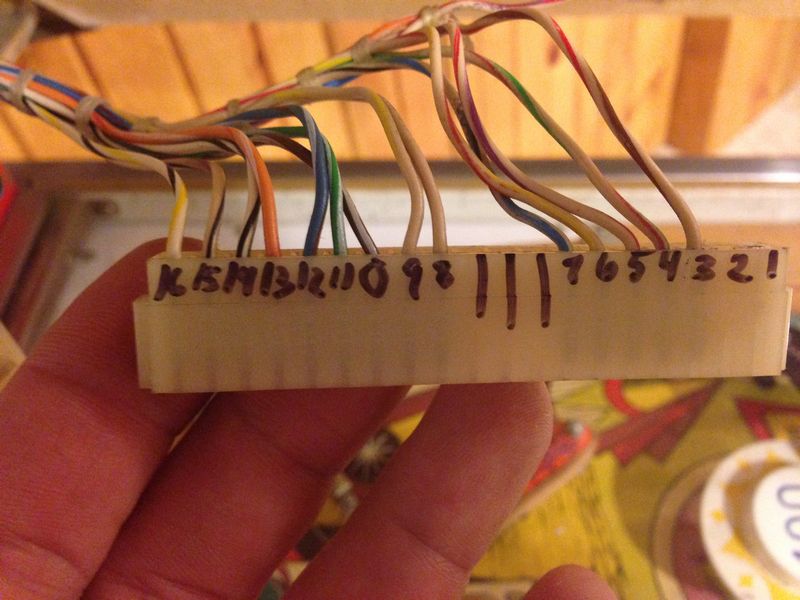
corroded wires. The first step of rewiring was to
label everything. As you can see below some of the connectors had
empty pins. So I had to keep everything in good order
because I knew that I'd never be able to spot a mistake in the future if
I messed up:
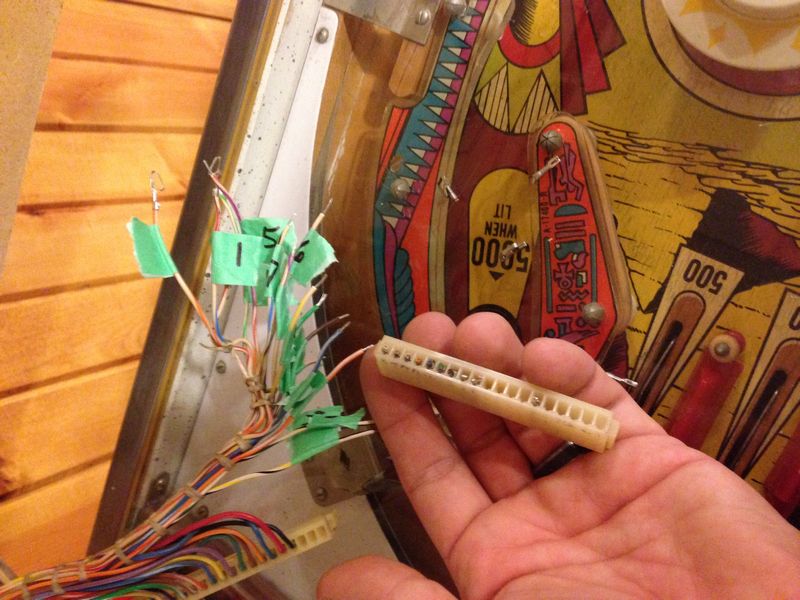
Then I used some tape to label each wire and
snipped each one off:
Here you can see the new pins that I crimped on
to a few of these wires. I had to crimp on over 100 of
these!
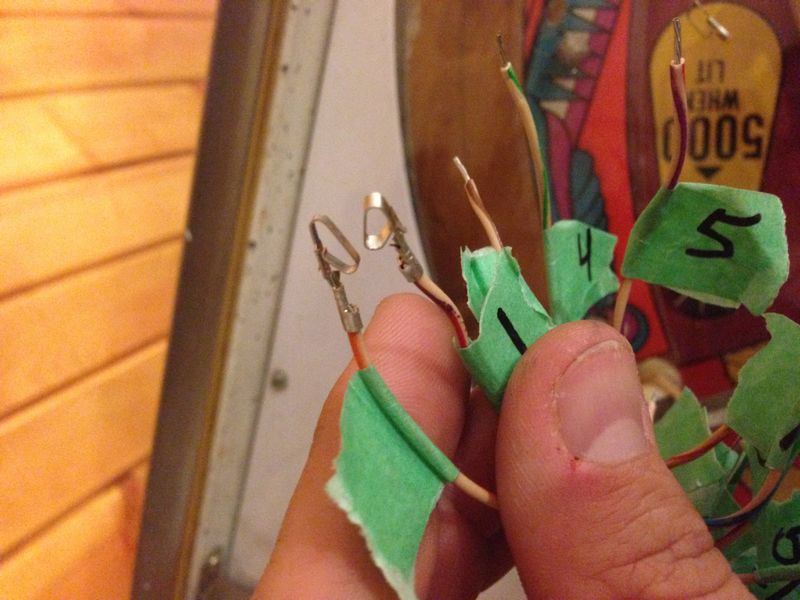
Finally I slid the connectors into the new
molex connector and printed off some new labels for each:

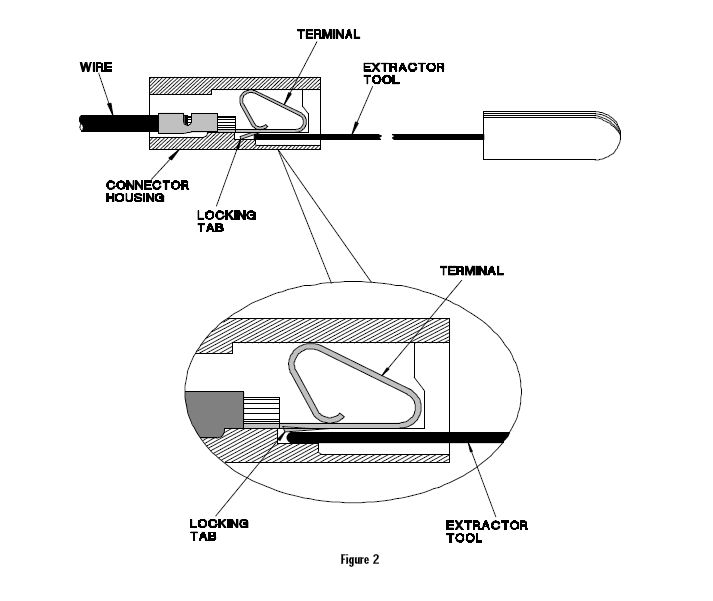
Finally after I repinned all those molex
connectors, I found this picture online which showed me the proper way
to remove the wires. I was doing it wrong at the
beginning. Had I found this picture at the beginning maybe I
could have reused my old connectors. But then again, maybe
not due to all the corrosion. Oh well, new connectors only
cost me around $10.
So along the way I also took out the power
board to inspect it. When I did and pulled lightly on the board it
just broke apart and several of the components came off. So that
had to be replaced as well. At the time I thought the
driver board looked ok, so I decided to try to leave that in place.
Here's a picture of all my new wiring as well
as the new CPU board and power supply. The CPU board was a
Ni-Wumpf board,
which cost a pretty penny. The power supply from a Rotten Dog replacement power
supply.

With those two new boards, new wiring and new
fuses I decided to start up the machine to see if it would
work! To my surprise it did!....sort of. The
game seemed to boot up but it was totally non-responsive. I could
not add quarters or start a game or do anything at all. But the
lights flashed and the score displays looked more normal. I
posted on the PinSide forum. Several users said it sounded like a
ground wire problem. So I spent hours and hours poring over my
wiring. All my wiring looked perfect. I rewired a few
connectors and still, no luck. Then after staring at
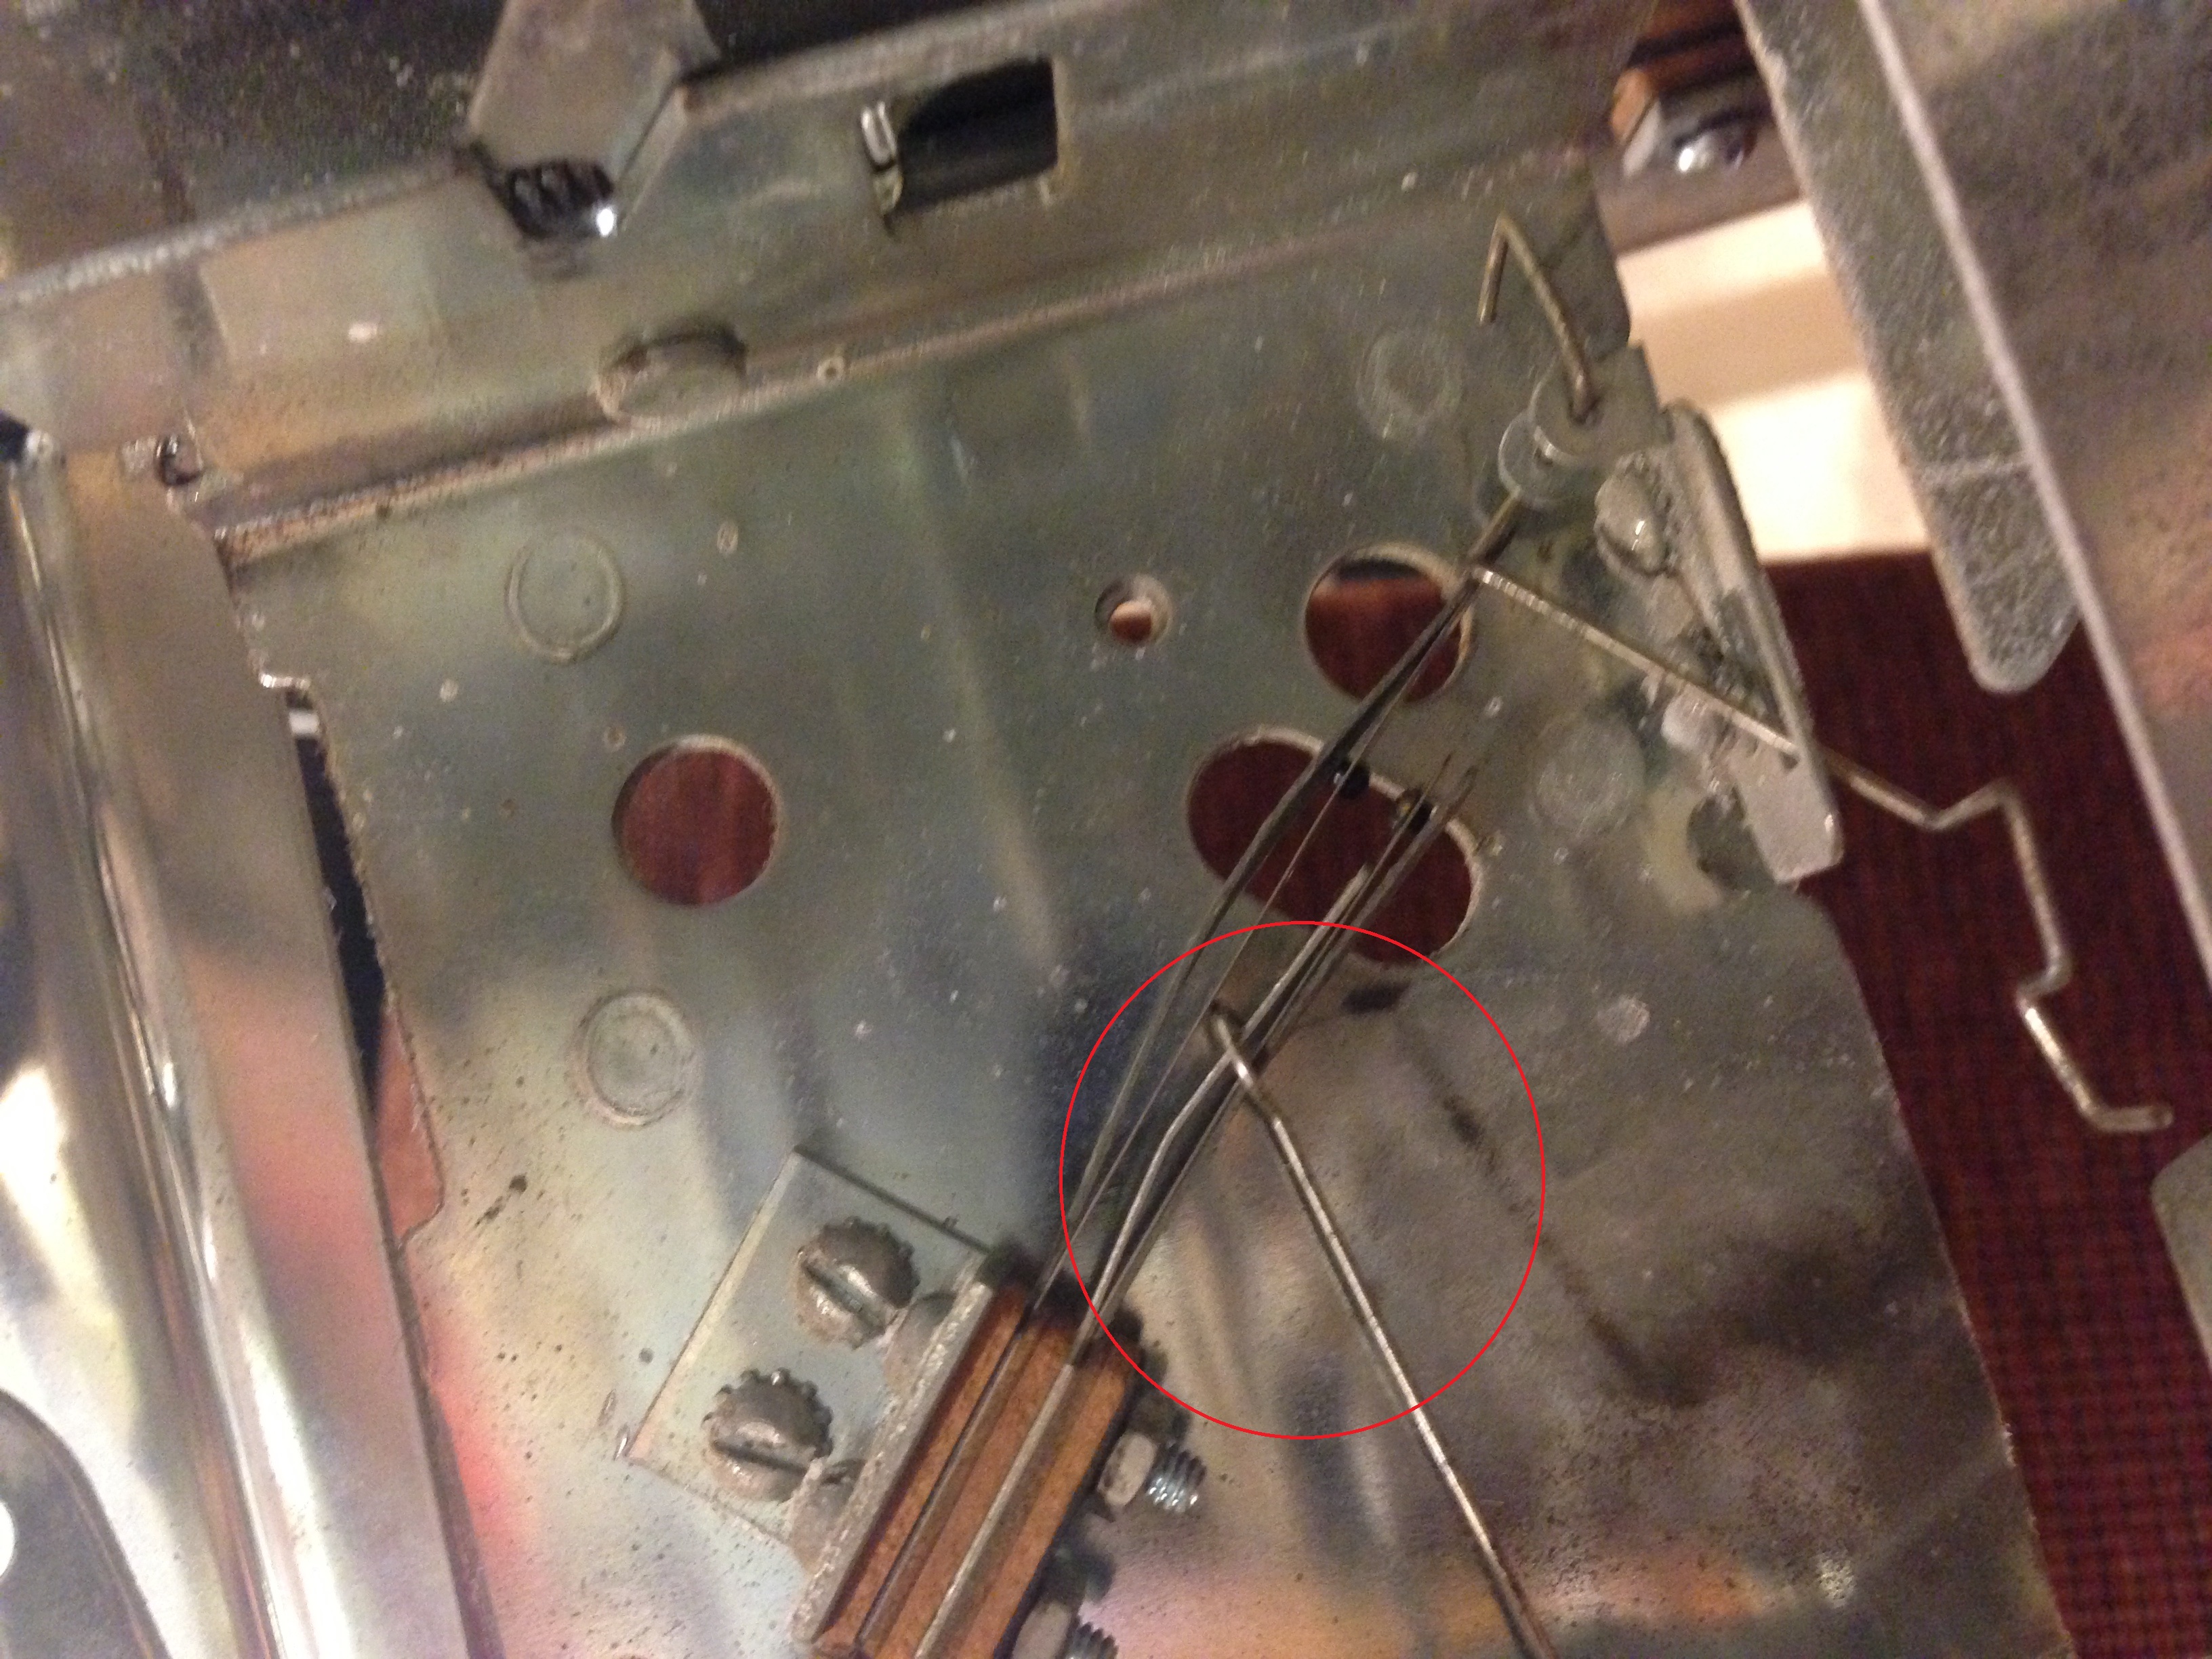
all the various parts inside the pin, I finally noticed something
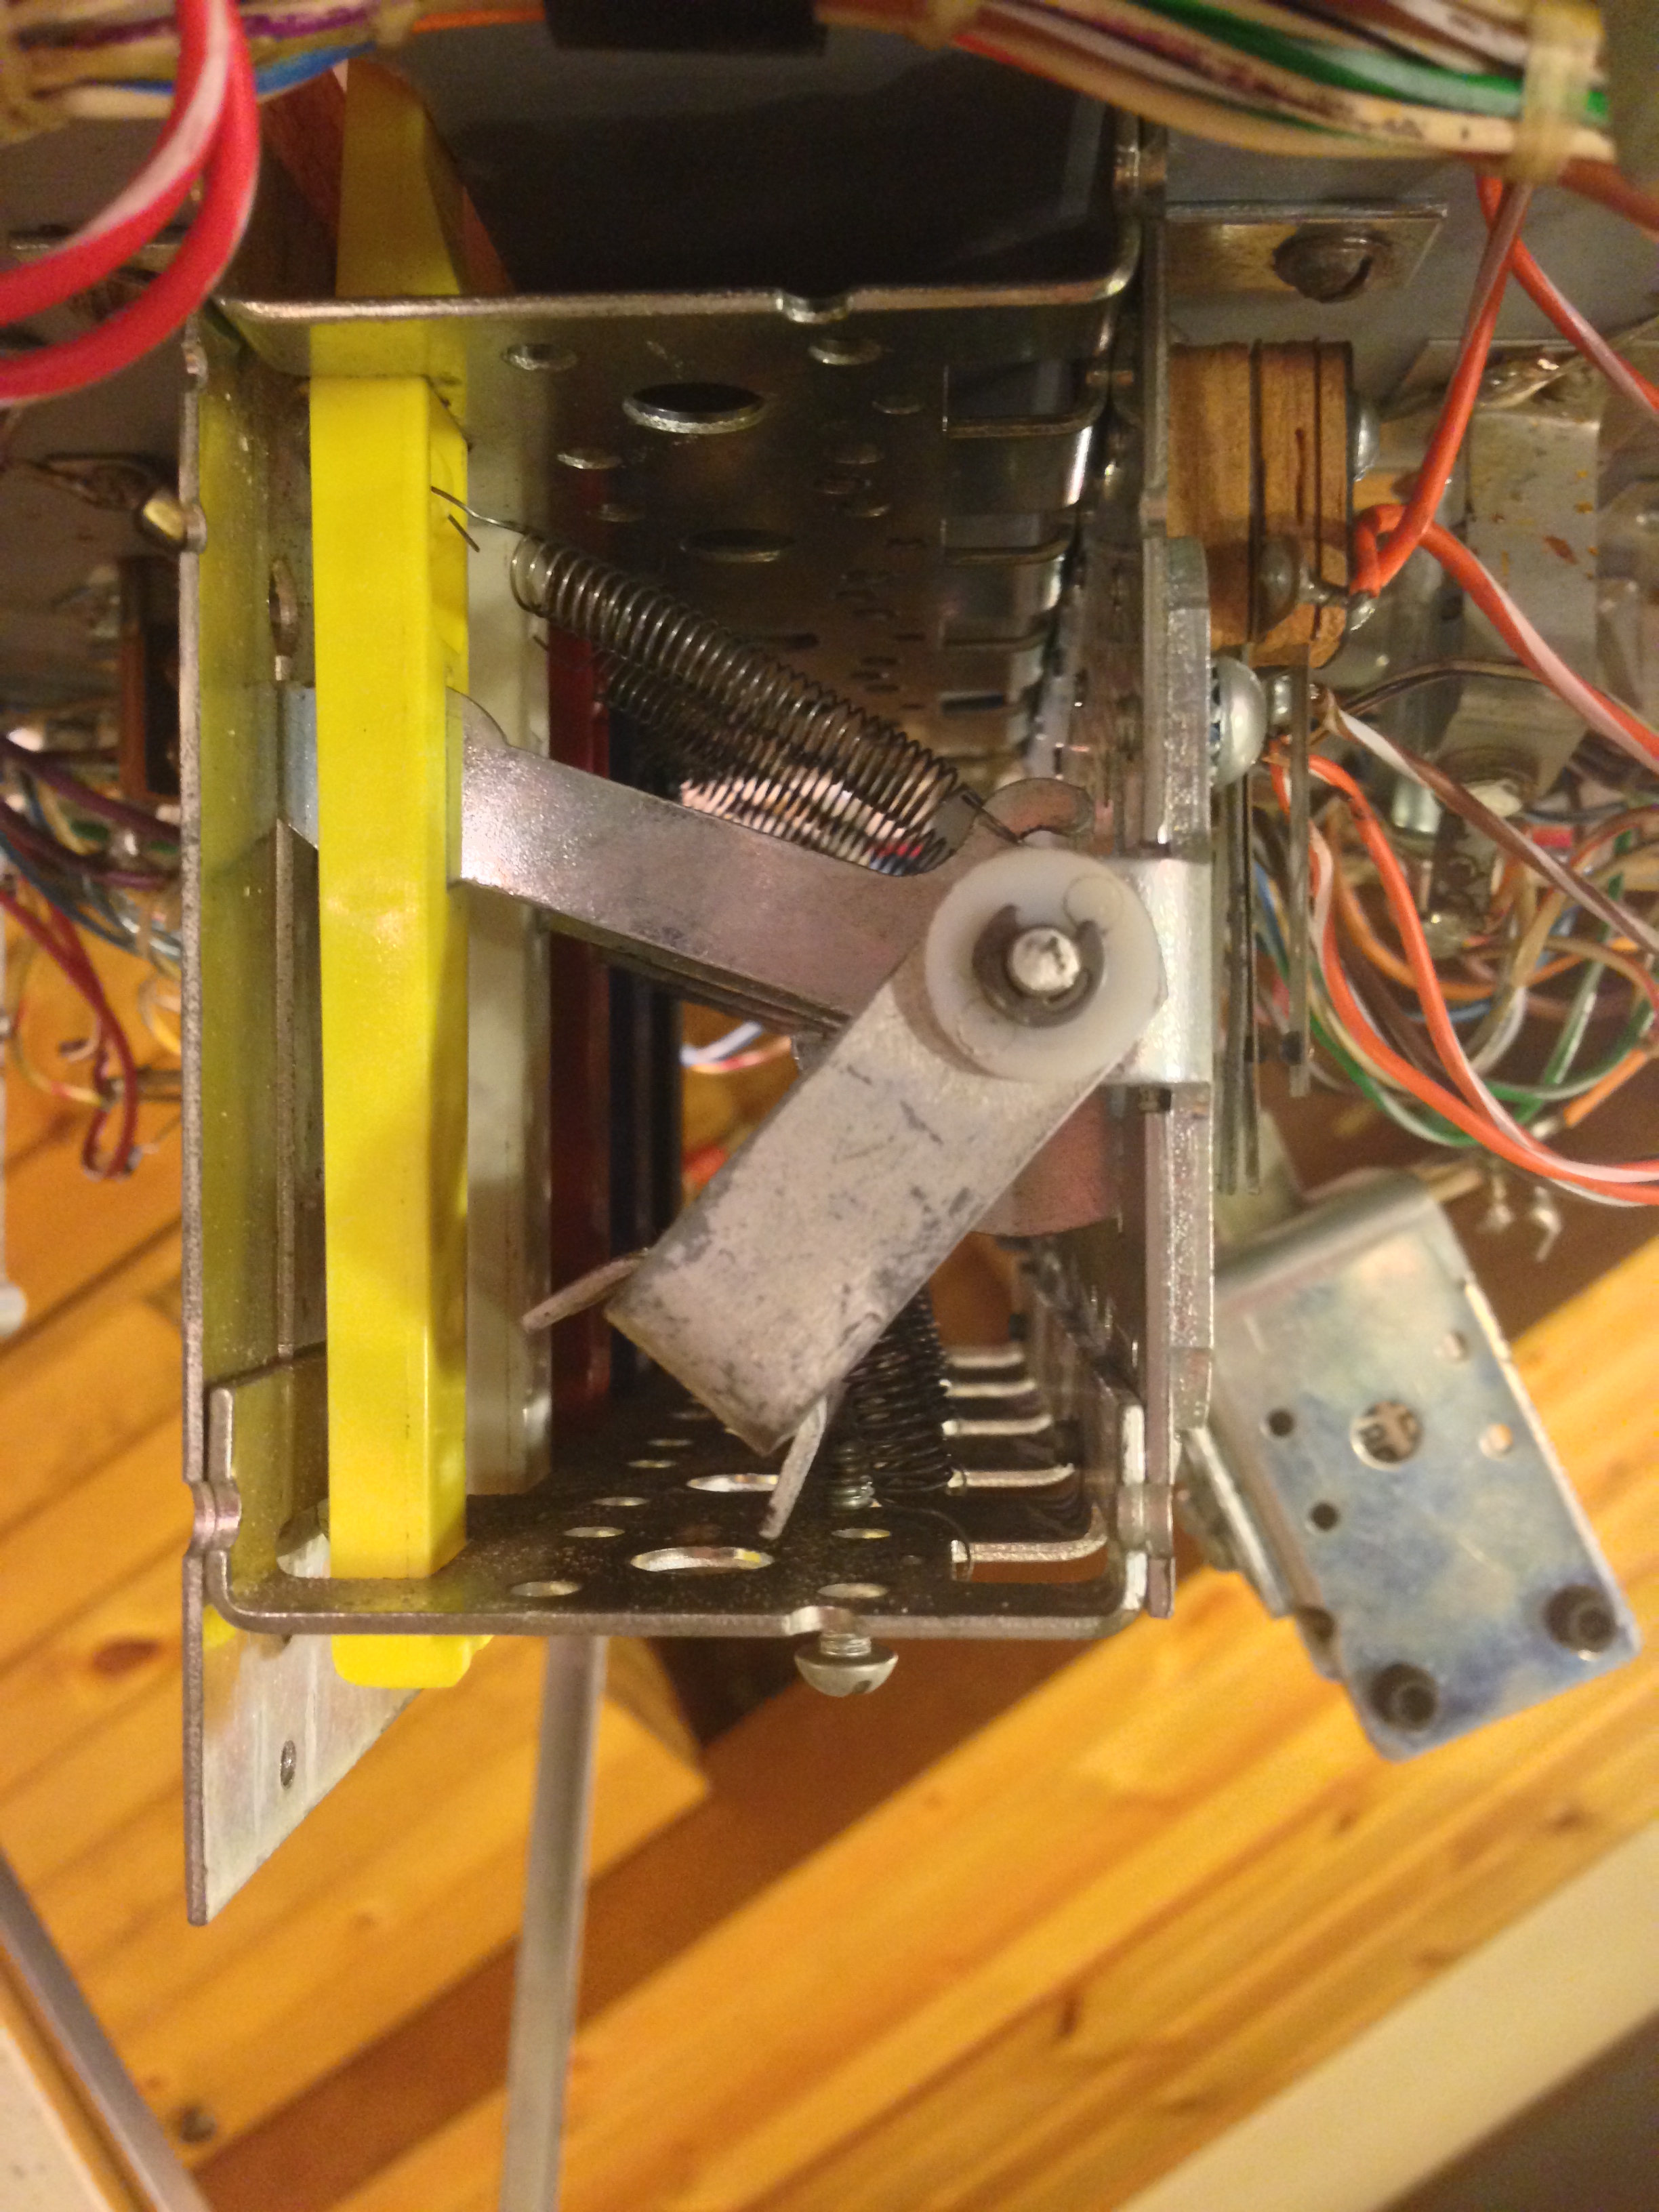
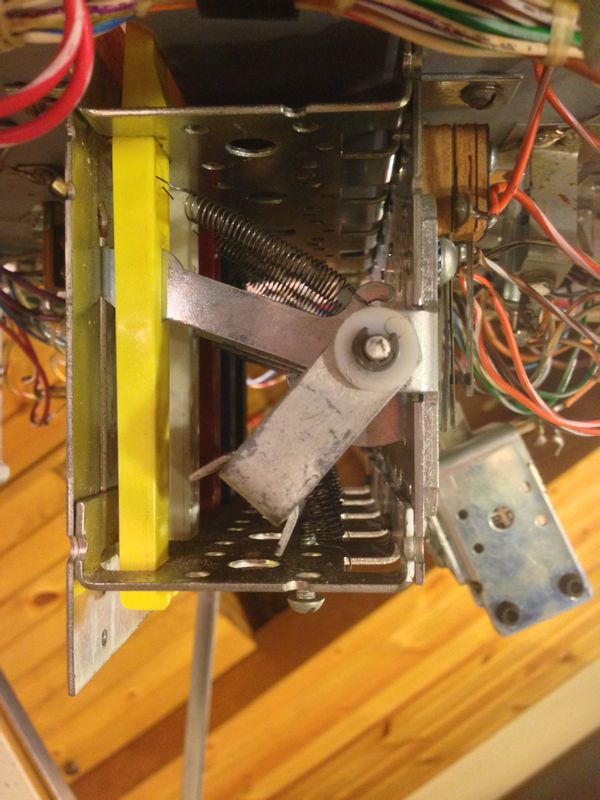
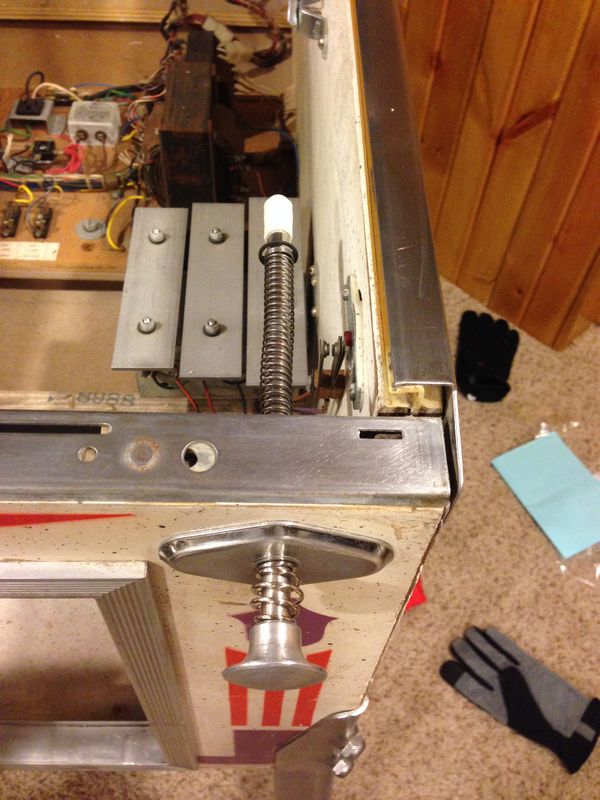
that seemed odd to me. I noticed this bar behind the coin
door. Its intended purpose was to energize when
the game was on so that it woud accept quarters. If the
game was off, it would not be energized and quarters would
just fall right through the coin mechs:
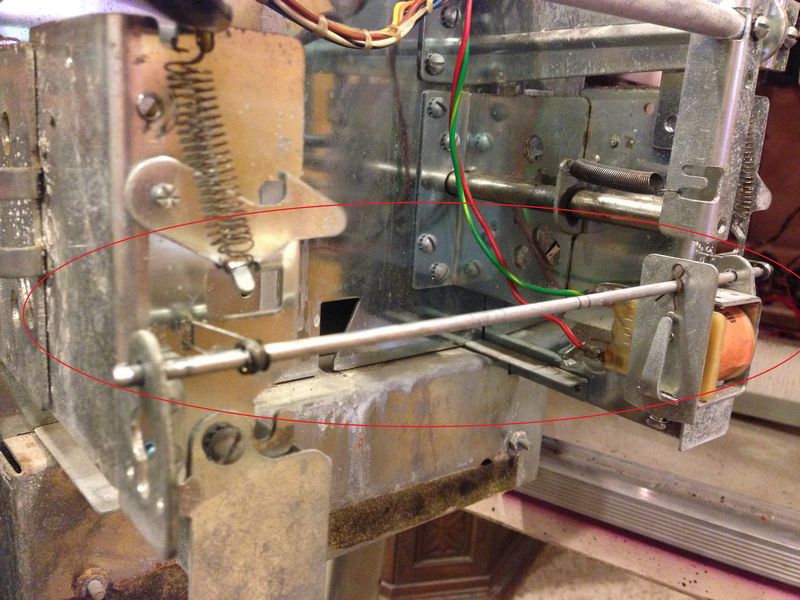
Well, I noticed two wires coming off the bar
above. One going to each coin mech. One side had
the wiring wrapped around the switch for the coins. The other side
did not. The one shown below was wrapped around the coin
switch and it shouldn't have been. So basically what it did
was it when the game booted up, it would immediately add a credit to the
game. Then the switch was stuck closed thanks to this little bar
below. So the game wouldn't allow another input to be pressed
(like the start game button for example). So by moving the
one wire shown below, it fixed all my issues! My game was
finally playable!

Now unfortunately for me, I jumped the gun a
bit. Some people on the forum eventually said that it sounded like
my problem was a bad driver board. So I did order a replacement
board for my machine. I ordered it the night before I
discovered the coin door problem above! Well, since I
ordered it, I guess I might as well use it. I got a Rotten Dog replacement driver
board. I guess I will just have to sell my original
drive board on eBay, or save it for parts!

So finally, my pinball machine came to life and
it was playable!
The playfield was filthy, some of the lights
were burned out, the rubber bands were all dry and cracked, but it was
playable!

It's kind of a weird thing to spend all this
time fixing a machine, and the second you do fix it, you immediately
disassemble it. I wanted to clean and replace some of
the playfield pieces, so it needed to be done. But
first things first, I replaced all the lights in the game with new
bulbs. Old bulbs can start to burn hotter and can damage backglass
evenutally. So I replaced all the bulbs first:
Here starts the long road to completely
disassemble everything. Here I've removed all of the plastic
artwork from on top of all the playfield parts:

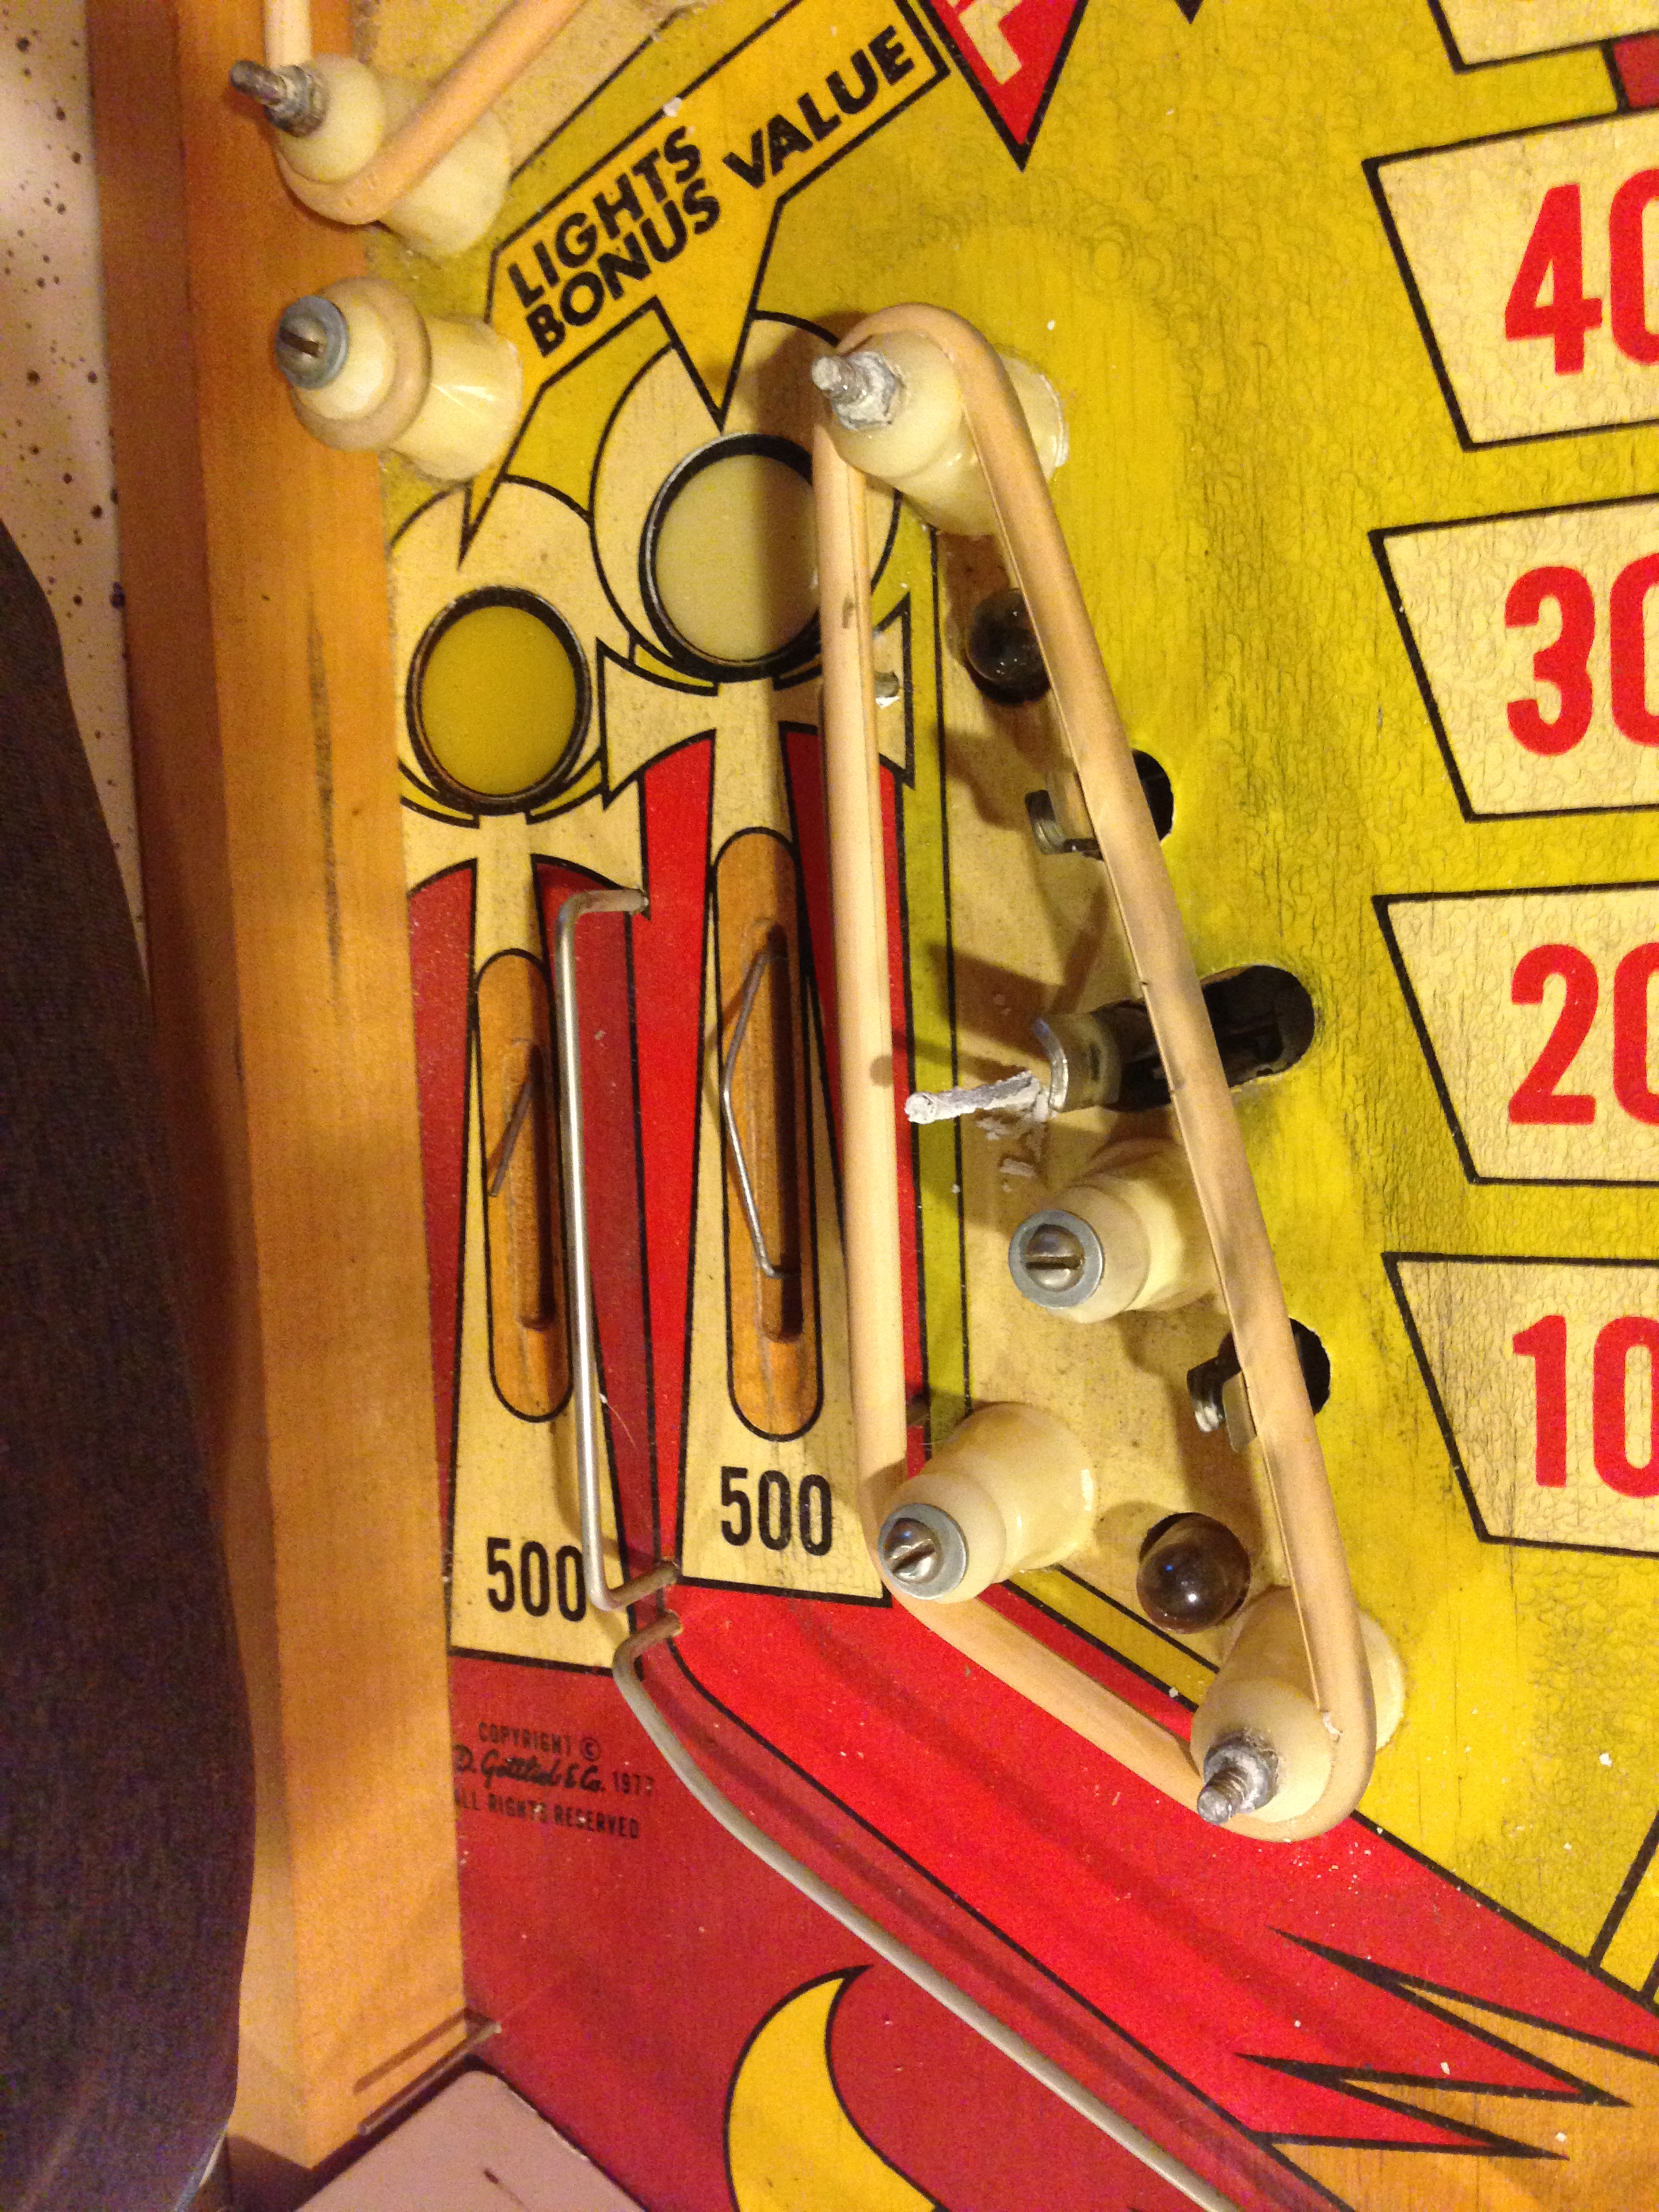
Here you can see how cracked and old the
rubbers are. You can also see how corroded the nails and screws
were!

Here's some of the old rubber bands coming
off:
Then I started to remove the posts from the
baord. When you look at the clean paint under the posts you
wish the whole playfield looked that new! It will never look
quite that new again, but you can still see there is plenty of dust and
grime that could be removed and cleaned off:
Upper playfield starting to be
disassembled:
Look at that dirt!

All that flaky stuff coming off the parts was
just gross. I suspect it's because these nails were not stock that
came with the game. They were just normal nails and weren't
stainless steel, so they corroded somewhat.

I removed all the metal rails from the top of
the playfield and look at all that dirt!
Here is everything all taken apart:
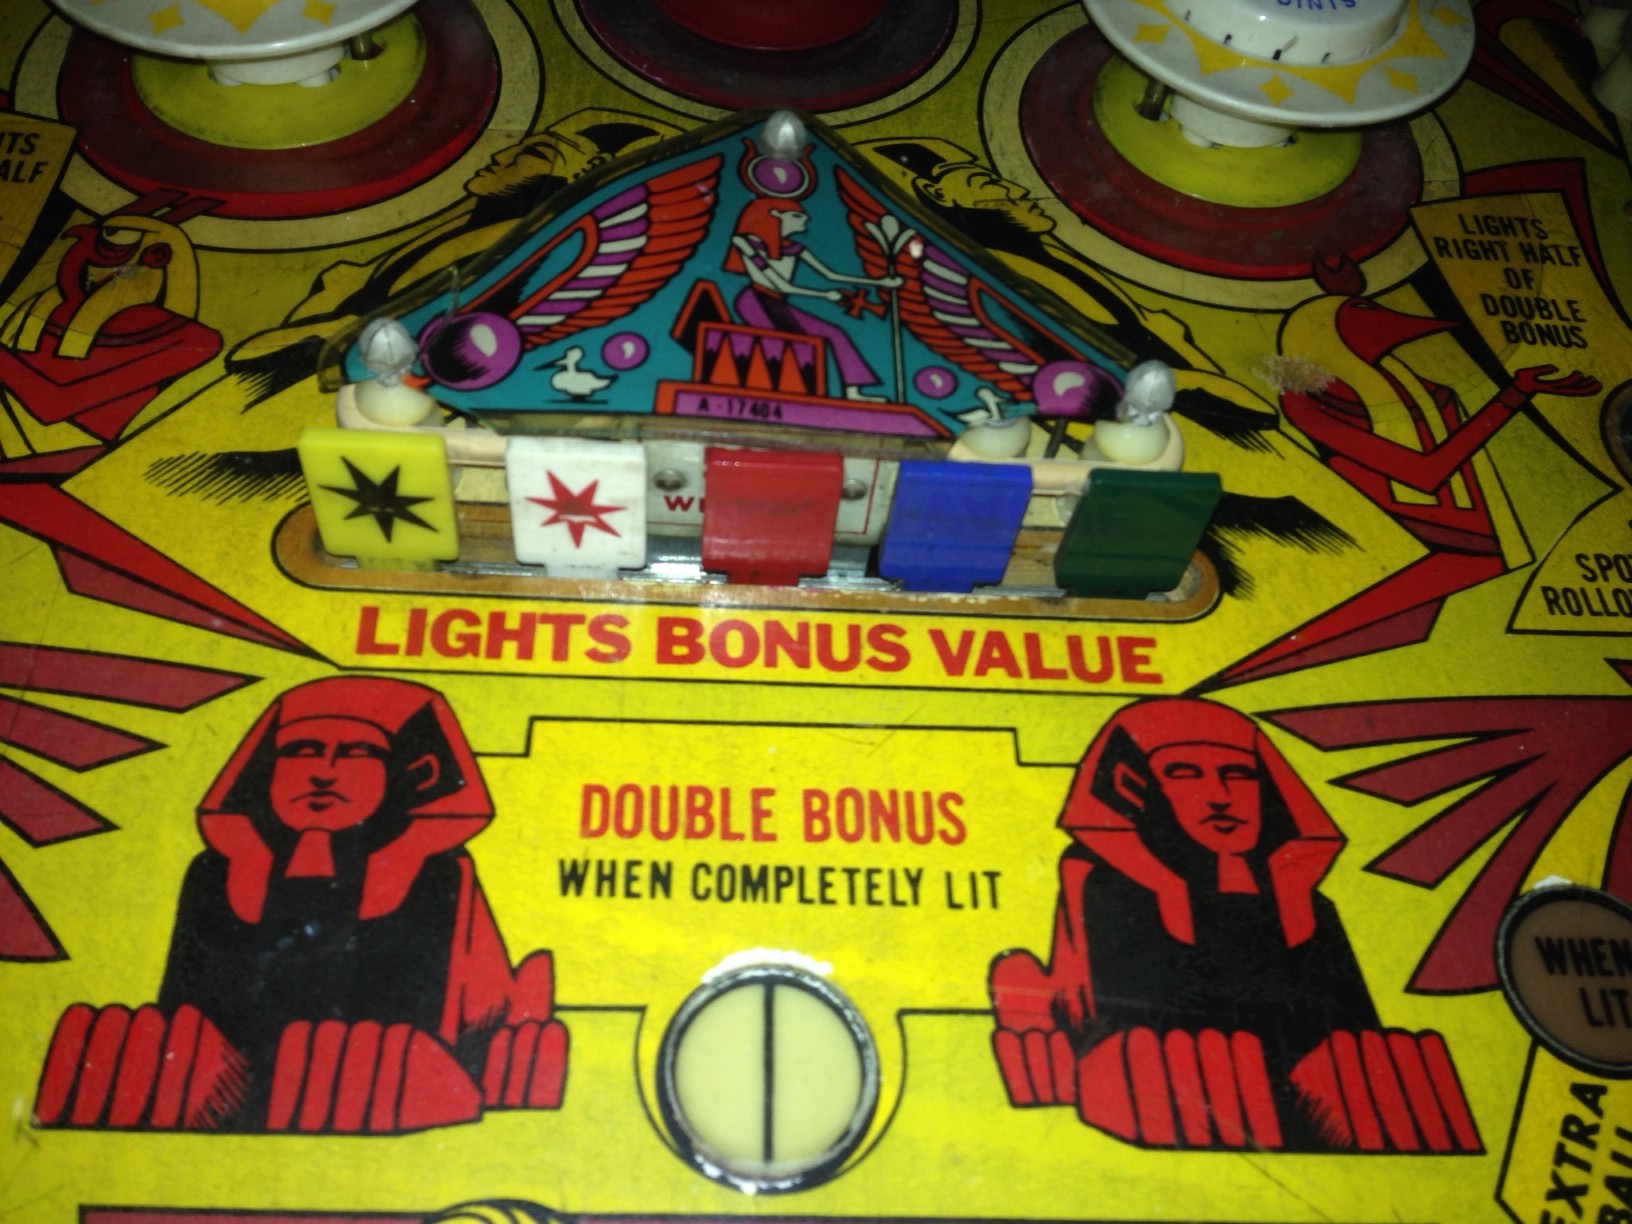
The area around the bonus lights in the middle
still shows its wear. That's ok by me. It's fine for a
pinball to show its age a little. Such damage would probably
take a entirely new playfield to correct anyway.
And here's the upper half:

Then what I did was soak all the metal parts
that I removed from the game in some CLR to remove all the grime.
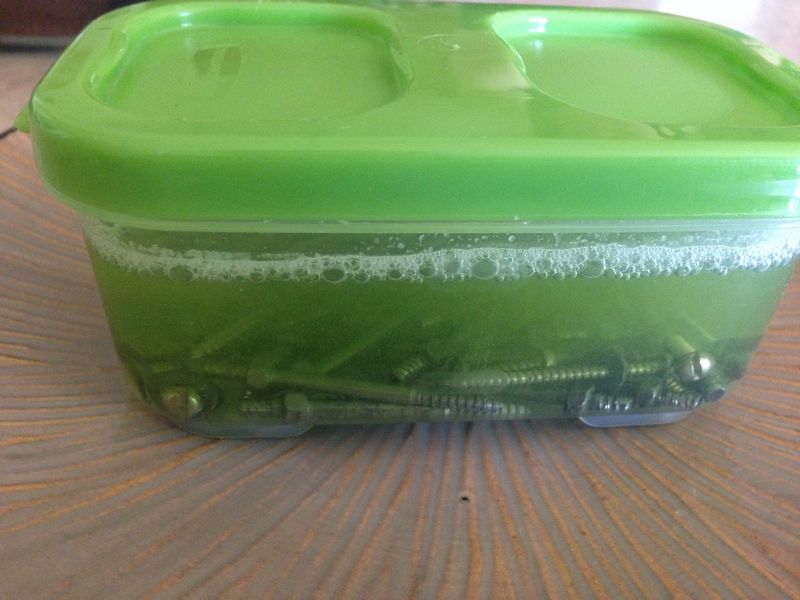
You can see all the fizz showing in the left
one of all the bad stuff melting right off. I left them soak
overnight.
While the green stuff was brewing, I decided to
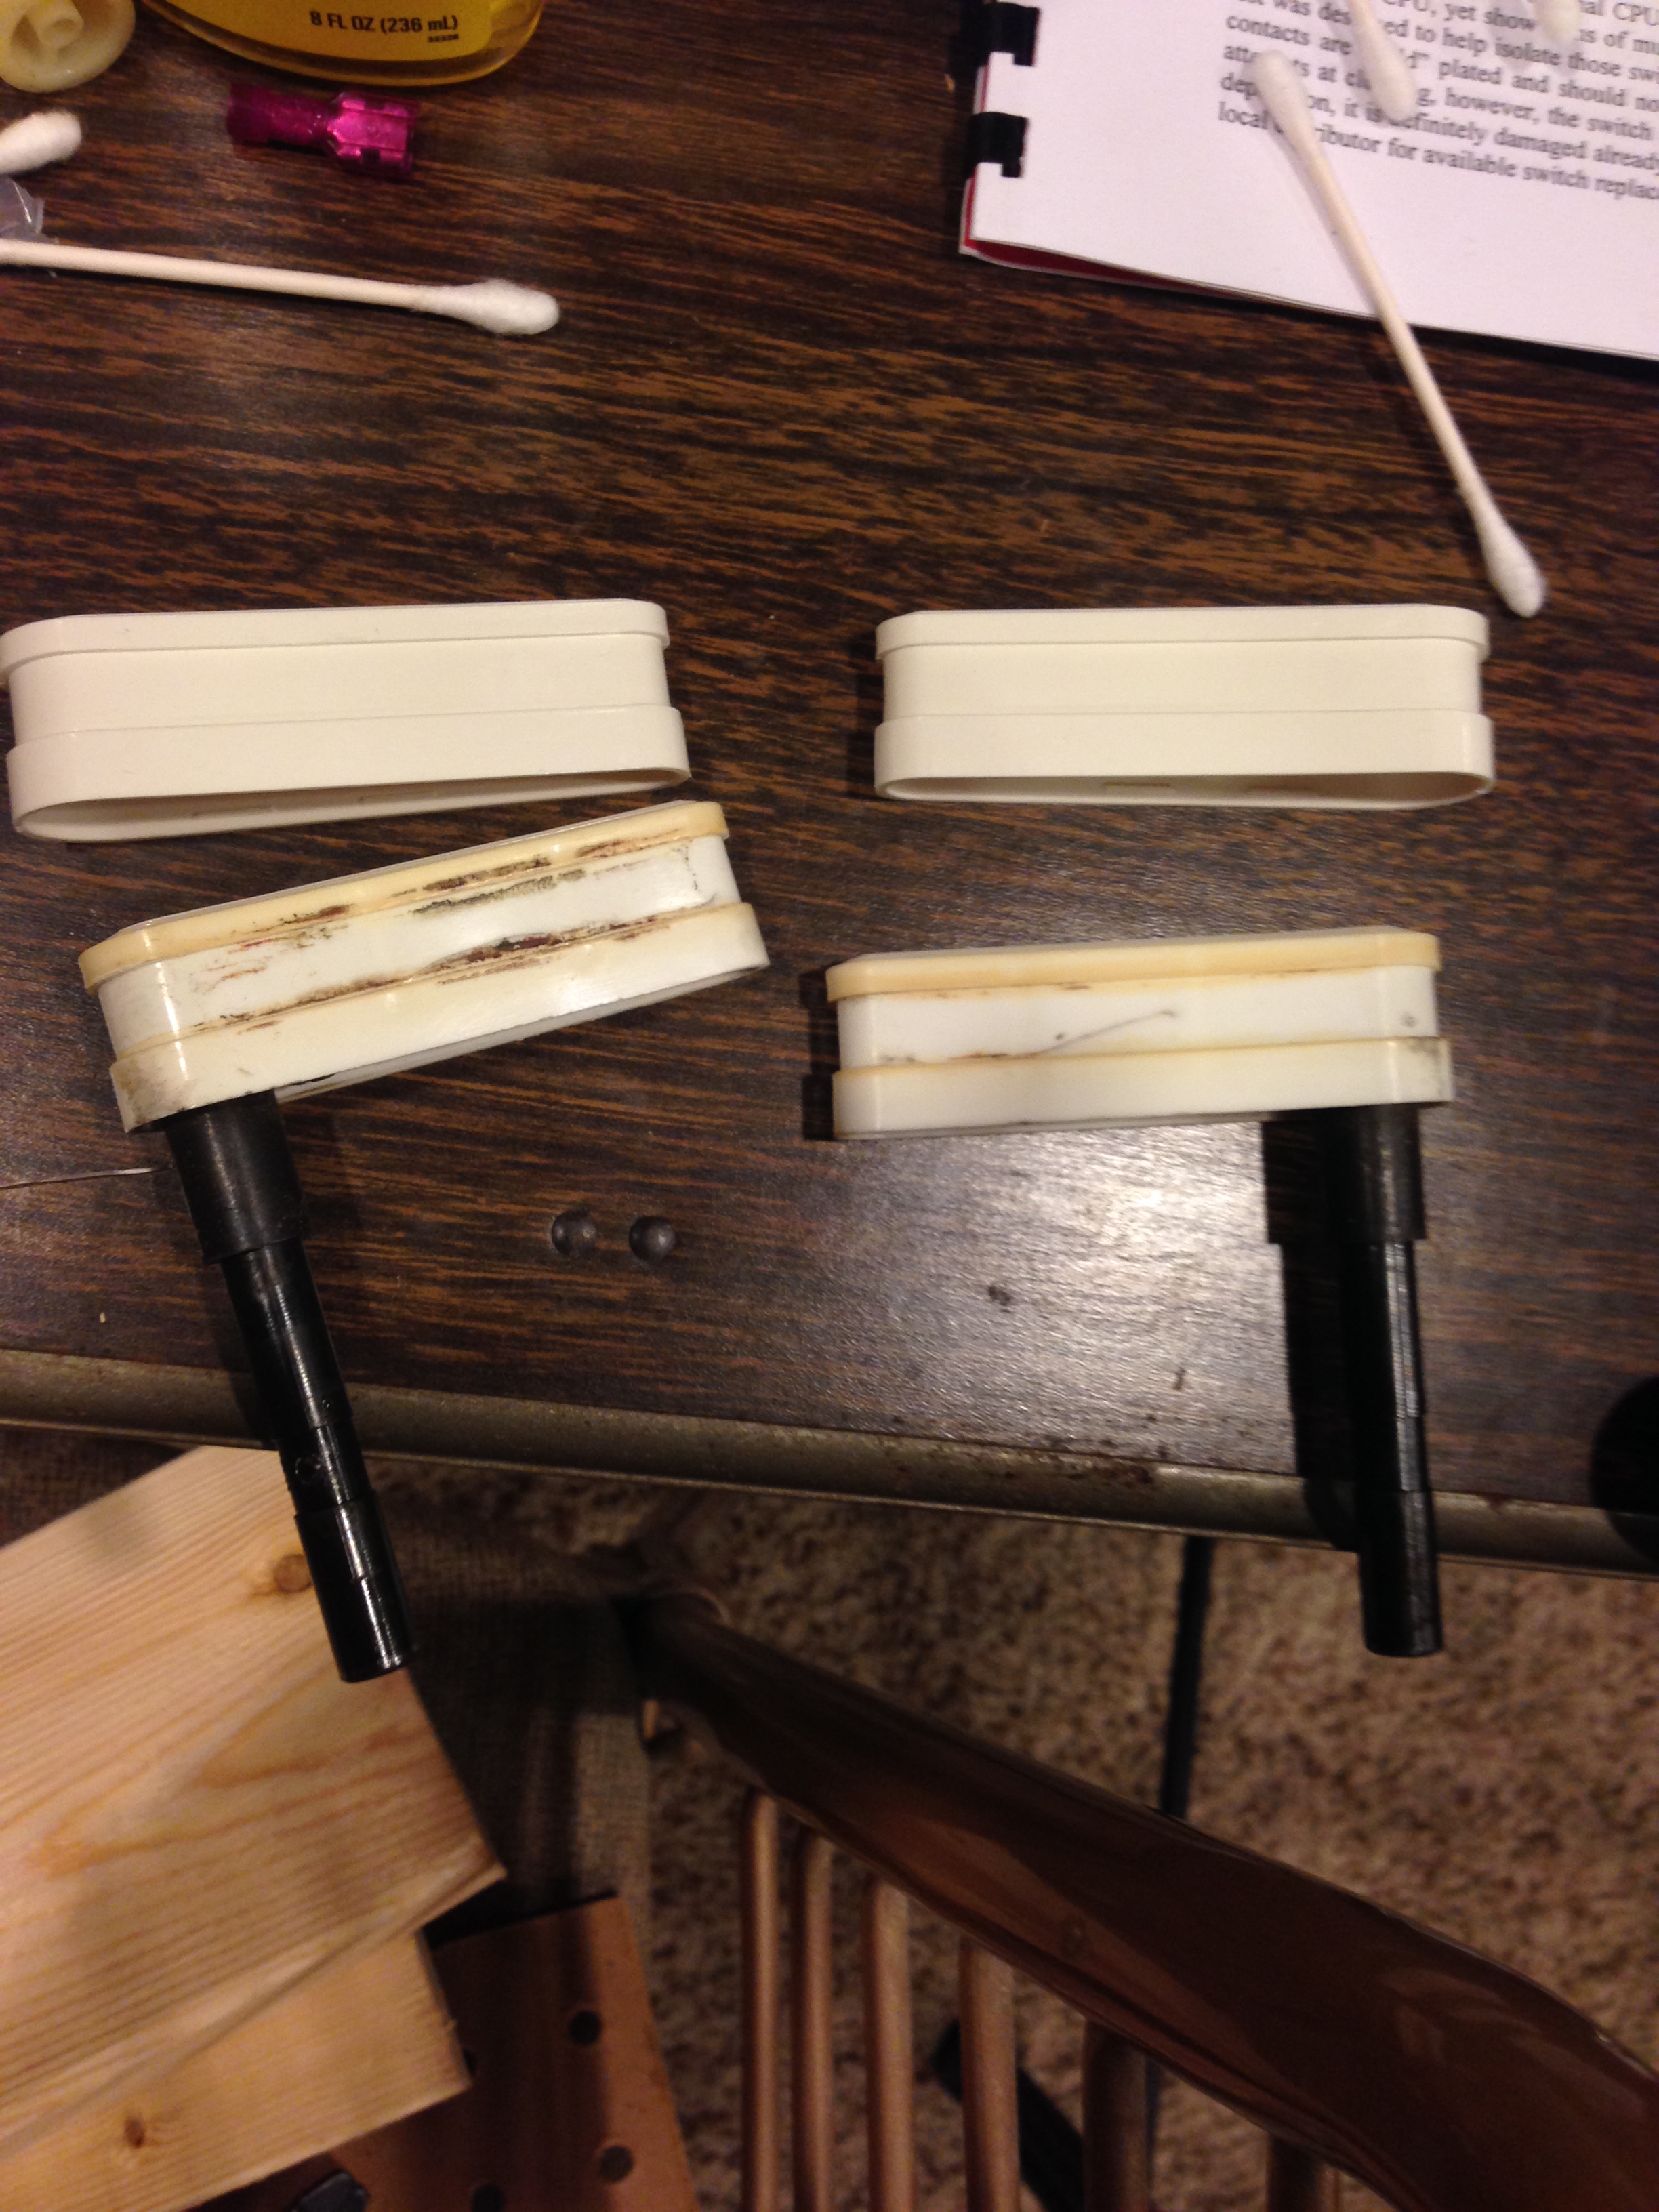
work on fixing the drop targets. You can tell the the two on
the left were replacements because they do not match the
others. I found pictures online that confirmed there
shouldn't be stars on these drop targets. So I wanted to replace
them.
Little did I know that it would be such a giant
pain in the butt to do! After 90 minutes I finally
dissembled this entire thing, replaced the targerts and put it all back
together. Each piece had two springs attached to it, and they are
essentially inside of this metal box. So you had to somehow get
the springs on inside of a box. It was quite challenging for
me to do.
Here's just another shot of the drop target
box.
Hard to argue with the results though.
The new targets all looked great:

The following day I took the metal parts out of
the CLR. I scrubbed them with steel wool, rinsed them under
hot water, then dipped them in Acetone to help them dry. When
finished I let them sit on paper plates for a bit to fully dry
off.

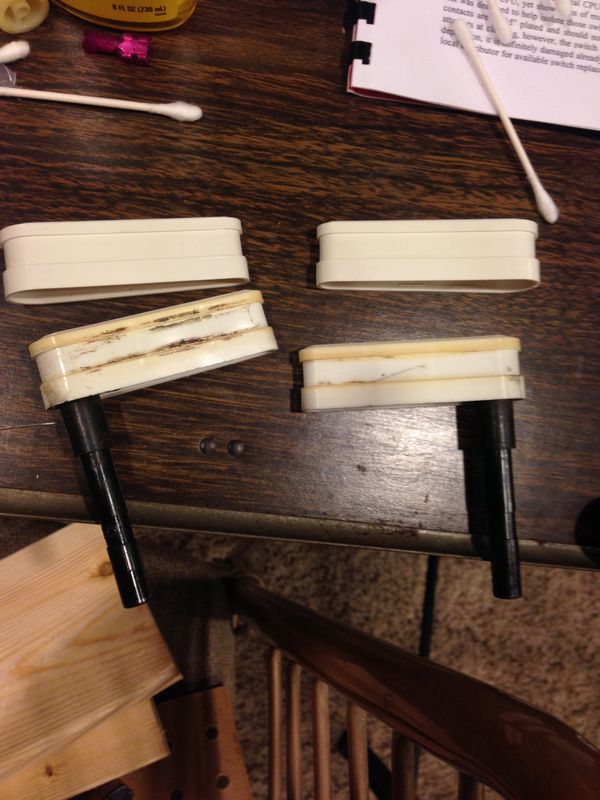
Here you can see the difference between one I
did clean up and one I didn't:
Next I cleaned up the ball
launcher. Below you can see the metal is all rusted and the
rubber all hardened:

I got all new springs and new rubber and
cleaned it all up real nice:
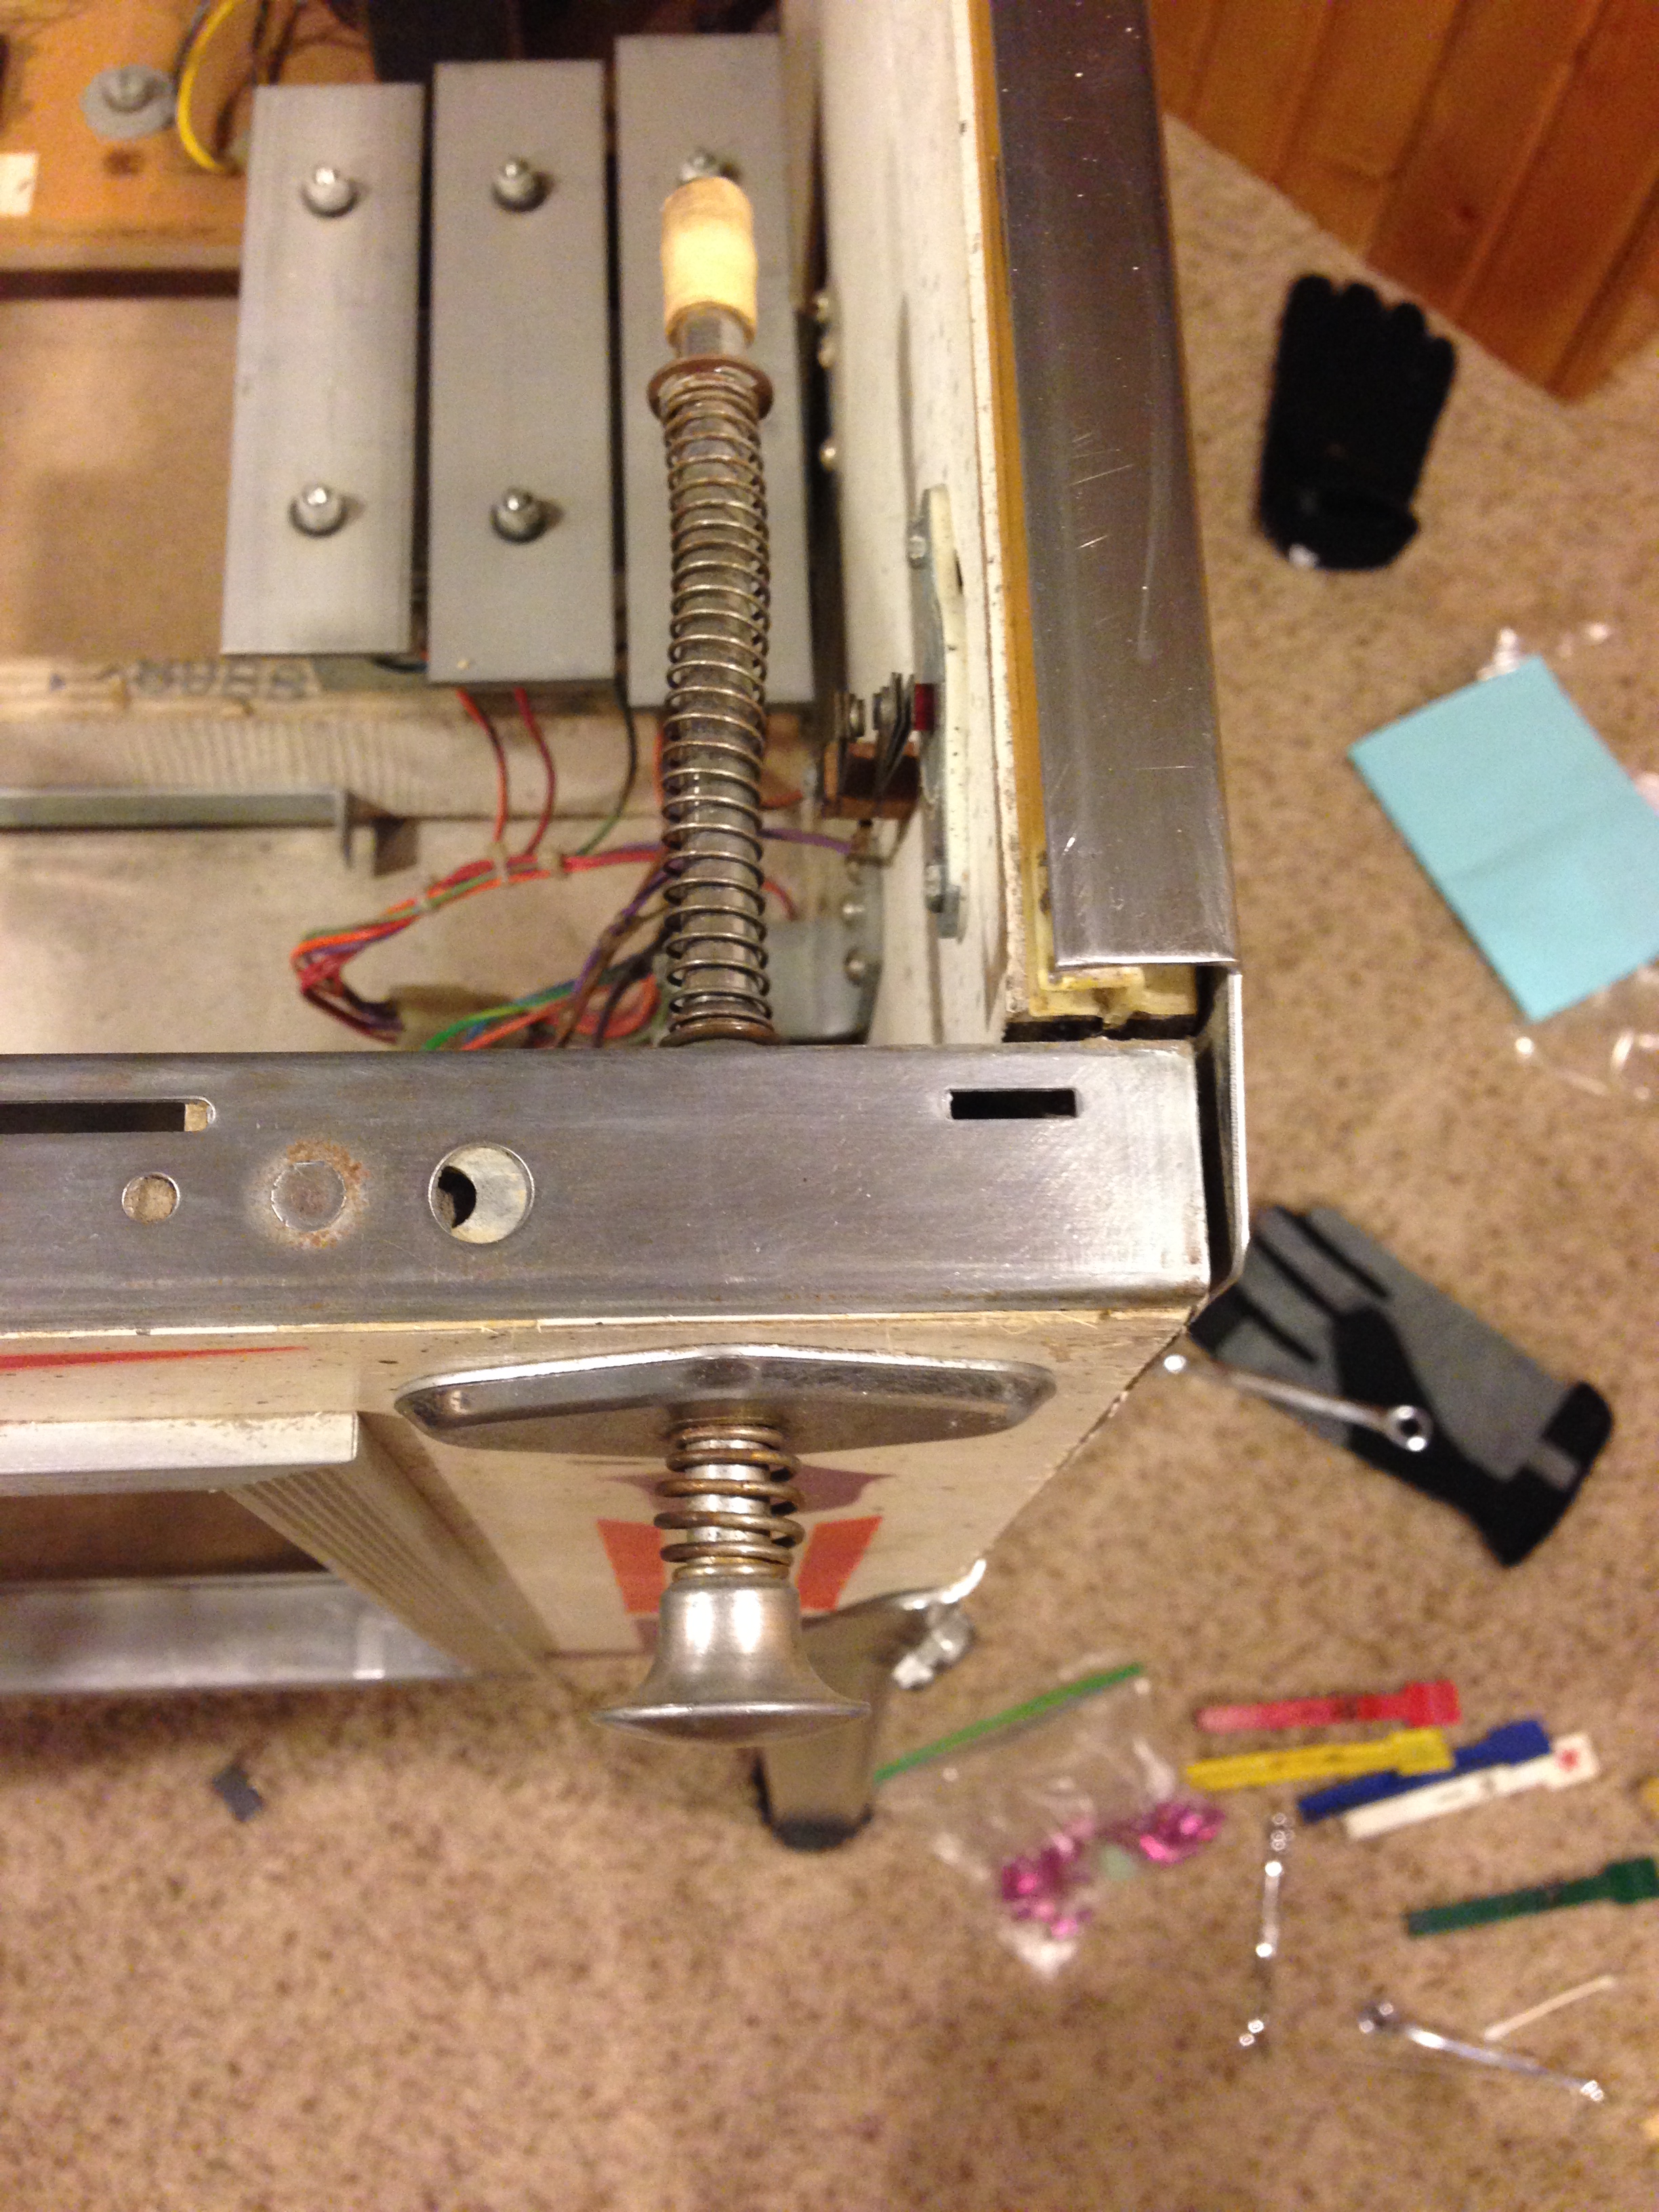
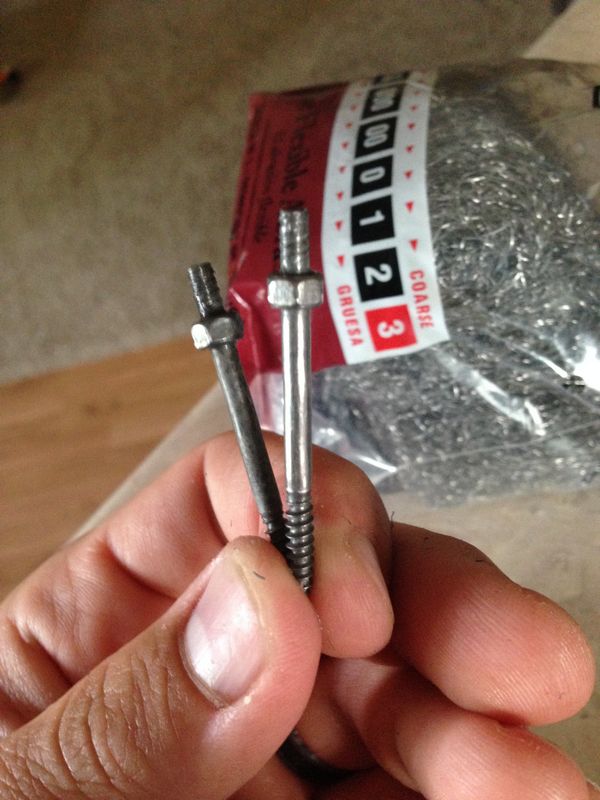
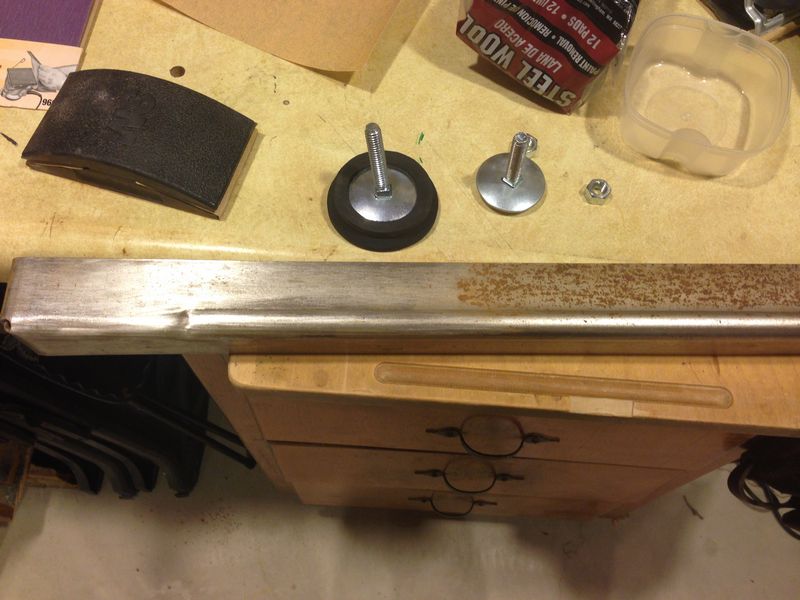
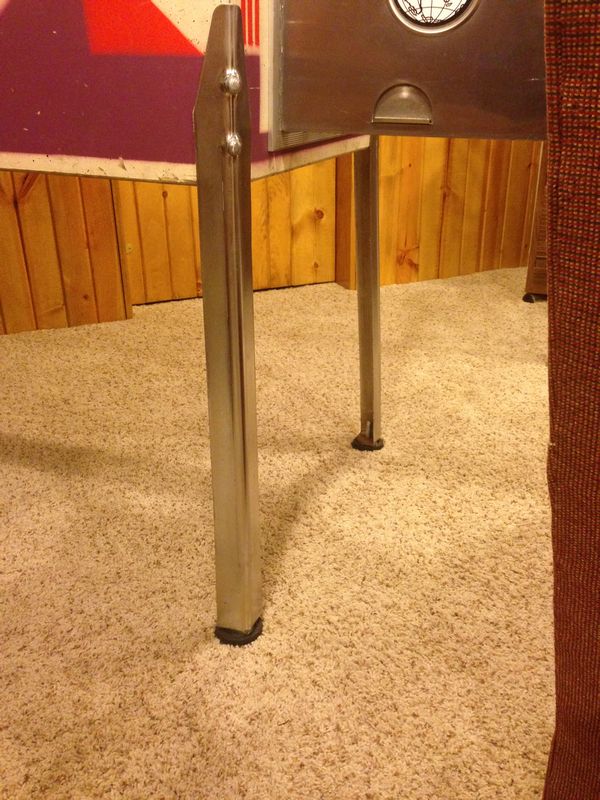
Next I cleaned up the legs. Each of
them had some pretty bad rust on them. In the picture below you
can see that I started to remove the rust from the left side. The
right side is how it looked when I started. I also added
feet and rubber coasters to the legs as well.
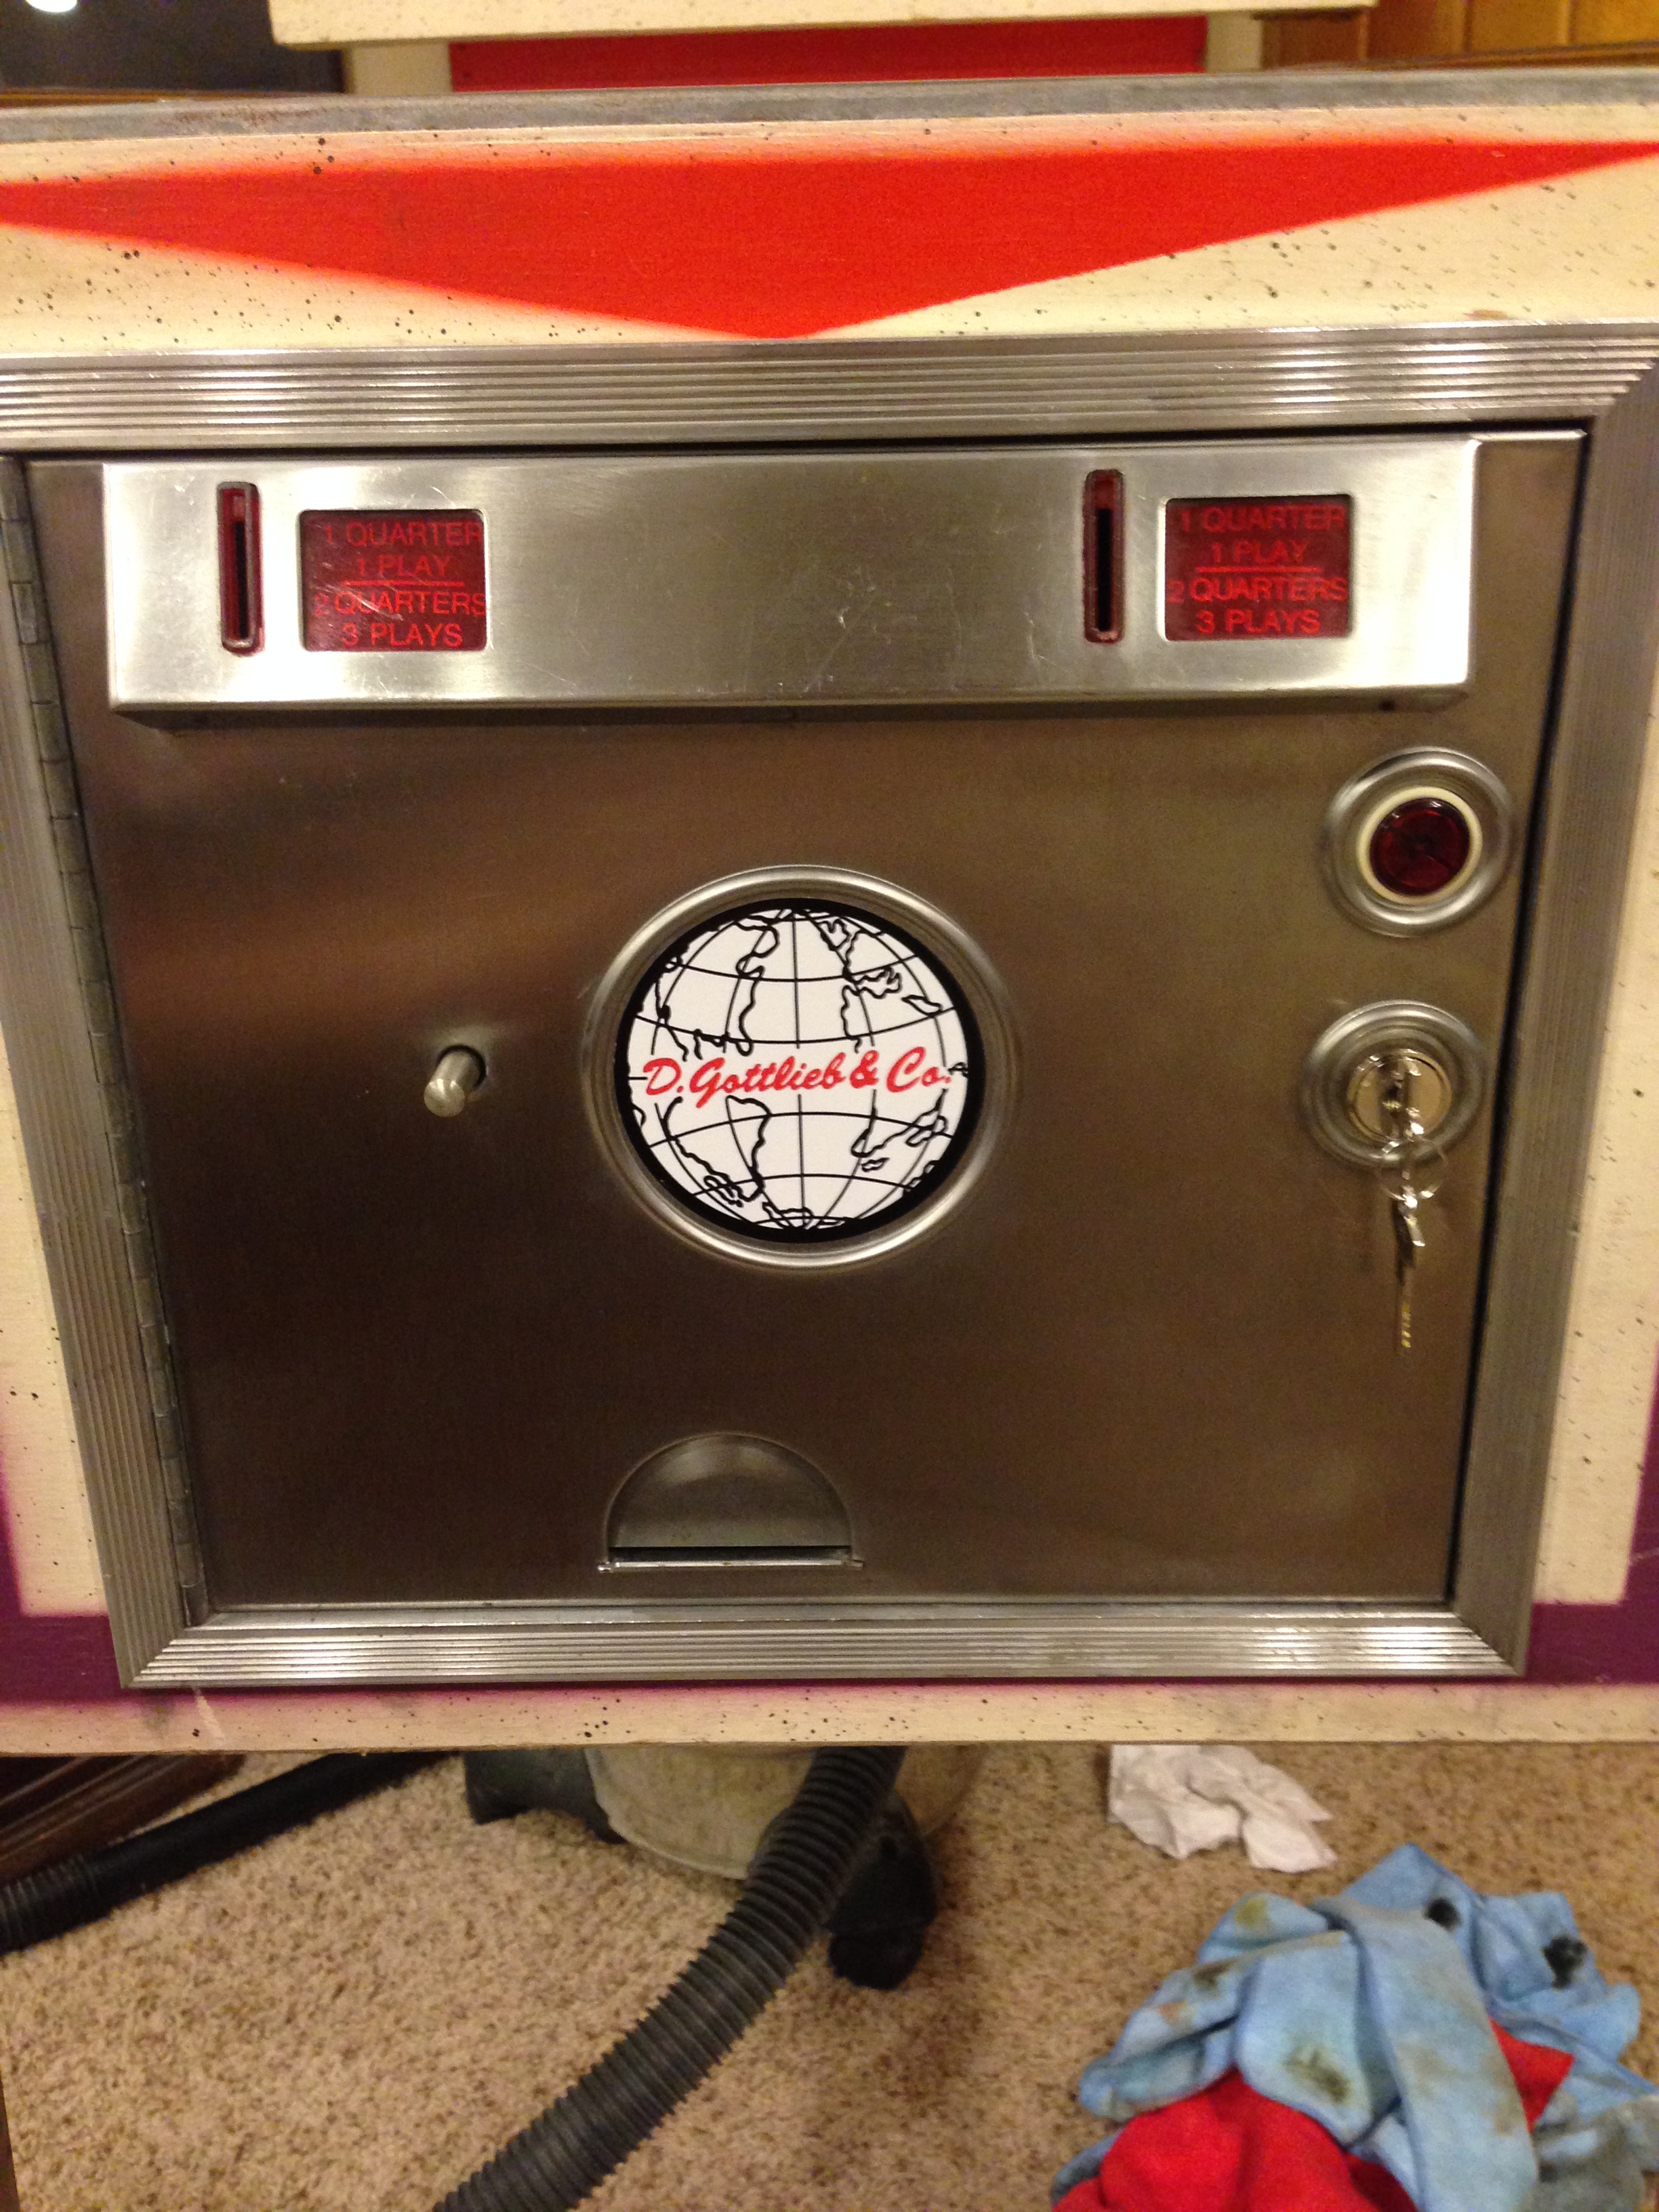
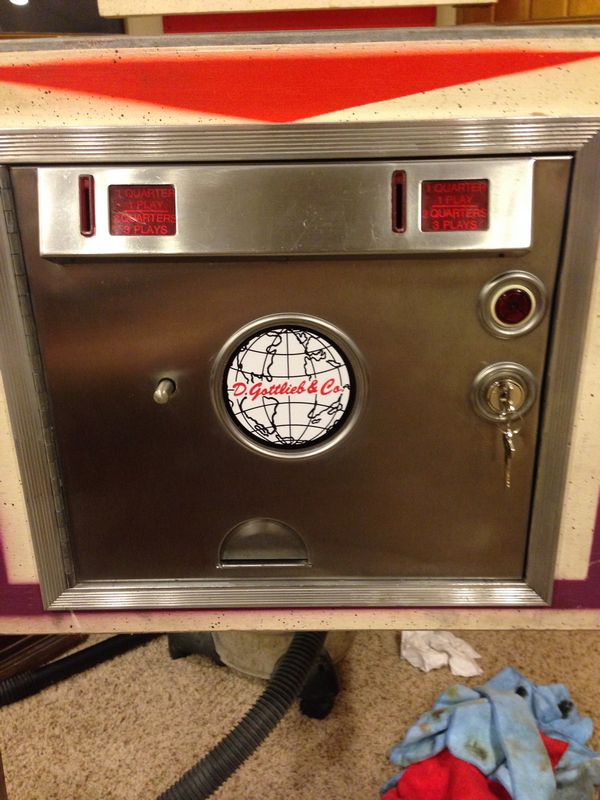
Next I entirely buffed out and cleaned the coin
door. I don't have a before picture, but you can see below
that it buffed out pretty well. I also got a replacement
sticker to put on the coin door:
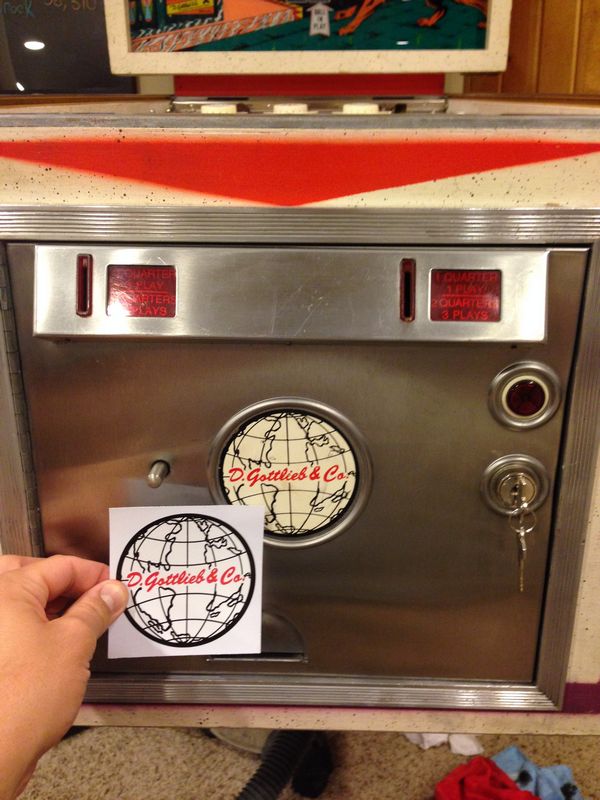
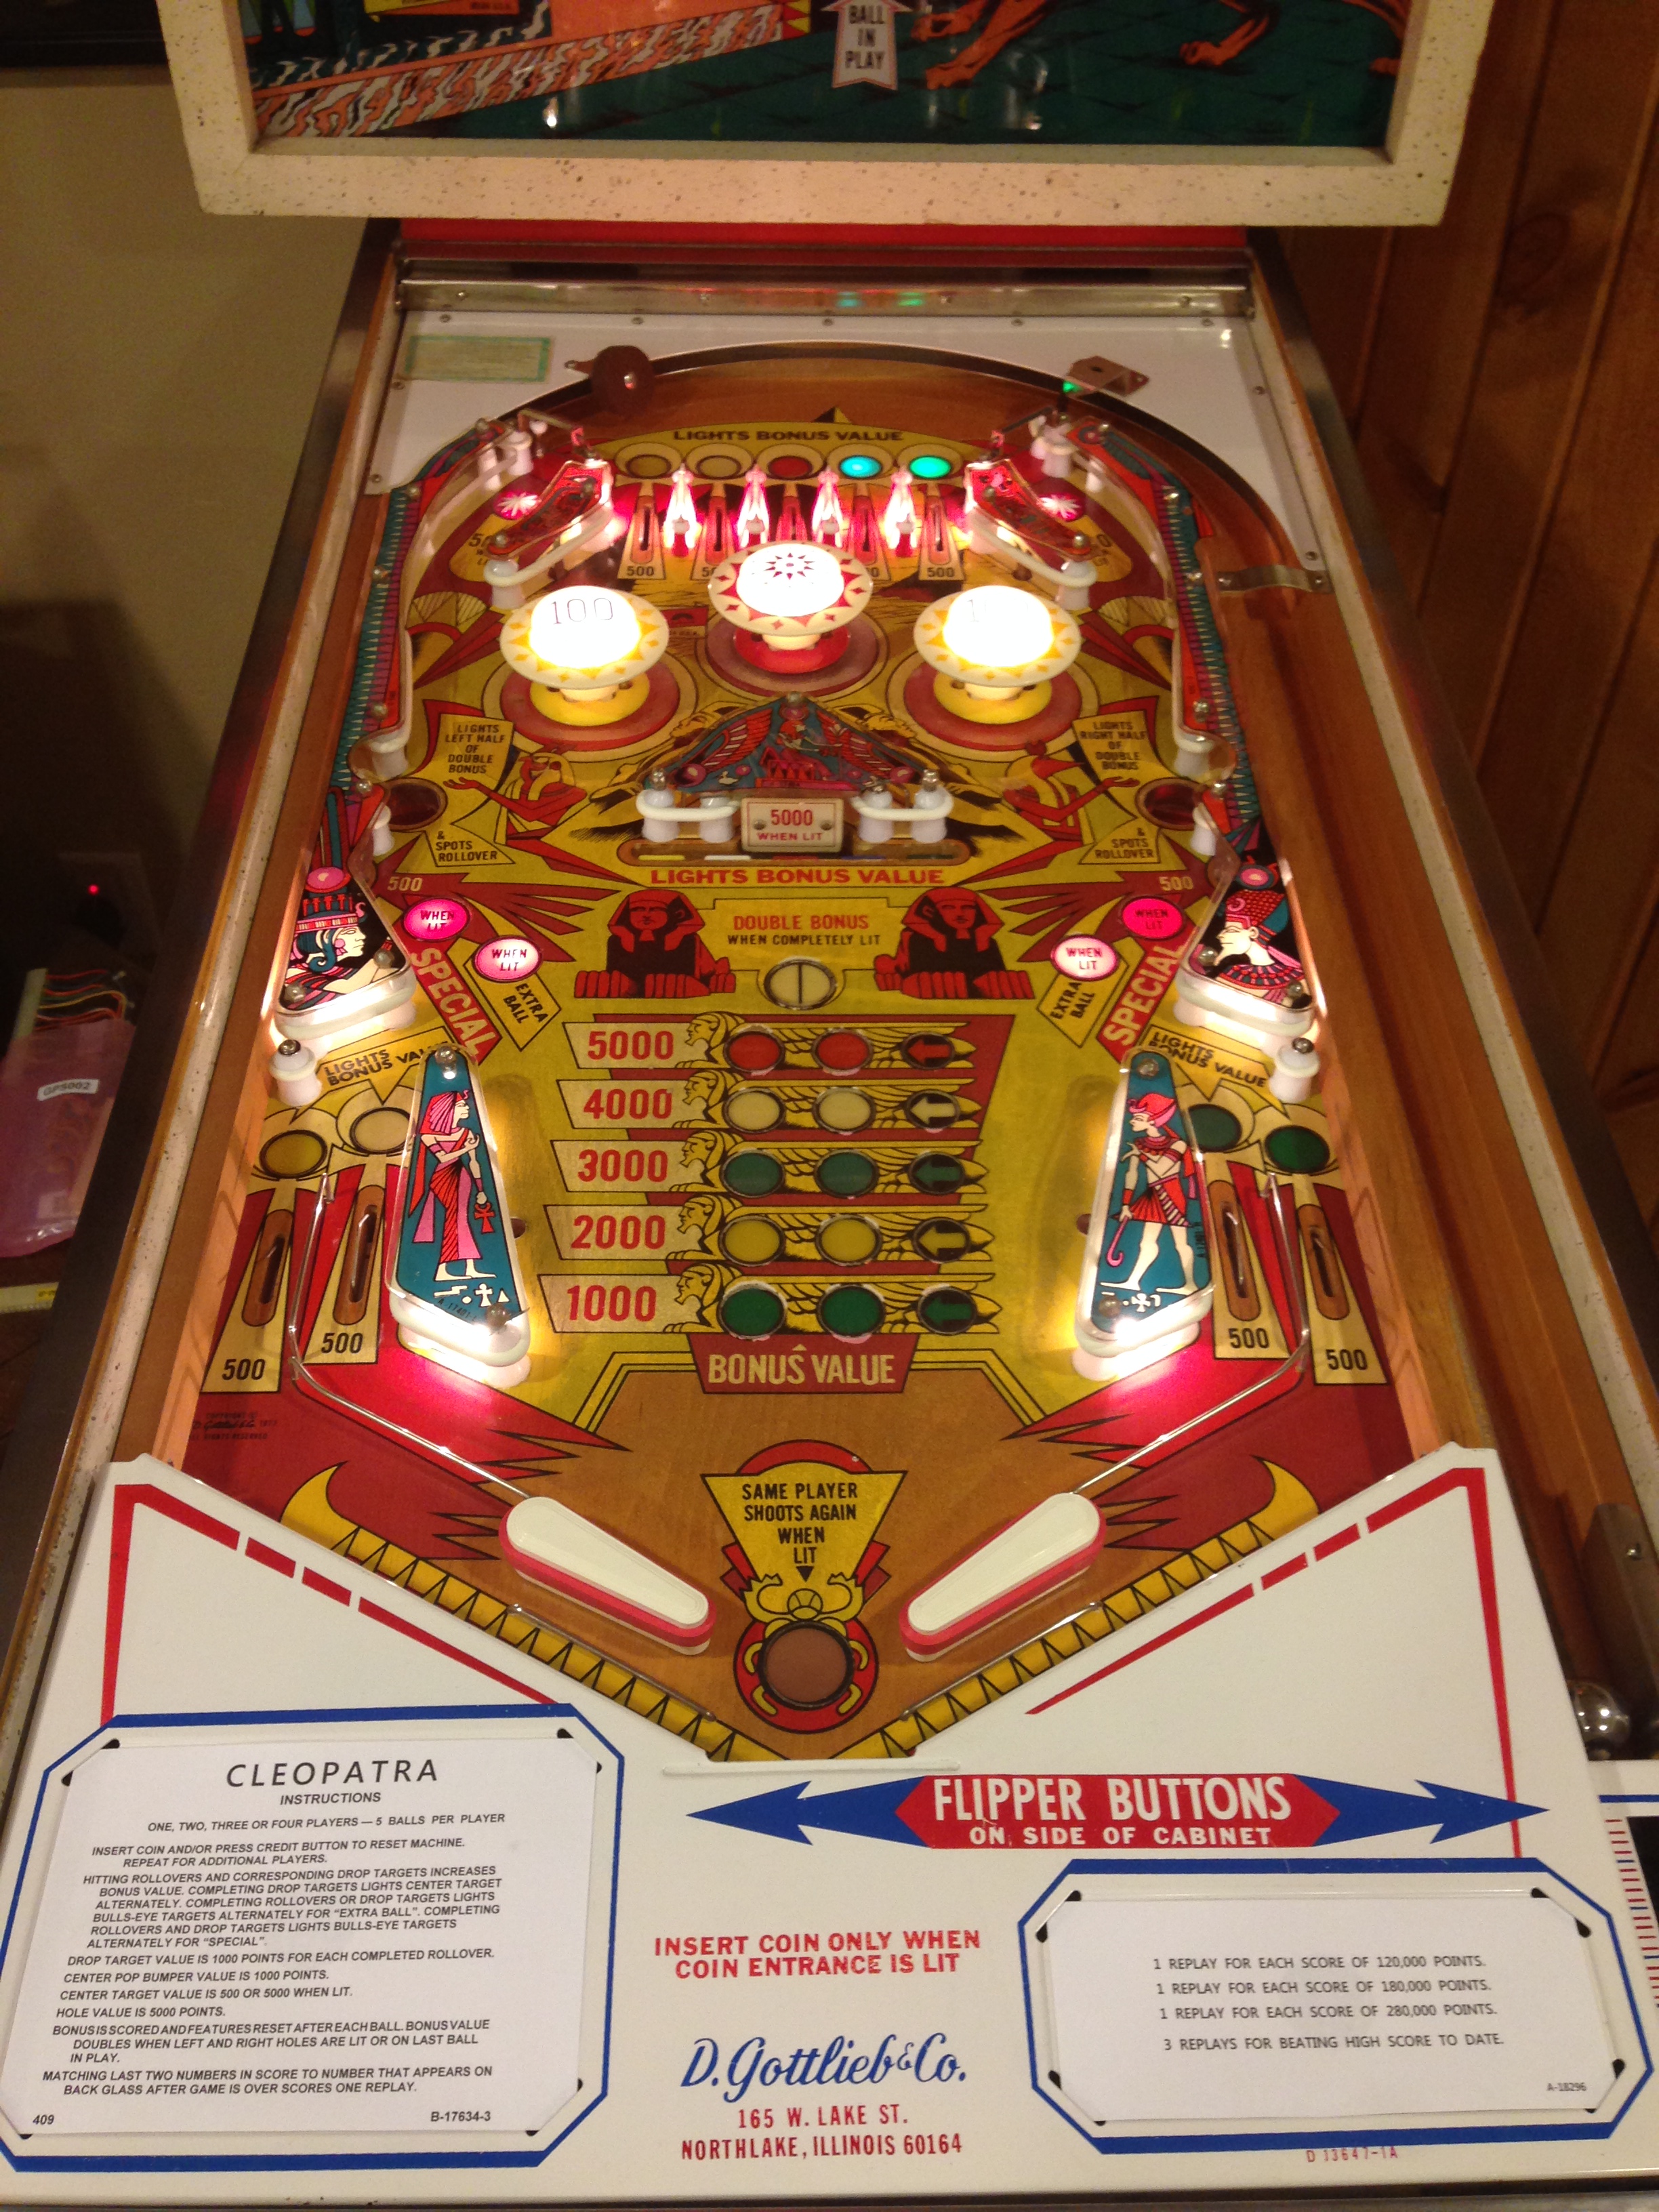
Here it is all finished up! Looks
great:
And here's a shot of the cleaned up legs in
place as well:
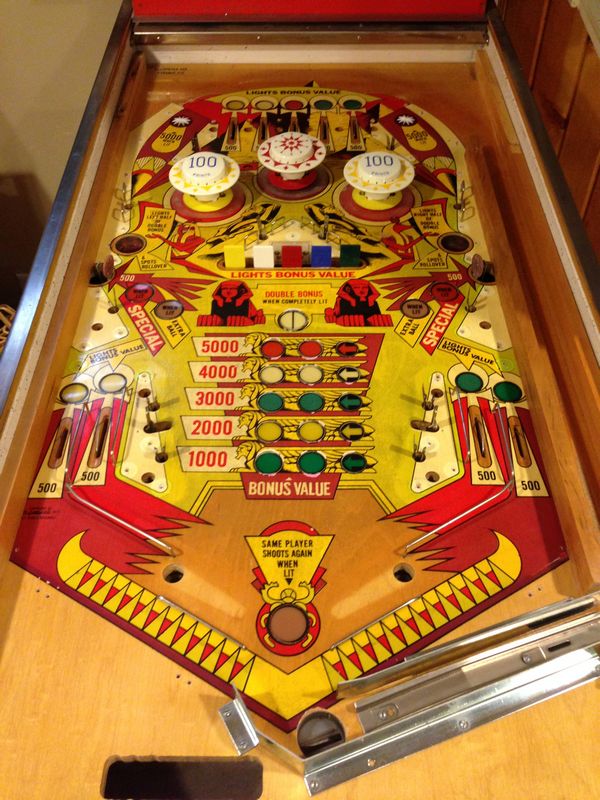
Once I finally had the playfield as taken apart
as I was going to do, I buffed and polished the whole thing with some
playfield cleaner/polish. The pictures don't do it justice, but
it's soooo much cleaner than it was before. Now it was finally
time to start to reassemble everything! Here I replaced the
red star rollover targets in the upper left and right:
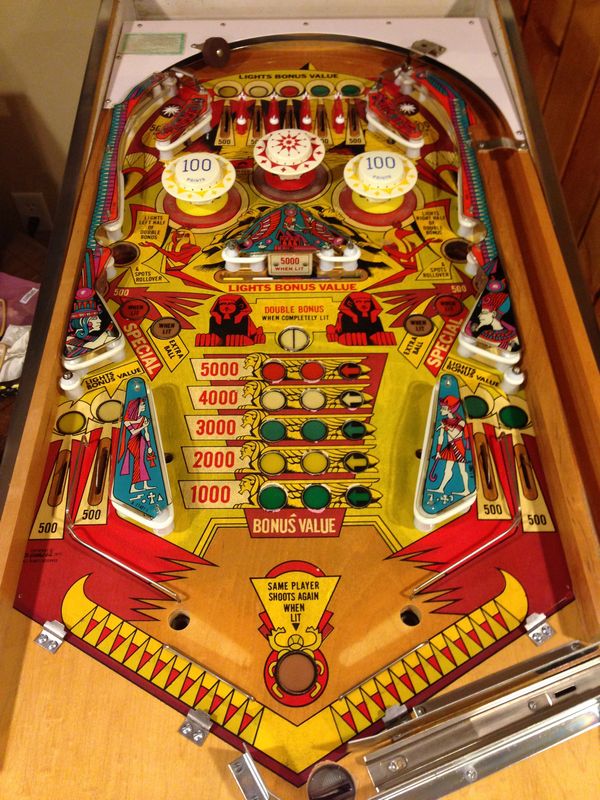
Here's the whole playfield all cleaned up,
ready to be reassembled:
I got all new posts for the playfield.
You can clearly see the difference. All of them were yellowed and
a few of them were cracked:

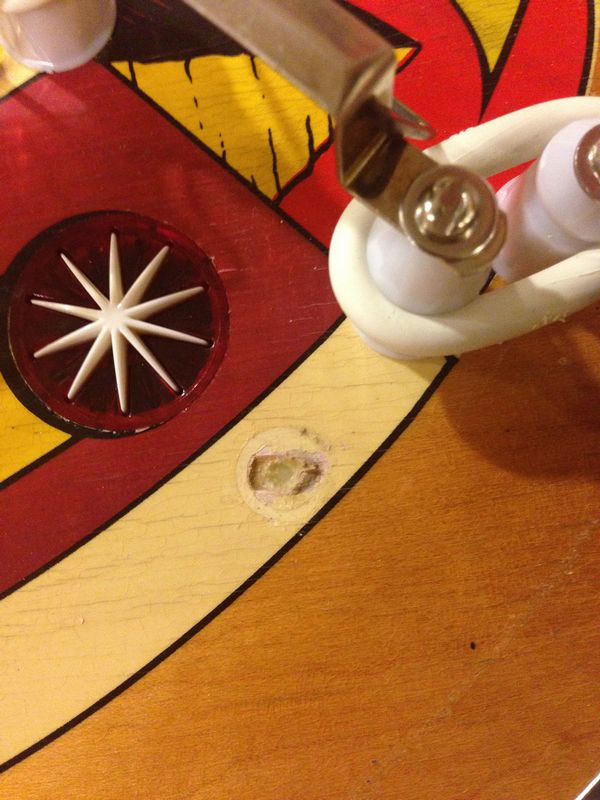
Some of the holes were the posts came out of
were a bit stripped. They would not hold a screw when I tried to
get everything back in place. For those I used wood glue to fill
the holes and let it dry over night. By morning the screws
held in place nicely in the holes:
Here you can see all the new posts in place and
the new rubbers as well:
Here the artwork is back in place as
well:
Here are the replacement flippers I bought. The
old ones were all cracked and the rubber was hardened and cracked as
well.
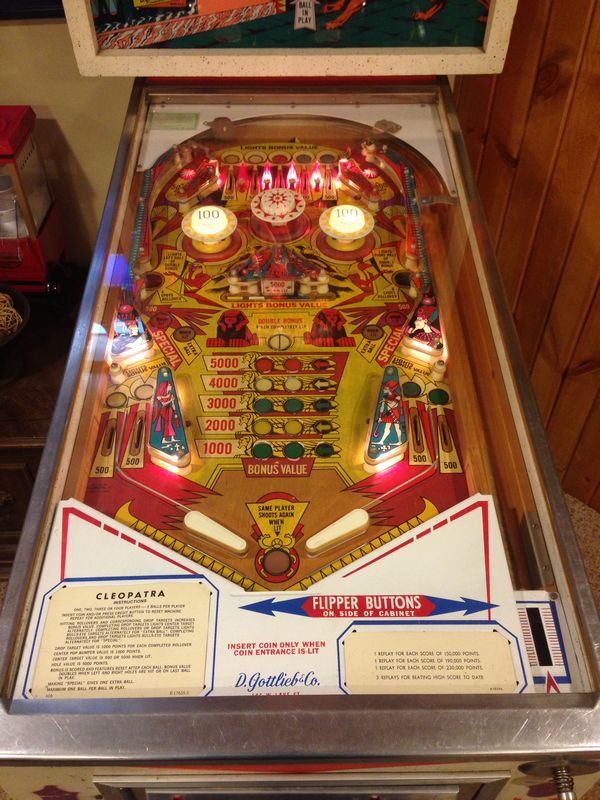
And here is most everything back in
place!

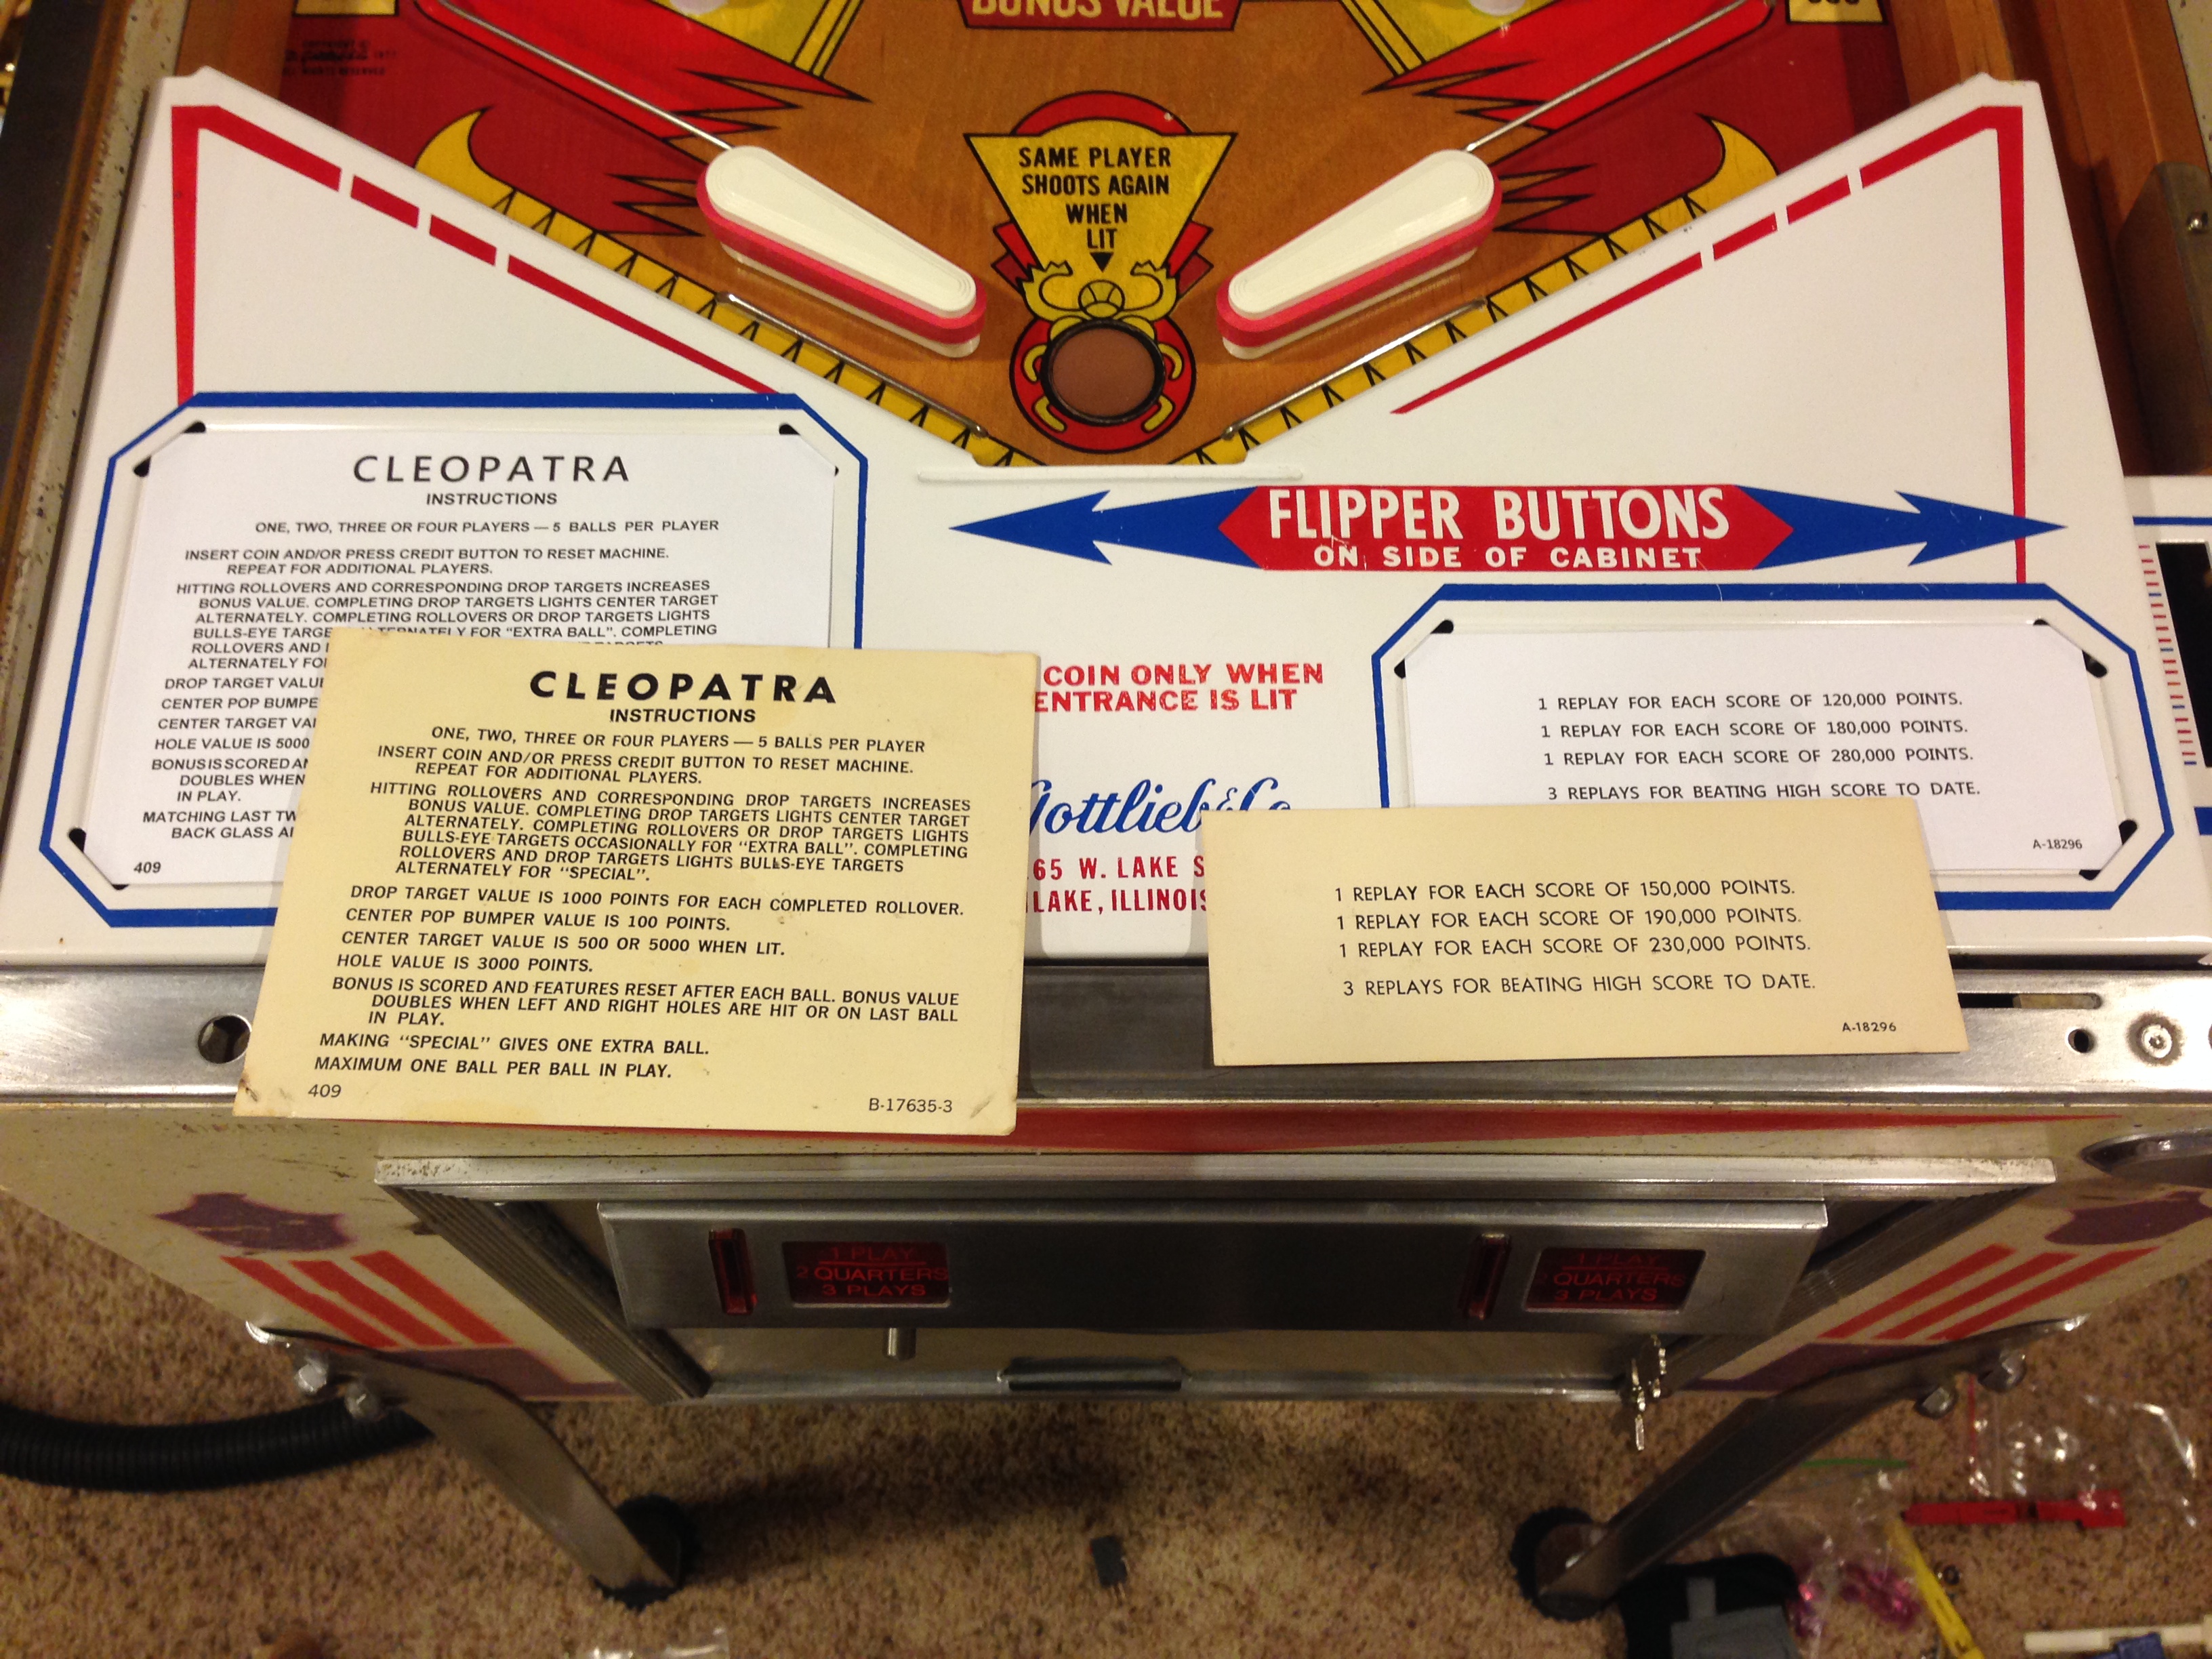
I printed off some new instruction
cards. They look great!

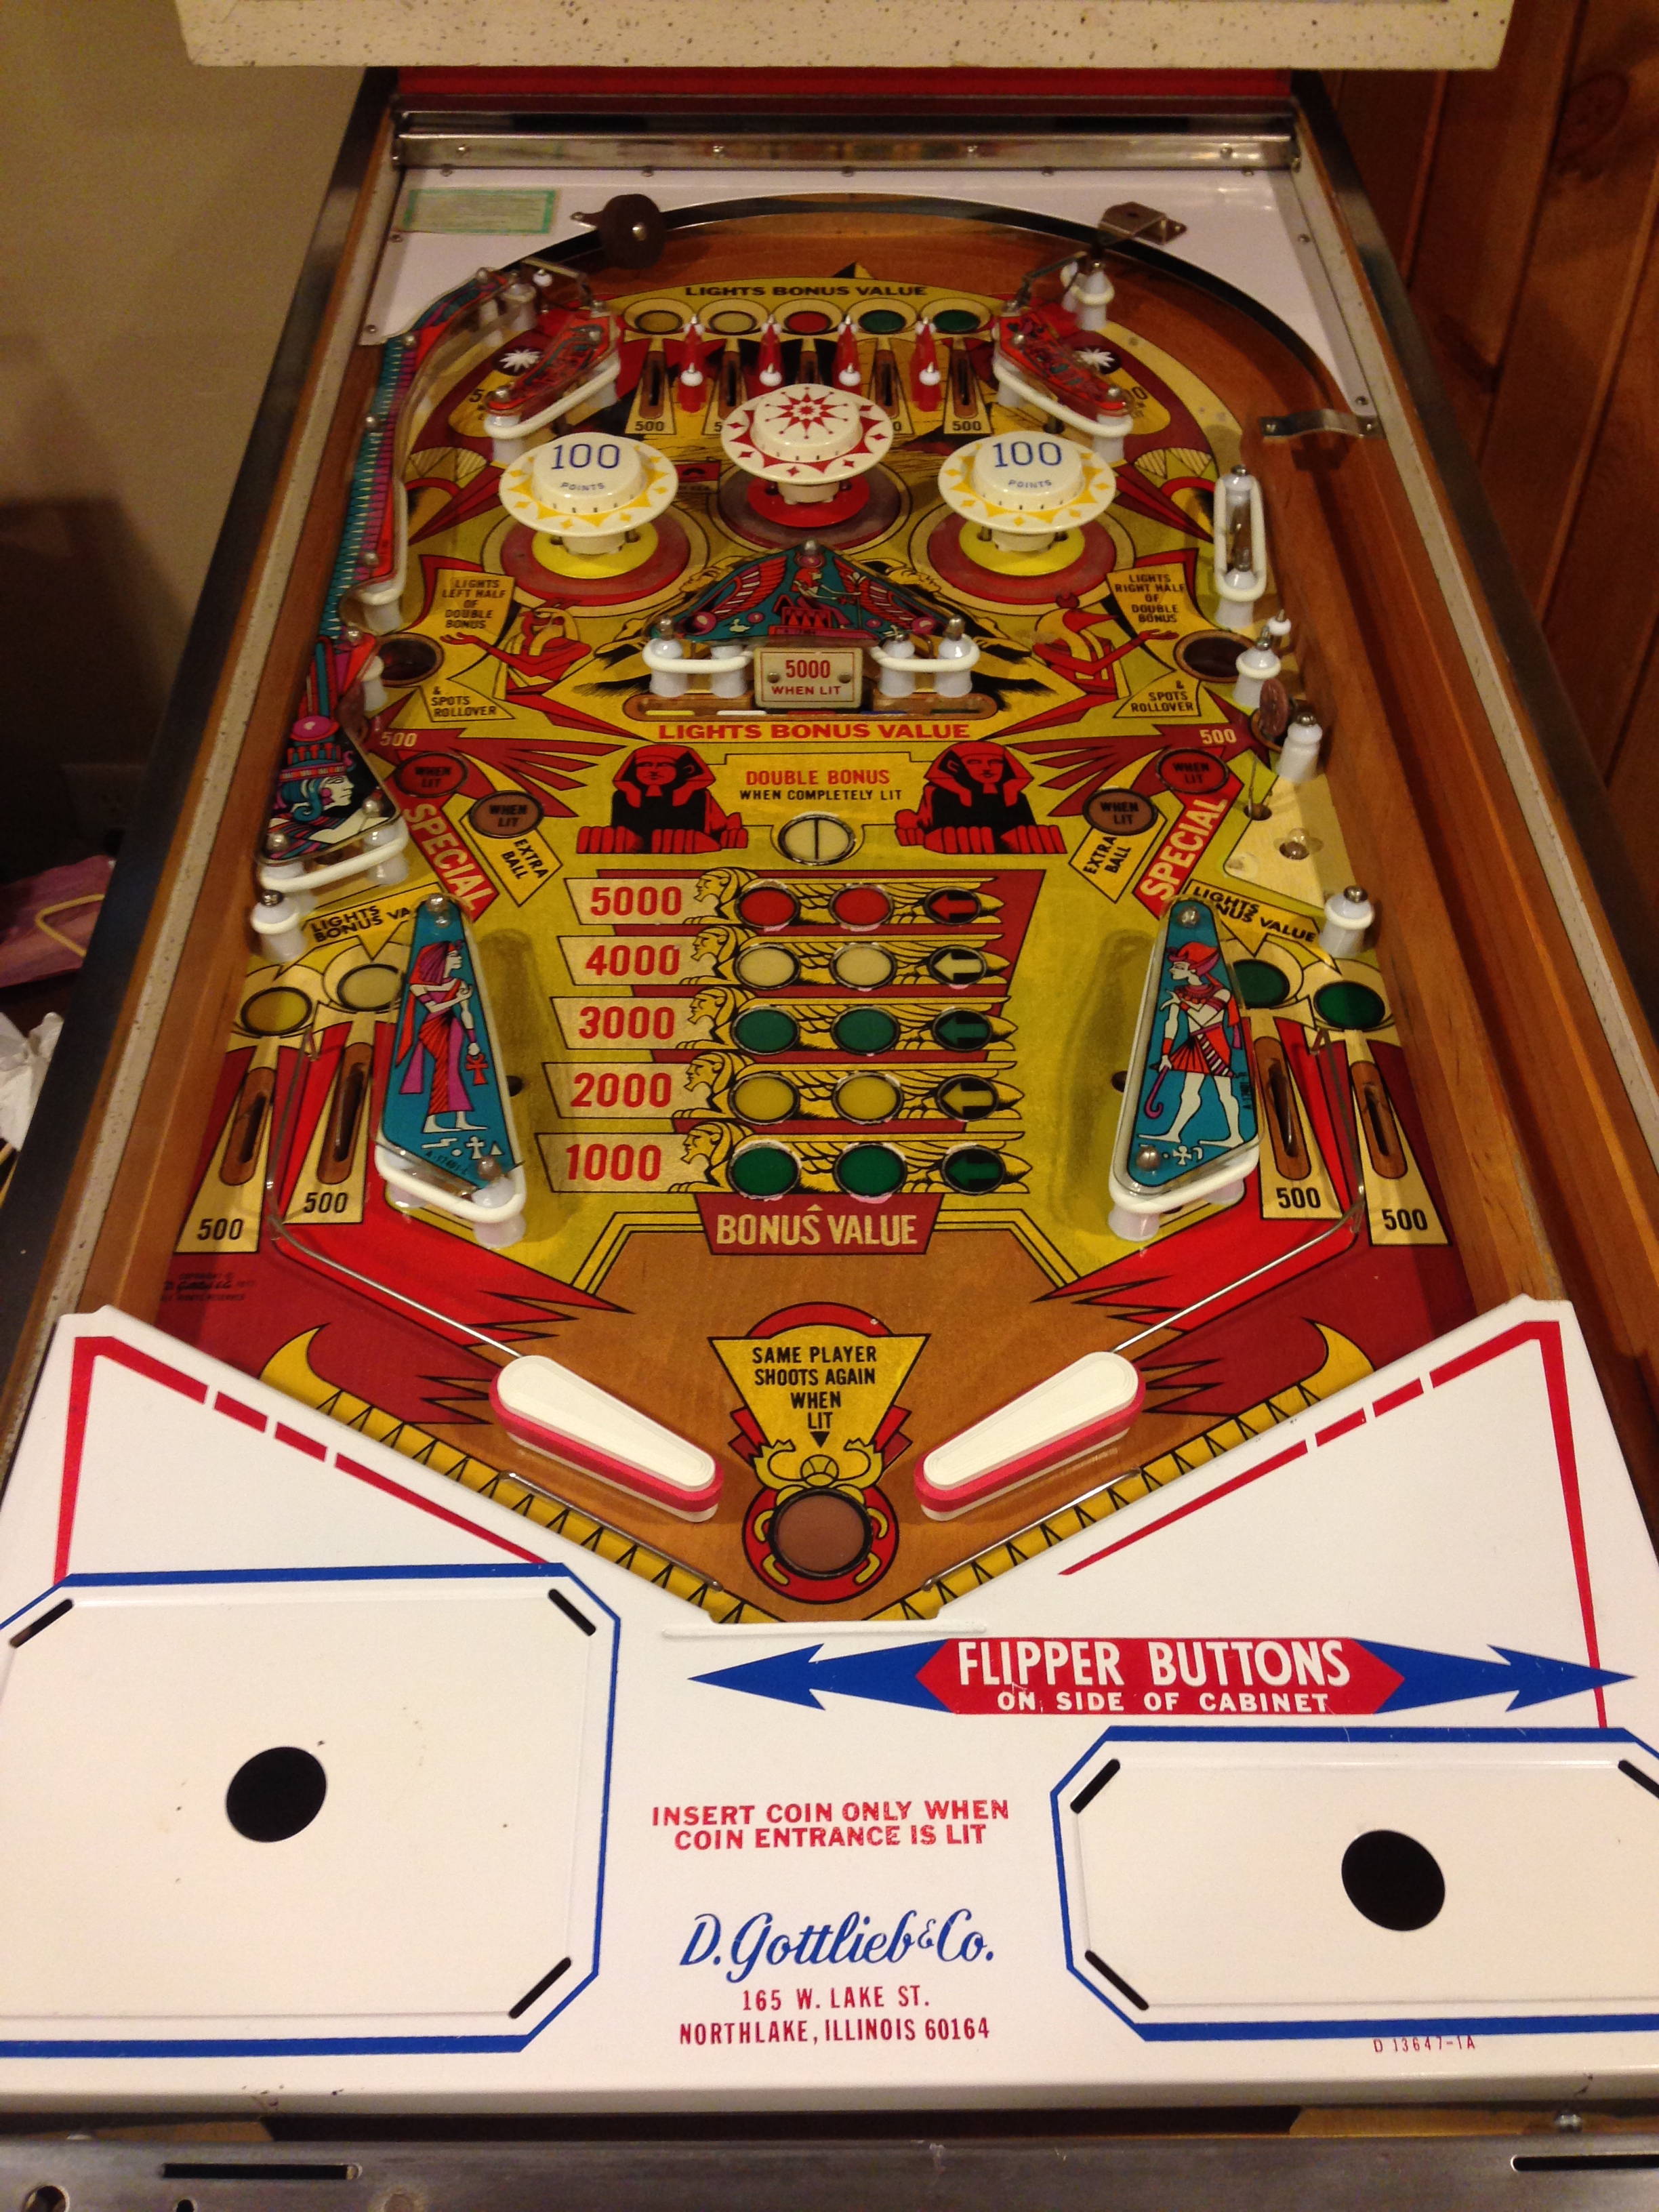
And here it is all reassembled! The
only thing not shown in this picture is the lockbar for some reason, but
I do have that as well.
Everything all cleaned up and looking bright
and new again:
As a finishing touch to all of this, I'm
playing around with adding LEDs in place of all the old school
lights. I might do this a little down the road. In the
mean time I just bought a bunch of different types of LEDs so that I can
start to play around and find which ones I like best.
But so far I'm having a lot of fun playing the machine! I'm
having a few problems with the game tilting here and there, but I think
it just needs a switch or two adjusted and the playfield leveled
out. I can't wait to spend some good quality time
playing it!
|